




How to Lay 600x1200 Tiles: Flatness, Layout and Joints
by Shivam Tayal 05 Nov 2026 0 Comments
Most guides on how to lay 600x1200 tiles open with the trowel and a pretty grid. That order is backwards. A tile this size will not bend into a hump or a hollow the way a small tile can, so a floor that looks fine by eye can still rock, lip or sound hollow once the piece is bedded.
Treat the job as a substrate and movement problem first, and a laying problem second. Order the tiles only after the straightedge readings pass, any wet-area falls are mapped, and the movement joints are marked on the floor. Extra adhesive will not rescue a weekend that starts with those three items still unknown.
Check the Substrate Before You Buy Tiles
The adhesive is the last thing to blame when a 600x1200 tile rocks. Flat and level are different checks. A floor can be level from wall to wall and still carry humps and dips that a 1.2 m edge bridges instead of follows.
Lay a 2 m straightedge in several directions across the room and along each wall. Mark every high and low spot with chalk, and note the depth of each dip. Grind the highs. Patch shallow hollows with a repair mortar. Pour a self-levelling cement only where the dips are broad and the product is rated for the substrate. A thicker adhesive bed is not a substitute. It can shrink more, cover unevenly, and cure in patches, leaving the voids you were trying to avoid.
Each 600x1200 mm piece covers 0.72 m². LATICRETE's Australian technical sheet ties thin-bed limits associated with AS 3958 to about 5 mm over 3 m on concrete floors and 4 mm over 3 m on walls. AS 3958:2023 combined and replaced AS 3958.1 and AS 3958.2, and it covers background preparation as well as bonded fixing. For large-format work, the check most data sheets call for is 3 mm under a 2 m straightedge. Confirm that figure against the tile maker's and adhesive data sheet for the exact system. If any reading breaks the limit for that surface, prepare the floor or wall first. If every reading passes and the base is sound, dry and free of dust, the substrate is ready for layout.
| Surface | Limit to work to | Target for 600x1200 |
|---|---|---|
| Concrete floor, thin-bed | 5 mm over 3 m | 3 mm under 2 m straightedge |
| Wall, thin-bed | 4 mm over 3 m | 3 mm under 2 m straightedge |
| Existing timber or patched floor | 3 mm under a 2 m straightedge | 3 mm under 2 m straightedge |
These tiles are heavy. Plan a two-person carry or a rated lifter before the first box comes inside. On a below-grade slab, check moisture and structure before you chase millimetres of flatness. If the room sits over a basement that still needs finishing, use step-by-step basement remodeling advice to plan that separate build sequence before the floor goes down.
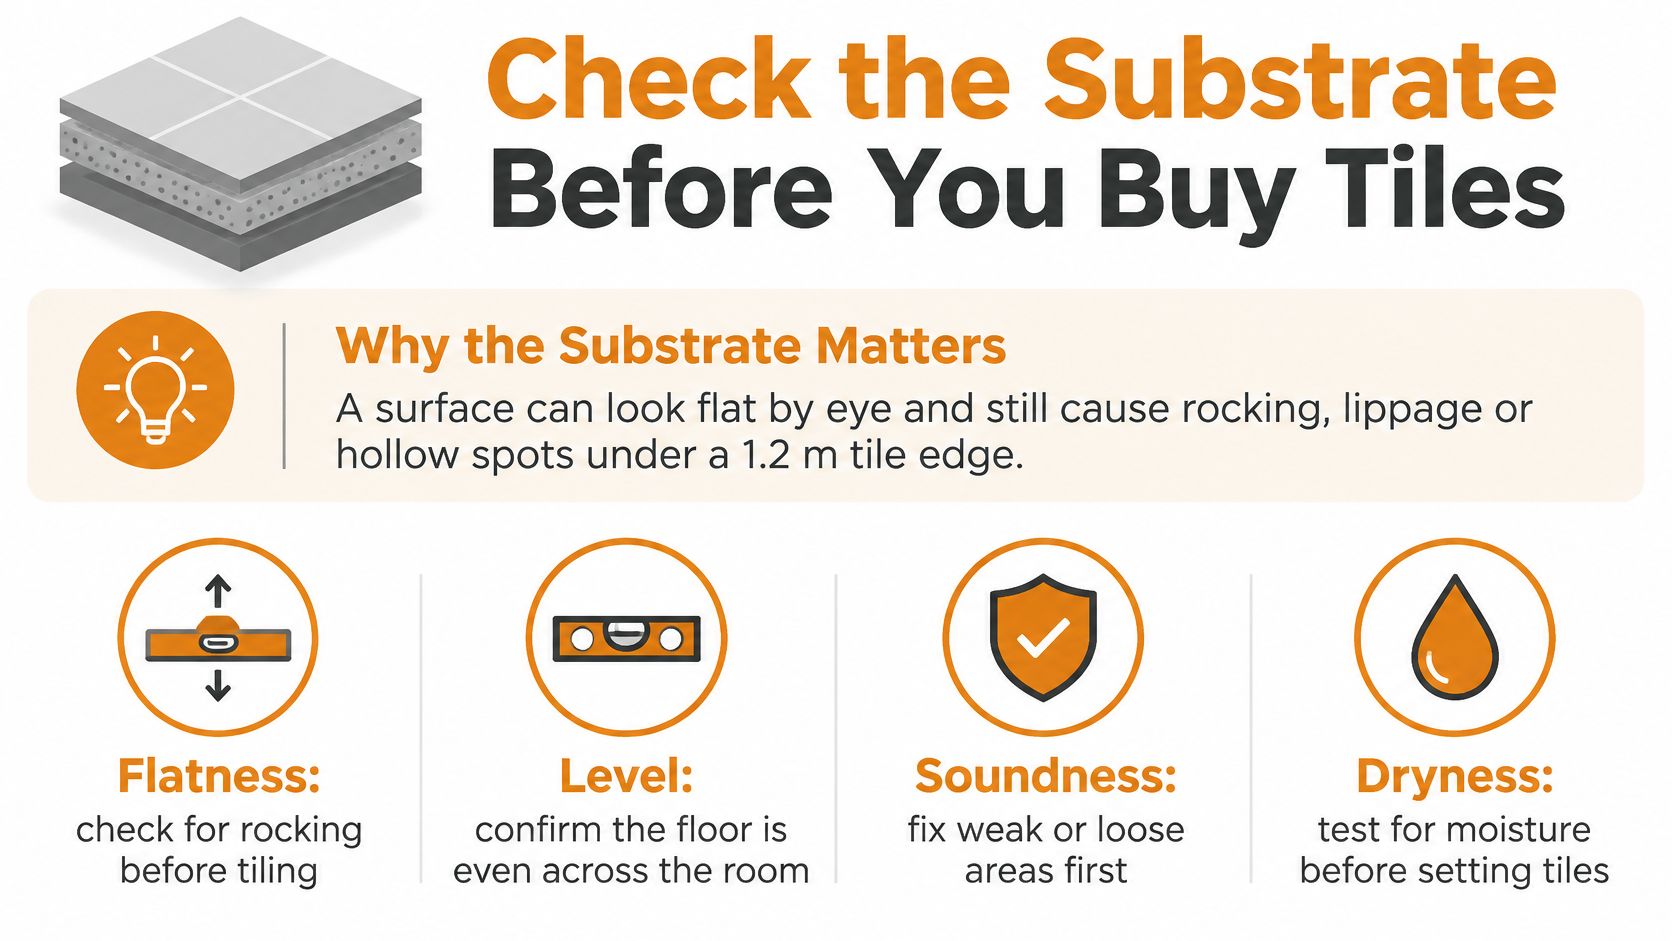
Go or no-go: one failed straightedge reading means the substrate is not ready. Passing every reading, plus a sound, dry, dust-free base, is the green light for adhesive.
Tools and Adhesive Sizes for Large Tiles
Buy the kit in the order you will use it, and match the notch to the job rather than to whatever trowel is already in the van.
Set-out. A 2 m aluminium straightedge, a spirit level of at least 1 m, a chalk line, a tape and a laser level. The laser keeps the grid square once you leave the first wall.
Bedding. A drill with a mixing paddle, two buckets, the notched trowel the data sheet names, and a flat trowel for the back of the tile. Use a cementitious adhesive rated for this format, and read it against the tile maker's notes. Our floor tile adhesive guide is the place to compare bed types before you mix a bag.
Fixing. Spacers, a rubber mallet, a suction lifter rated for the tile weight, and a clip-and-wedge system. The lifter is not a luxury on a piece this size.
Cutting and finish. A wet saw with a diamond blade, a clean bench and a spare blade. Then a sponge, a bucket of clean water, and a gun loaded with flexible sealant for the perimeter, not grout.
| Job | Trowel notch | Adhesive |
|---|---|---|
| Flat concrete floor | 10-12 mm square notch | Large-format cementitious adhesive |
| Wall, thin-bed | 10 mm square notch | Large-format wall adhesive rated for the tile size |
| Back-buttering any tile | Thin skim with flat trowel | Same adhesive as the bed |
Confirm the exact notch on the adhesive data sheet before you open a bag. A smaller notch on a floor this size is a common way to starve the bed.
Wet Areas, Falls and Waterproofing Limits
In a bathroom the tile is a surface finish. The membrane and the substrate keep the water in. Grout will not do that job, and neither will a dense porcelain face.
Where a floor waste is installed, the National Construction Code requires a fall under Housing Provisions Clause 10.2.12. Guidance that interprets AS 3740 commonly sets a minimum general fall of 1:100 toward the waste outside the shower, which is 10 mm across 1 m, as set out in the NCC waterproofing FAQ. AS 3740-2010 also sets the design and installation rules for domestic wet-area membranes, and it includes floor-finish falls.
Why this tile fights the fall
A 600x1200 tile laid flat across the room cannot follow that drainage plane. The waste, the cuts and the direction of fall have to be drawn before any adhesive is combed. If the long edge runs across the fall, the tile will either pond or rock on the high side.
Shower heights to mark first
The same NCC guidance, tied to AS 3740, calls for waterproofing at least 150 mm above the finished shower-floor level, or 25 mm above the maximum retained-water level. Water-resistant construction then extends to a minimum of 1800 mm from the finished floor. Grout lines, tap penetrations and wall junctions must not cut through that membrane.
Check the falls with a level before tiling. Mark the waste and the membrane heights on the walls. If you are not the waterproofer, have that person or the building surveyor confirm the marks. The waste position decides where the first full tile can start, so this check sits ahead of the grid.
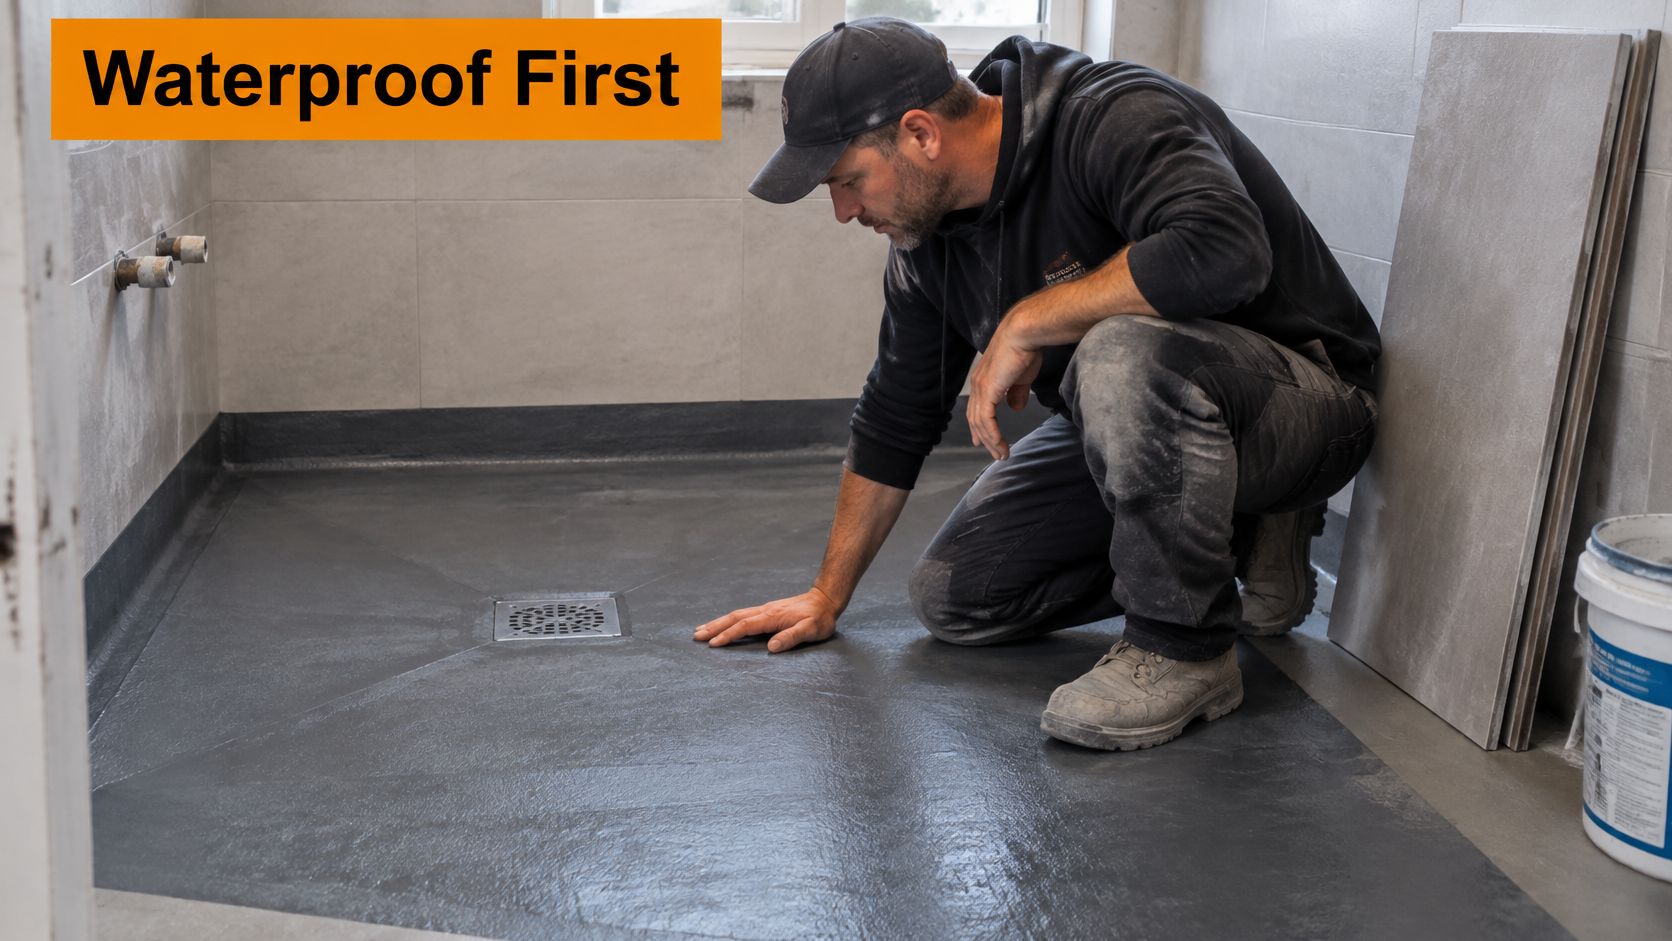
Never rely on tile or grout to keep water out. If the membrane is incomplete, stop and fix that before the first tile is buttered.
Grout Joints and Movement Gaps to Plan
Rectified does not mean jointless. Machine-square edges still need a joint, because the tile can vary slightly and the building still moves.
HIA guidance linked to AS 3958:2023 says to plan movement joints on a large internal floor once a dimension exceeds 9 m, with spacing no greater than 4.5 m. Direct-sun areas trigger closer planning once a dimension exceeds 6 m. Mark those lines on the substrate during set-out, ideally on a doorway or a structural line so the joint reads as deliberate. Our notes on tile expansion joints show how those lines sit in a real floor plan.
A movement joint is generally at least 6 mm wide. It must pass through the tile and the bedding to the substrate, and it stays free of adhesive and grout until flexible sealant goes in. Leave a flexible gap at walls, joinery, columns and penetrations. Rigid grout in those spots is one of the failures that cracks both grout and tiles, and it has little to do with the nominal tile size.
Set the 600 mm and 1200 mm module from the most visible datum. Dry-lay the rows and avoid a sliver at the perimeter. A centred layout usually looks calmer than a start hard against one wall. Keep grout joints to the tile maker's minimum and keep that width the same across the room.
| Location | Rule | Treatment |
|---|---|---|
| Interior floor over 9 m | Movement joint required | Space joints at no more than 4.5 m |
| Floor exposed to direct sun over 6 m | Plan closer joints | Space joints closer than the 4.5 m standard |
| Any movement joint | Minimum 6 mm wide, through tile and bedding | Keep clear of adhesive and grout, then fill with flexible sealant |
| Walls, joinery, columns, penetrations | Flexible perimeter gap | Seal with flexible sealant, never rigid grout |
| Grout joints on rectified tiles | Minimum width from tile maker | Follow the minimum; rectified does not mean jointless |
In a bathroom, those joints have to sit with the falls and the membrane. The tile is still not the waterproof layer.
Cutting, Handling and Levelling Large Tiles
A 600x1200 porcelain tile is awkward before it is difficult to cut. Carry it on edge, one person on each long side, and use a suction lifter to lower it onto the bed. A flat carry across the room is how edges get chipped and backs get strained.
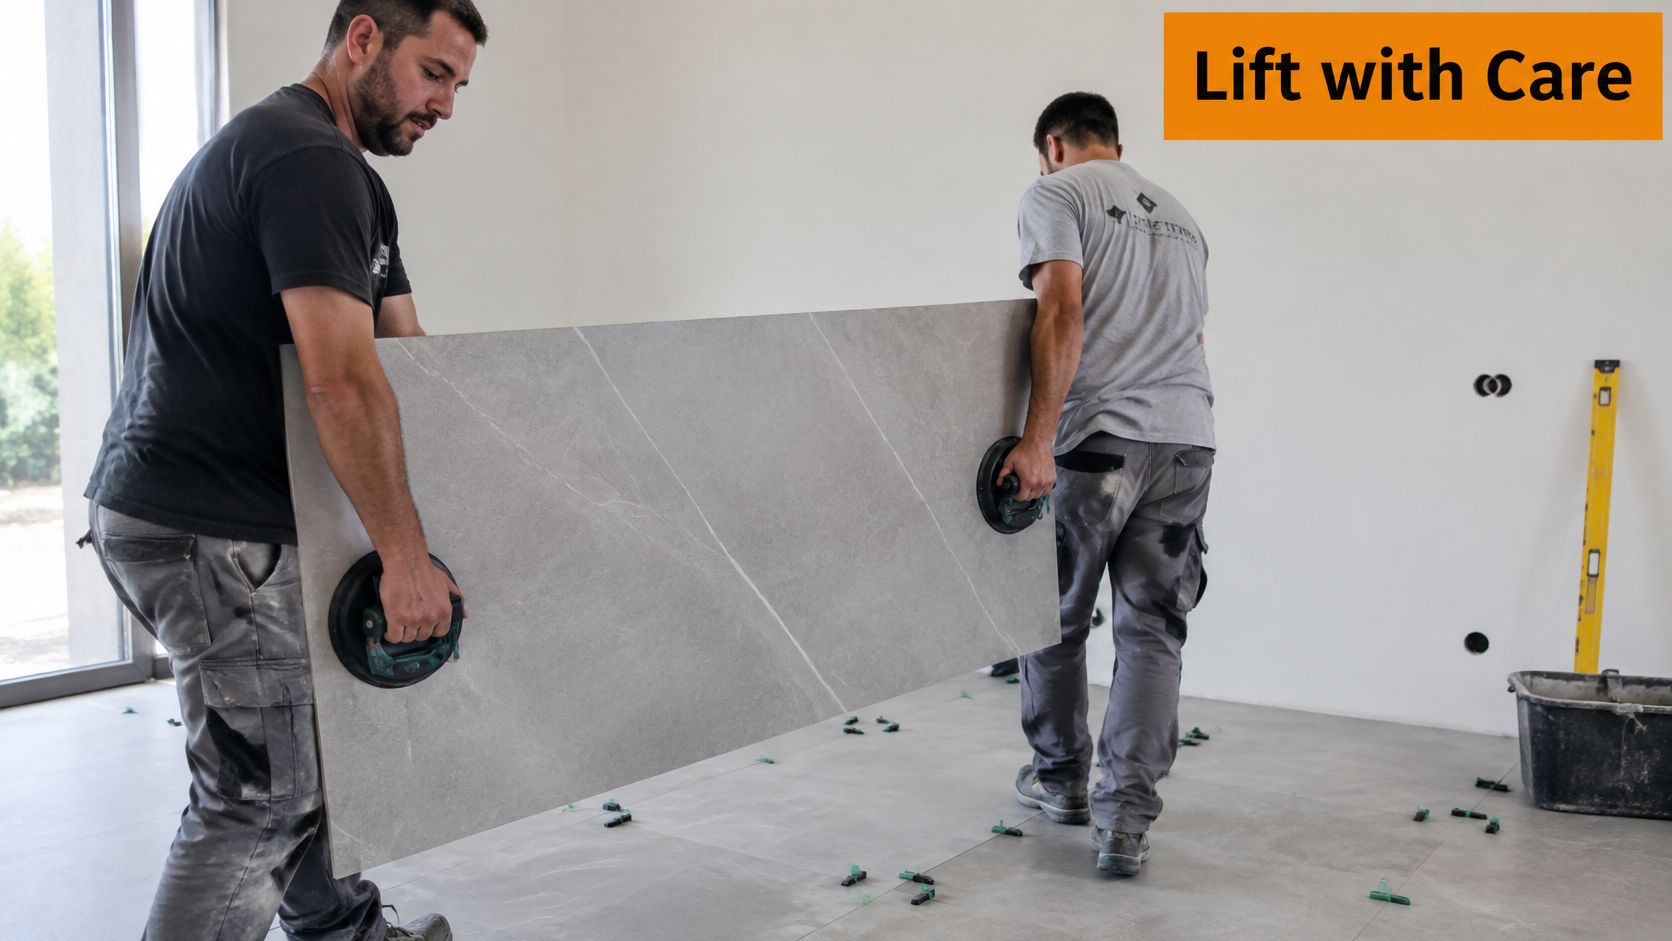
Cuts that do not leave a sliver
Mark the cut on the face, support the full tile on a clean bench, and run the wet saw slowly so the diamond blade does not chip the edge. Plan the layout so no piece is narrower than about one third of a tile. A thin strip at a wall is usually a layout mistake, not a cutting mistake. If the dry lay shows that strip, shift the grid before you mix adhesive.
What clips can and cannot do
Clips and wedges pull neighbouring edges onto one plane and control lippage, the step between two tiles. They cannot correct an uneven substrate. If a tile rocks when you press a corner, lift it. Do not crank the wedge harder.
Remove the clips once the adhesive has set, on the timing the clip maker prints. Then run a hand across each joint and a straightedge across three tiles. Fix any edge that stands proud while the bed is still soft.
A short site walk-through of the lift and set is worth watching before the first box is opened.
How to Lay 600x1200 Tiles Step by Step
Substrate preparation stays the quality check even on laying day. Correct highs and lows with the straightedge before you comb adhesive. Do not try to hide them in the bed.
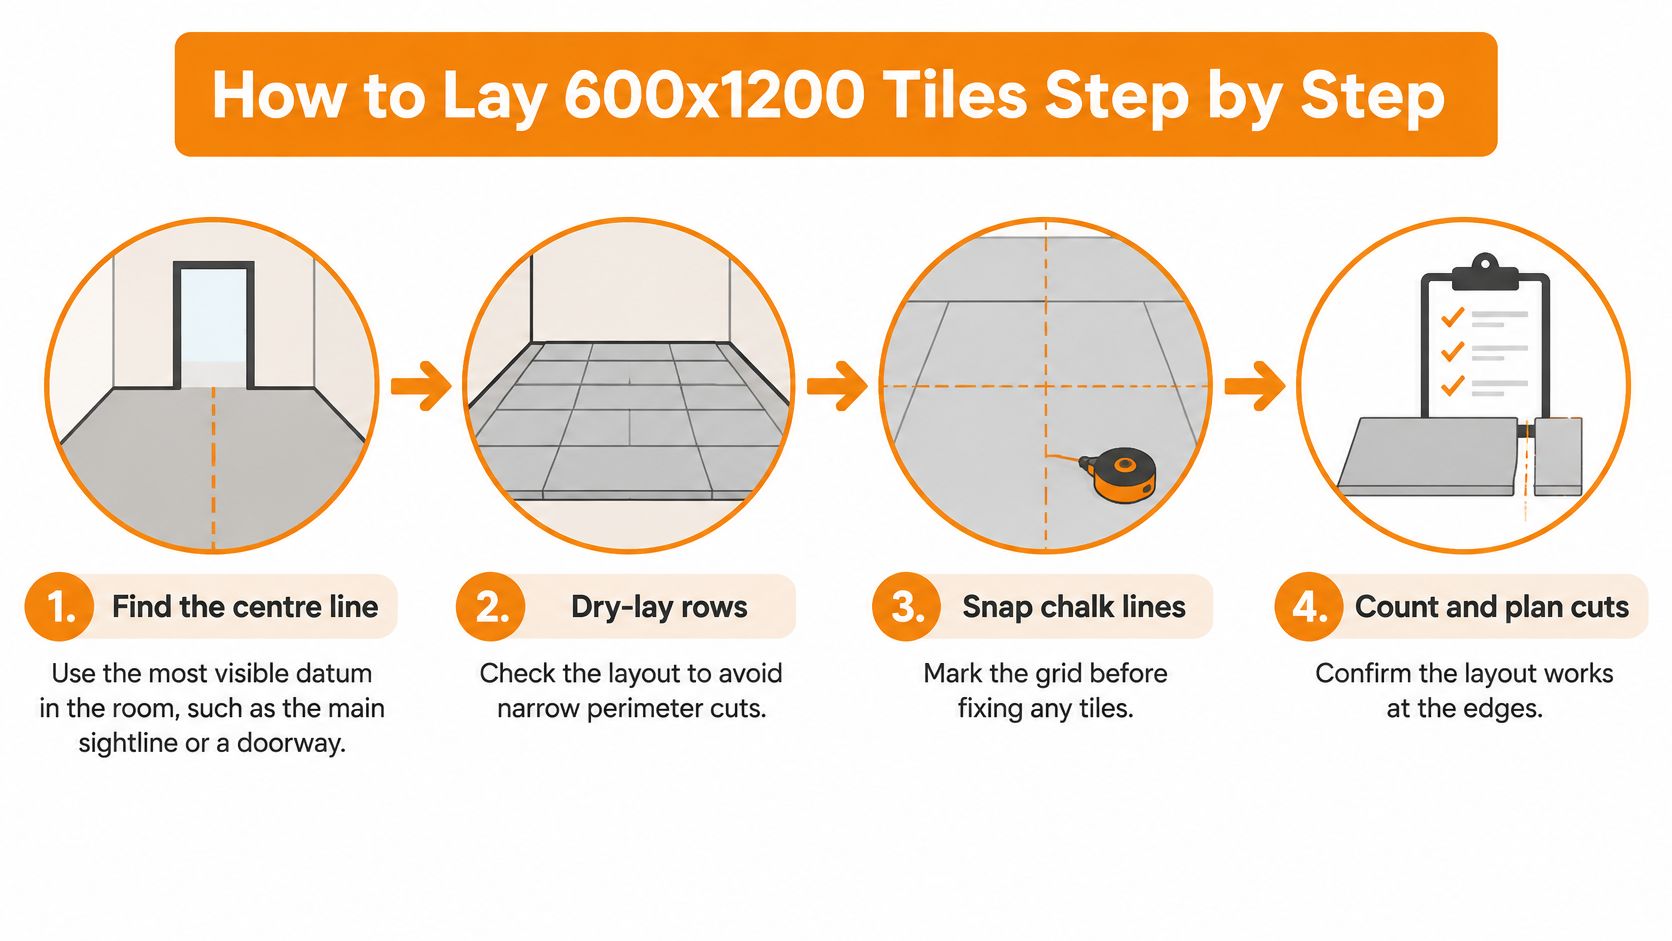
- Find the centre from the most visible datum, such as the main sightline or a doorway. That line is what people see first, so a balanced cut there matters more than a full tile against a hidden wall.
- Dry-lay rows in both directions. Shift the start until perimeter cuts stay a sensible width, then lock that decision.
- Snap chalk lines for the grid and count the tiles, with a few spares. Movement-joint marks go on the floor now, not after the bed is down.
- Prime the substrate the way the adhesive maker specifies. A dusty or thirsty slab will steal water from the mix and shorten the working time.
- Comb parallel ridges with the recommended notch. Spread only what you can cover inside the open time. One Australian product specification puts that at about 15–20 minutes at 21°C, which LATICRETE's large-format sheet treats as a practical limit, not a suggestion.
- Back-butter each tile with a thin skim of the same adhesive. Two people set the tile, then slide it across the ridges so the ridges collapse. Pressing straight down leaves tunnels.
- Lift a fresh tile every few placements. Australian guidance in that same sheet calls for at least 80% coverage on residential floors and 90% in wet areas, with continuous support at the edges. A void near a corner is a crack and a drummy tile waiting to happen. Lift and re-bed it. Do not spot-dab and do not hope grout will hide it.
- Set each tile flush, insert spacers, and check lippage with the straightedge. Clips only hold that plane. They do not fill a hollow.
- Leave the bed to cure for the time on the data sheet before anyone grouts or walks the floor.
Slips that ruin an otherwise careful grid
Spreading a whole room of adhesive, letting the ridges skin, and trusting grout to fill a void are the three mistakes that show up later as loose tiles. If the ridges look dull, scrape them off and comb fresh adhesive.
I would stop a DIY job and call a tiler when the room includes a shower membrane, a floor longer than the movement-joint spacing, or a substrate that still fails the straightedge after patching.
Troubleshooting and Maintenance After Installation
Match the symptom to the cause. Most of these faults were set on laying day.
- Lippage. One edge stands proud. Lift the tile while the adhesive is soft, re-bed it with full coverage, and use clips only to hold the final plane.
- Hollow sound. Tap and you hear a drum. Lift the tile, clean the back and re-bed it. Injecting adhesive through the grout does not fill the void.
- Cracked grout or tiles at corners. The perimeter was grouted rigid, or a movement joint was left out. Cut the grout out, form the joint, and fill it with flexible sealant.
- Adhesive on the face. Wipe it with clean water inside the open time, before it hardens.
- Grout haze. Once the grout has begun to set, clean with a neutral-pH cleaner and a soft pad. Seal the grout after full cure.
Sweep daily, mop with a pH-neutral cleaner, and reseal grout in wet areas every one to two years.
Order Tiles Only After the Site Checks Pass
Do not order because the sample looks right in the showroom. Order when the site can take the tile.
- Substrate. Every straightedge reading is inside the large-format limit, or the highs are ground and the hollows are patched.
- Layout. The grid, the movement-joint lines and the perimeter gaps are marked, and a dry lay has killed the narrow cuts.
- Quantity. Count from the room plan and add 15% wastage. That is the allowance we ask customers to use.
- Batch. Tiles from different batches can differ slightly in colour and size, so have your tiler check that every box matches before the order is locked.
- Wet areas. Falls, waste position and membrane heights are confirmed before the tiles arrive.
- Adhesive. The product and the notch match the data sheet.
View samples beside the room's own light, not under showroom lamps. A wider renovation still needs the same kind of tick-list, and the 9Builders home renovation planning guide is a useful way to line the tiling checks up with the rest of the job. Once every line is ticked, place the order. If a measurement is still in doubt, call us on 1300 680 580 before the boxes leave the warehouse.
Tiles Mate Pty Ltd stocks 600x1200 porcelain, including gloss and matt marble-look options, alongside the adhesives and layout advice this size requires. If you are planning a floor or wall in Melbourne or elsewhere in Victoria, browse the range and order samples so you can check colour under your own light. Start at Tiles Mate Pty Ltd.