




600x1200 Concrete Look Tiles Buyer's Guide
by Shivam Tayal 03 Nov 2026 0 Comments
One 600x1200 concrete look tile covers 0.72 square metres, so you'll need about 1.39 tiles per square metre before cuts and waste. That single number should drive your budget, your tile count and your conversation with your tiler, long before you fall for a grey sample photo.
The popular advice says bigger tiles are cheaper and easier because there are fewer grout lines to lay and clean. That's only half true. Fewer joints can save money, but only if your floor is flat enough, the tile itself is flat enough, and the exact finish you've chosen carries the right slip rating for the room. Skip those three checks and any saving disappears into levelling compound, extra labour, lippage you can feel underfoot, or a bathroom floor that's slippery when it's soapy. Buy in the right order and the format works beautifully. Buy on looks first and you're paying to fix problems a smaller tile would have hidden.
Coverage and Specs at a Glance
Start with quantity, because everything else costs money per square metre. For Australian projects, the Surface Studio datasheet guide confirms a 600x1200 mm tile measures 0.72 m² per tile, which means approximately 1.39 tiles are required per square metre before allowing for cuts and wastage. That guide also notes porcelain performance is assessed under AS ISO 13006, and slip resistance is classified under AS/NZS 4586, including the wet-pendulum P0 to P5 scale, where P5 represents the highest resistance.
Use those figures to run a take-off before you compare quotes. Measure the net floor area, multiply by 1.39, then add your waste allowance. A simple rectangular room laid in a straight grid wastes less than a bathroom cut around a niche, shower fall, vanity and two doorways, so don't use one waste figure for every project.
Working the Numbers
Say a bathroom floor measures 12 m² once you subtract a built-in bath footprint. Multiply 12 by 1.39 and you get about 17 tiles before cuts. Add waste on top, then round up to full boxes, because a broken tile mid-job from a different batch can shift in shade or calibre.
A large open floor shows the scale even more clearly. A 100 m² floor needs about 139 tiles before waste, so even a small error in your waste allowance becomes a full box or two. That's why you should confirm box coverage on every quote rather than trusting a per-metre price alone.
| Spec | Planning figure | What to do with it |
|---|---|---|
| Face size | 600 x 1200 mm | Fewer joints and a continuous concrete field |
| Area per tile | 0.72 m² | Divide room area by 0.72 for a tile count |
| Tiles per m² before waste | About 1.39 | Multiply net area by 1.39 |
| Straight-lay waste | About 10% | Add for offcuts on a simple grid |
| Complex-room waste | About 15% | Use for niches, doorways and diagonal layouts |
| 100 m² floor before waste | About 139 tiles | Add the waste allowance on top |
| Edge | Rectified | Plan grout joints around 2 to 3 mm |
| Body standard | Porcelain under AS ISO 13006 | Check the classification and absorption group on the datasheet |
| Wear | PEI 4 homes; PEI 5 heavy traffic | Match the busiest room, not the sample photo |
| Slip class | AS/NZS 4586 on the exact finish | Do not infer grip from a matt concrete colour |
Read the table from top to bottom when you shop. Face size gives you coverage, coverage gives you count, and count plus waste gives you boxes. Only then should price enter the decision.
Reading the Rest of the Spec
Rectified edges are ground after firing so each tile is closer to a true rectangle. That precision lets your tiler run 2 to 3 mm grout joints instead of wider joints that break up the concrete plane. It doesn't remove the need for movement joints, and it doesn't excuse a wavy substrate, because narrow joints show lippage more, not less.
Specify porcelain for floors rather than assuming any concrete print will do. Porcelain classified for floor use, commonly with water absorption of 0.5 percent or less, handles bathroom moisture, kitchen spills and heavy foot traffic better than a softer ceramic body made for walls. Check the absorption group on the datasheet, not the showroom label.
- PEI wear rating: Choose PEI 4 for a typical home where shoes carry grit through an entry and kitchen, and look for PEI 5 where traffic is commercial or unusually heavy.
- Finish name: Treat matt, honed and textured as descriptions, not guarantees, because two matt greys can polish differently under mopping and foot traffic.
- Approved use: Confirm the sheet rates the exact tile for floor, wall or both, since a wall-only concrete look can fail quickly under chair legs and dropped pans.
Multiply net area by 1.39, add waste, then round to boxes. Don't compare quotes until every supplier is pricing that same tile count.
A final confusion catches many buyers. A matt grey colour doesn't prove grip, and a textured display board doesn't prove the tile in the box was tested the same way. Grip comes from the tested finish on the datasheet, so keep that document with your quote from the start.
Porcelain Versus Ceramic for Concrete Looks
The concrete look is a surface, not a slab of cast concrete. Manufacturers print grey variation, pitting and board marks onto a tile body, or they carry a similar tone through the body itself. Your job is to separate that picture from the material underneath, because the body decides where the tile can live.
The comparison below distils the practical difference before we walk through each body in detail.
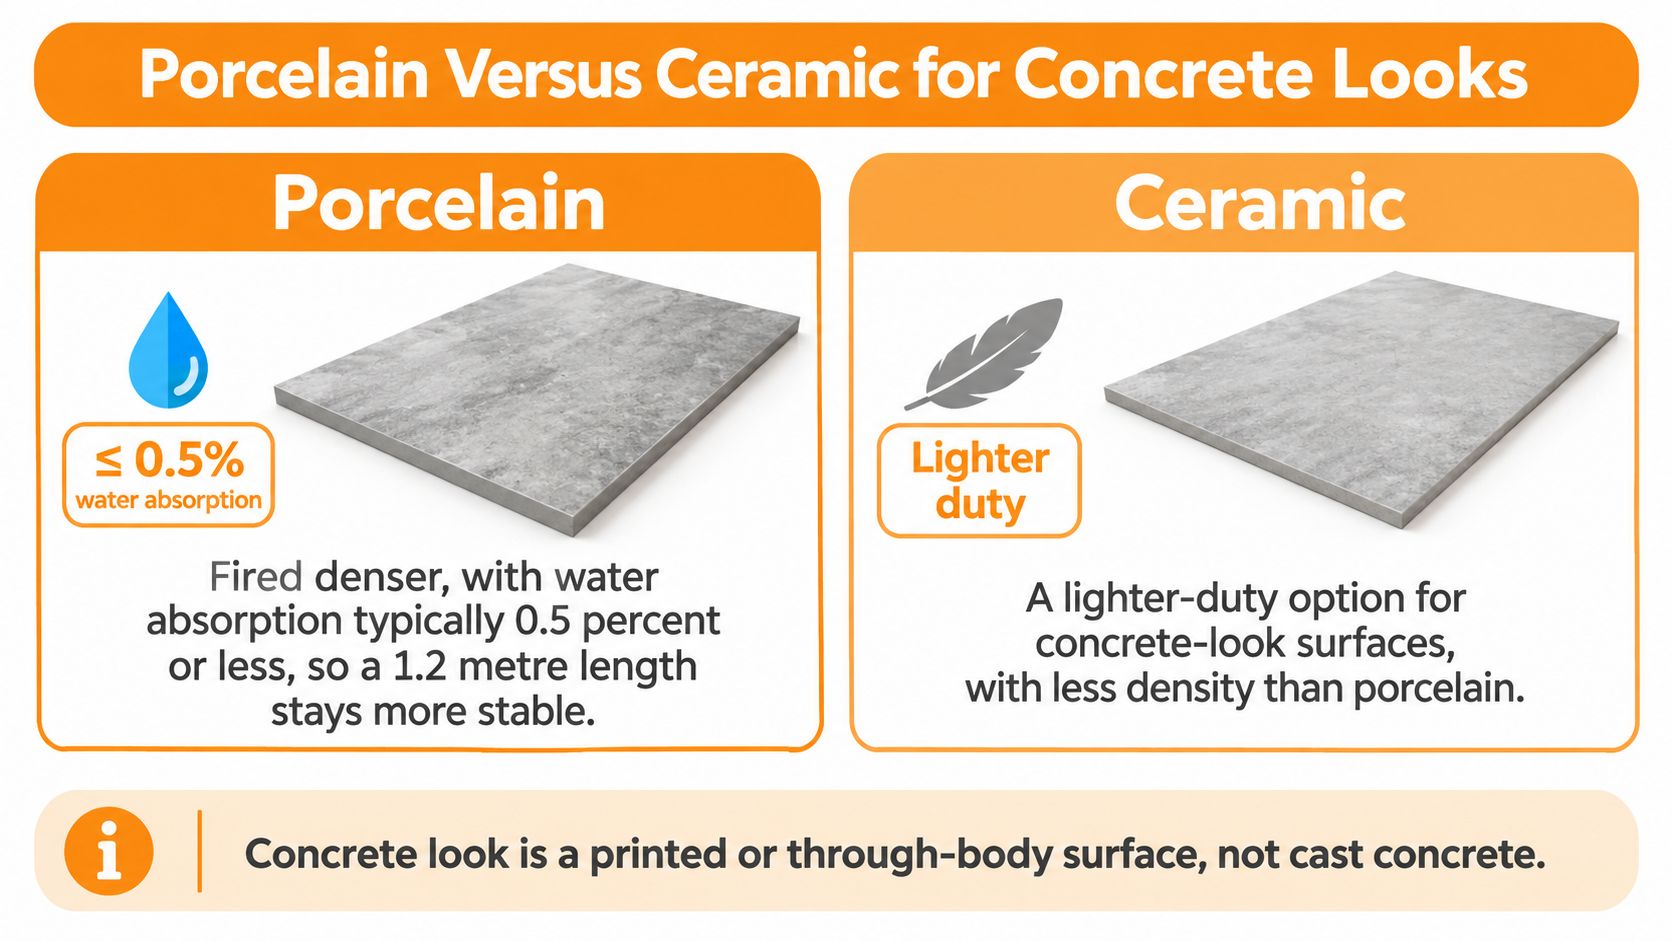
Porcelain is fired denser, with water absorption typically 0.5 percent or less, so a 1.2 metre length stays more stable in bathrooms, laundries and covered outdoor areas. That density also helps in entries and kitchens where dropped utensils, pet claws and tracked grit punish a floor daily. If you're weighing tiles against other hard surfaces for busy zones, you can also find scratch-resistant flooring options to compare maintenance and wear expectations before you commit.
Ordinary ceramic often absorbs more water, sometimes into the low single digits, which usually suits dry walls better than wet floors. A glazed ceramic tile can imitate board-formed pitting beautifully on a splashback, but a chip on a floor corner can reveal a pale biscuit body that stands out against dark grey. On a wall you may never notice. In a kitchen walkway you'll see it every day.
What a Chip Tells You
Through-body porcelain keeps a similar tone through its thickness, so a small chip reads as a concrete nick rather than a white scar. Surface-printed porcelain still performs well if the glaze and PEI rating suit the room, but you should know which type you're buying. Ask to see a cut edge or a broken sample corner instead of judging from a polished showroom face.
For a deeper explanation of bodies and manufacturing, our guide to porcelain tile composition, types and comparisons breaks down how porcelain differs from other ceramic products. Read it alongside the datasheet for any 600x1200 concrete look tiles on your shortlist. You'll ask better questions at the counter.
Five Fields to Check Before Price
Don't compare room photos. Compare technical sheets, field by field.
- Absorption group: Confirm the tile belongs to the low-absorption porcelain group if it'll sit on a wet or external floor.
- PEI rating: Match the wear class to the busiest room the tile will cross, including the path from garage to kitchen.
- Shade variation: V2 or V3 usually gives a believable concrete mix, because real concrete never dries one flat grey.
- Face finish: Note whether it's matt, honed or textured, then tie that exact finish to the slip test result.
- Approved use: Look for floor, wall or both in writing, and don't let a salesperson expand that approval verbally.
Price alone won't sort this out. Marmoré reported that its Australian concrete-look tile catalogue contained 667 products in 2026, with a median price of A$58 per m² including GST, and the catalogue included 600×1200 mm formats. A catalogue that wide will contain wall ceramics, dense porcelain and outdoor grip products under similar grey photos, so the median tells you about market spread, not whether a particular tile suits your shower.
Match body to room and the choice simplifies. Choose porcelain for floors, wet areas and entries. Use ceramic only where its sheet explicitly rates it for that exact use, most often a dry internal wall. If a supplier can't produce the sheet, treat that as your answer and move on.
Slip Ratings for Australian Wet Areas
Choose the finish by its test result, not by how convincingly it looks like raw concrete. Practical Australian guidance in the DW Tiles porcelain quality guide identifies P3 as a baseline commonly used for residential bathroom and laundry floors, P4 for more exposed alfresco or entry conditions, and P4 to P5 for pool surrounds. That same guidance explains Australian classification uses AS/NZS 4586 wet-pendulum P ratings and oil-contamination R ratings.
Those letters matter because contamination changes friction. Water alone reduces grip, then soap, body oils, sunscreen, dust and outdoor grime reduce it further. A smoother matt face can therefore perform differently from a textured face even when both tiles share the same concrete print and product family name.
| Area | Common target | Finish to favour |
|---|---|---|
| Dry living and bedrooms | Slip class less critical unless there is a ramp | Matt or soft sheen |
| Bathroom and laundry floors | P3 often used as a domestic minimum | Matt |
| Shower recess, barefoot | P4 or P5 | Textured |
| Alfresco and exposed entries | P4 | Textured |
| Pool surrounds | P4 to P5 | Grip texture |
| External paving | P4 or P5, with drainage | Textured, outdoor-rated |
Use the table as a planning starting point, not as certification for your project. A certifier, designer or builder may require a higher class for a ramp, a commercial tenancy, aged care, childcare or a common-area walkway. Ask early, because changing finish after ordering can change shade, texture and lead time.
Why Two Grey Tiles Behave Differently
Say you place two samples side by side in a Melbourne showroom. Both look like pale concrete, both feel matt under a dry fingertip, and both come from the same range. One has a fine, closed texture that water sheets across, while the other has a micro-texture that breaks the water film under a bare foot. Dry, you'd struggle to separate them. Wet and soapy, they can land in different P classes.
That's why you should request the manufacturer's test report for the exact tile finish, not merely the product family. Check the finish code on the report matches the finish code on your quote and sample. If the report covers a textured outdoor version but you're buying the smoother indoor version, it doesn't support your bathroom specification.
Practical rule: If the slip report doesn't name the exact finish on your sample, you don't yet have a slip rating for the tile you're buying.
Size doesn't rescue a poor rating. A 600x1200 format reduces grout lines and can simplify cleaning, but fewer joints also means fewer interruptions to a sliding foot. The format won't compensate for an unsuitable surface classification, poor drainage or falls that leave water ponding near a shower screen.
Waterproofing and Outdoor Checks
Wet-area selection sits on top of a compliant waterproofing system. The NCC wet-area provisions govern the waterproofing system beneath tiled floors and walls, so your membrane, falls and junctions need coordination with the tile layout before fixing starts. A membrane isn't a substitute for a P rating, and a P rating isn't a substitute for a membrane. You need both, installed by appropriately licensed trades where required.
Outdoors, favour a textured grip face that's explicitly outdoor-rated, and confirm drainage so water doesn't sit on a large tile and grow algae in shaded corners. Don't carry an indoor polished or fashion gloss concrete look onto paving just because the colour matches through a sliding door. The indoor and outdoor pieces can share a print while carrying different finishes, thicknesses and ratings.
Check three extra fields for Australian exterior use. Confirm frost and freeze-thaw suitability where mornings get cold, UV-stable colour where sun hits part of the alfresco all afternoon, and the stated slip performance for external conditions. Sun, rain and coastal salt air age a surface differently from indoor mopping, so an indoor-rated tile belongs indoors unless the manufacturer approves the exposed use in writing.
Room Layouts That Keep the Concrete Look
Open-plan rooms reward restraint. When 600x1200 concrete look tiles run in a stacked grid with the long side following the room, the floor reads like large cast panels rather than a patchwork of small pieces. The photo below shows that calm, continuous effect across a living, dining and kitchen zone.
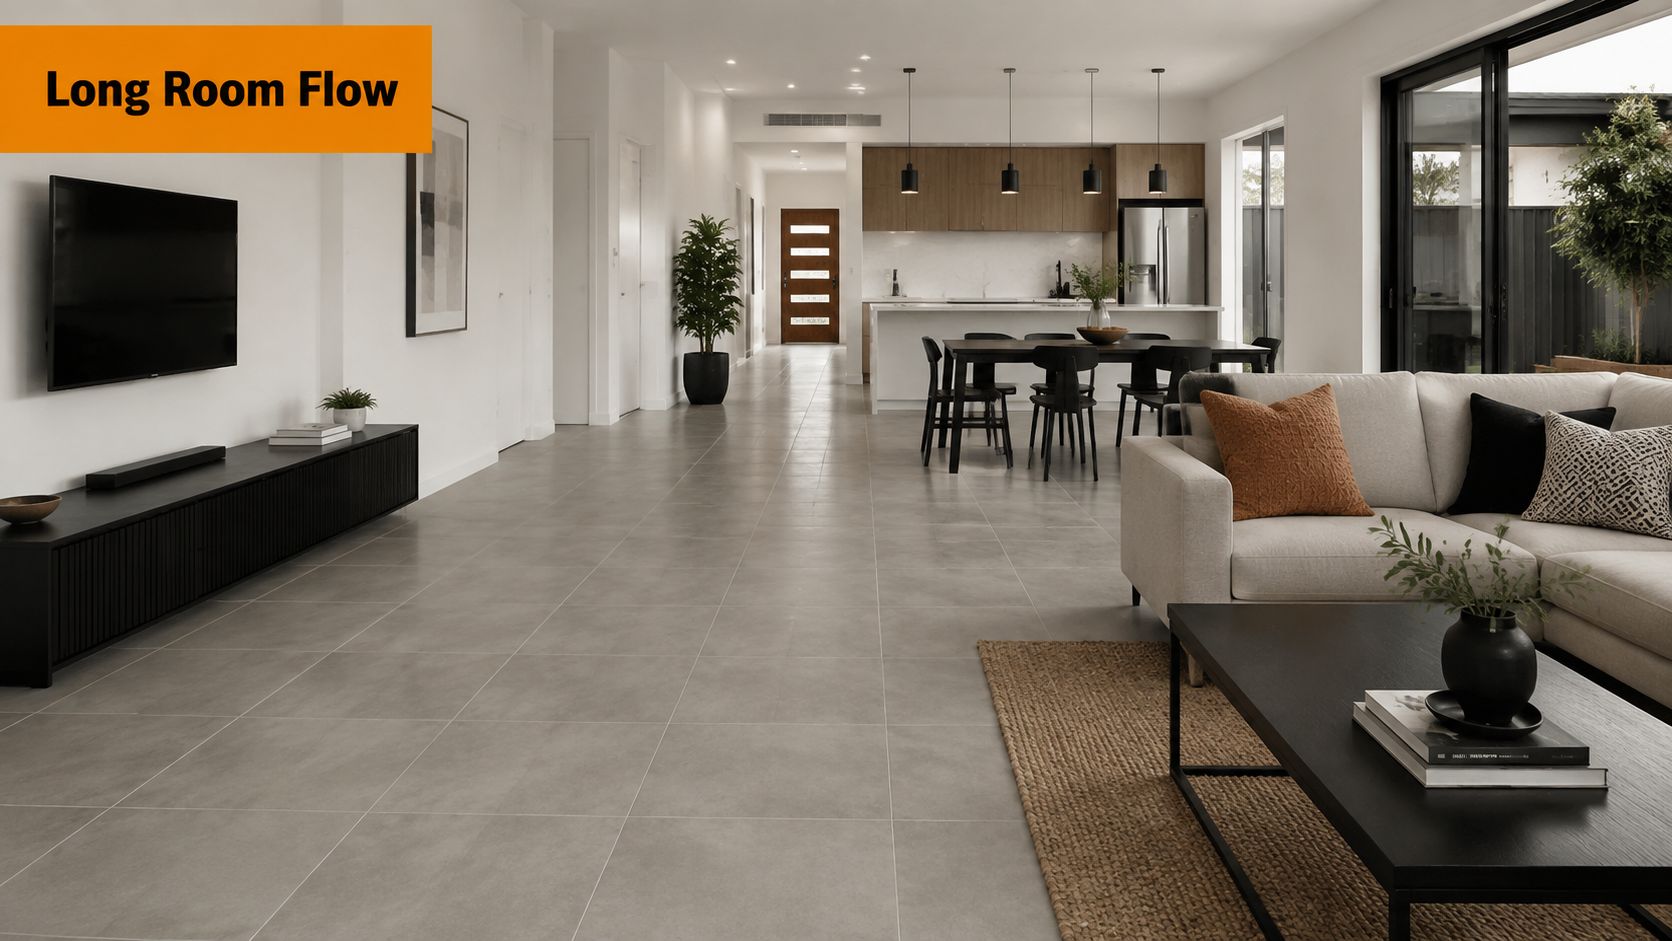
A stacked grid suits open living areas and long hallways because the joints line up like saw cuts in a slab. Run the 1200 mm direction along the longest sightline, usually from entry toward a rear window or alfresco door. You'll see fewer cross joints, and furniture legs land on a quieter field. If you're still arranging sofas and dining settings around that sightline, it helps to plan a room around your furniture before you fix the starting joint, so a grout line doesn't slice awkwardly under a table edge.
A third-offset brick bond gives a different character, closer to large concrete boards or planks. Keep the stagger modest, around one third, because larger offsets place the highest point of one tile beside the lowest edge of the next. If the tile has any bow, that pairing can show lippage. A restrained offset keeps the board feel without asking every tile to sit perfectly flat against its neighbour's crown.
A Narrow Bathroom Worked Through
Take a typical narrow Melbourne ensuite where the door opens toward a vanity and the shower sits at the far end. Run the 1200 mm side along the longer wall, so the long joint draws your eye toward the shower and fewer cut ends face the doorway. Centre the layout on the vanity or the shower screen, whichever you see first, then check what happens at the niche.
Avoid a tiny sliver at the niche or window reveal. Shift the starting line so cuts stay above roughly half a tile where possible, because narrow strips look accidental and they're harder to cut cleanly in porcelain. Draw the layout on graph paper or in a simple CAD sketch, including the waste drain position, before anyone mixes adhesive.
The short video below is useful for visualising how direction and joint placement change a room before tiles arrive on site.
Watch it with your room sketch beside you. Pause where a layout turns a corner or meets a threshold, then mark the same decision on your plan. That ten minutes prevents the common mid-install argument about which wall should carry the cut.
Kitchens Laundries and Thresholds
Kitchens can carry one tile from floor to a full-height splashback for a monolithic concrete backdrop. Keep the slip-rated finish on the floor, and consider an easier-wipe face on the wall if the range offers one in the same print. Align a floor joint with a cabinetry break or island edge where you can, so the grid looks intentional rather than random.
Laundries suit the quieter matt finish, because gloss highlights detergent drips, lint and water spots under harsh downlights. Run the long side toward the external door if the room doubles as a mud entry, and keep a textured, higher-rated piece near the trough if water regularly reaches the floor. Practical beats pretty in a room that floods occasionally.
At an alfresco threshold, break the indoor tile run unless the outdoor piece has its own rating and the junction includes a movement joint. A continuous colour can continue, but the product specification changes at the door track. Mark that break on the plan so the tiler doesn't bridge it with rigid grout.
Choose grout close to the tile tone, warm grey on warm concrete and cooler grey on charcoal, at about 2 to 3 mm on rectified edges. High-contrast grout turns each large tile into a framed rectangle and destroys the slab illusion. Finish every room with one ruled layout sketch that shows tile direction, starting point, cut locations and the long joint line, then order from that sketch.
Flatness Movement Joints and Adhesive
A 600x1200 tile covers the same area as two 600x600 tiles, so it can mean fewer grout lines. That saving holds only if the substrate is flat, the tiles are acceptably flat and the chosen finish has the right slip rating. Otherwise, extra levelling and careful installation can cost more than the grout saved.
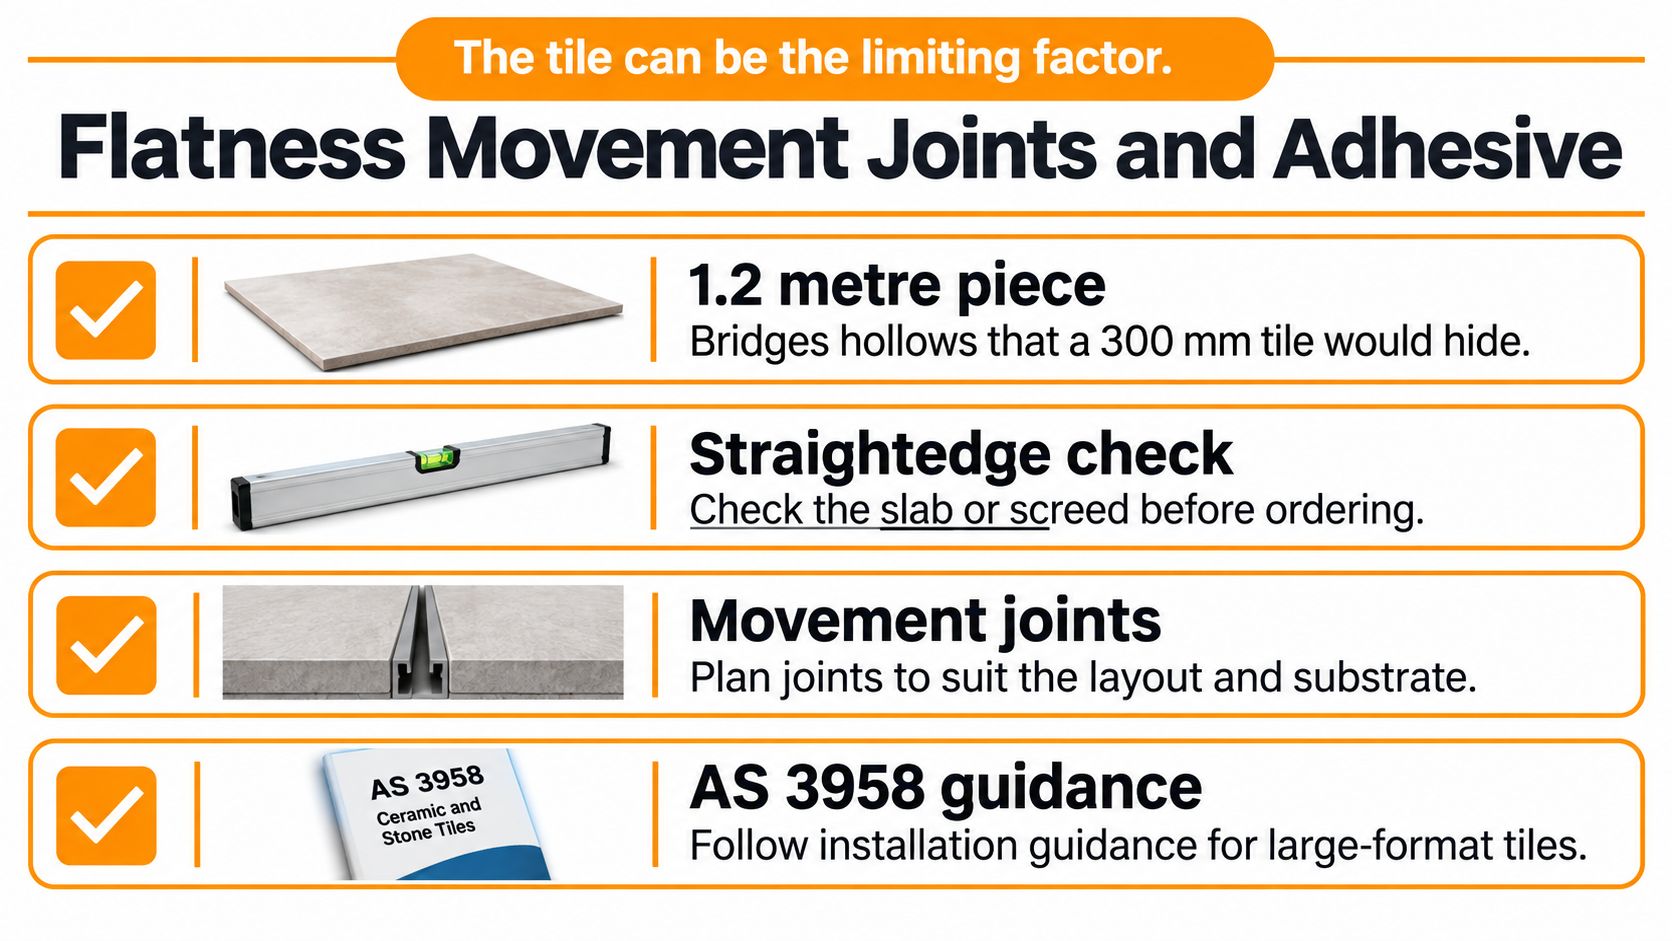
Check the substrate with a straightedge before choosing a tile or setting a budget. The Chalkline floor coverings guide identifies AS 3958:2023 as the current standard and gives a flatness check of within 3 mm under a 2 m straightedge. Use the flatness limit in the current AS 3958 edition and the tile manufacturer's written specification for the job. If they differ, get the tiler to clarify the applicable requirement before work begins.
Large tiles make small surface changes easier to notice. A 1200 mm edge bridges hollows that a shorter tile may follow, much like a long ruler rocking over a bump. A high spot can lift the tile and leave voids underneath; a low spot can lead to uneven adhesive thickness and a raised edge. Levelling clips help align neighbouring tiles, but they cannot fix an uneven substrate or a bowed tile.
Why Flatness Controls Everything Else
The tile itself also affects the finished surface. Check several pieces from the intended batch for size and flatness, and ask the tiler to agree in writing on a realistic lippage standard before installation. A straight screed cannot flatten a bowed tile, so checking the product and substrate together helps avoid a dispute once the floor is laid.
The tile can be the limiting factor. A perfect screed can't flatten a bowed 1200 mm porcelain plank.
Adhesive Coverage and Handling
Choose an adhesive system approved for the tile size, substrate and conditions of use. Large-format porcelain commonly calls for a deformable C2S1 or C2S2 adhesive, with the notch and technique selected to achieve good transfer. Back-buttering adds adhesive to the tile's back as well as the substrate. The tiler should lift an early tile to check coverage, then adjust the method if needed. Wet-area and external work may require greater coverage, so confirm the requirement in the relevant product instructions and installation specification.
Plan handling as carefully as the adhesive. A 600x1200 tile can be awkward through a bathroom doorway, and a corner can chip if it hits a frame. A clear route from delivery to the room and suitable handling equipment help reduce rushed placement and breakage. Include the extra handling and preparation in the cost comparison with 600x600 tiles.
Movement Joints Are Not Optional
Grout joints do not replace movement joints. Plan flexible joints at perimeters, around columns and cabinetry, where the substrate changes, and over existing structural joints. Their locations and spacing should be set by the designer or tiler for the slab and its exposure, rather than assumed from a general rule. The guide to tile expansion joints and where they belong explains why these joints need a flexible sealant and should not be filled with rigid grout or blocked by skirting.
Before ordering, check the whole installation method, not just the tile price.
- Measure flatness: Use a straightedge across the slab or screed in several directions, and mark high and low areas for assessment.
- Check the tile: Inspect several pieces for size consistency, shade and bow. Confirm the chosen finish has the slip rating required for its location.
- Budget preparation: Include grinding, levelling compound or a new screed if needed, along with the labour involved in handling large tiles.
- Agree the method: Ask the tiler to specify the adhesive, application approach, coverage target and movement-joint locations in writing.
- Order when the details align: Buy once the substrate condition, tile specification and installation method have been considered together.
That sequence gives a clearer answer to the cost question. Fewer grout lines save money only when the substrate and tiles are flat enough for the agreed method, and the finish suits the room. If levelling and installation outweigh the grout saving, a smaller format may be the better fit. If the surface is ready and the tile checks out, 600x1200 concrete-look tiles can deliver a more continuous appearance without unnecessary remedial work.
How to Clean Concrete Look Porcelain
Porcelain doesn't need sealing the way cement or many natural stones do, but that doesn't make it maintenance-free. Grout haze, alkaline cleaner residue and gritty soil can dull a matt concrete print quickly. Separate the first clean from weekly care and you'll protect both appearance and grip.
After installation, remove grout haze with a product the adhesive or grout manufacturer allows for porcelain, then rinse thoroughly with clean water. Don't let a haze remover dry on the face, and don't flood fresh joints before they've cured as directed. Test any specialty cleaner on an offcut or hidden corner first, because textured glazes can hold residue differently from smooth ones.
Weekly Care That Preserves Grip
For routine cleaning, sweep or vacuum loose grit, then mop with a neutral pH cleaner and a flat microfibre mop. Rinse if the product label requires it, and change dirty mop water instead of spreading grey soil across a pale floor. Our step-by-step guide on how to clean porcelain floors without leaving film covers mop choice and dilution in more detail.
Skip oil soaps and polish-style cleaners. They can leave a film that makes a P-rated floor feel smoother under wet feet and attracts more dust between cleans. A floor that looks shinier after mopping isn't necessarily cleaner. It may be coated.
- Vacuum grit first: Sand under shoes or a mop acts like abrasive paper, especially on textured shower and alfresco faces.
- Use a soft brush in joints: Rectified 2 to 3 mm grout joints need a narrow soft brush, not a wire brush that scratches edges.
- Dry splash zones: Matt concrete prints show hard-water spots, so wipe the tap splash area and shower screen line after heavy use.
- Avoid abrasive powders: Scouring products can burnish a matt glaze unevenly and leave shiny traffic lanes.
Textured outdoor and shower faces trap more soil because the texture that helps grip also holds sand and soap. Rinse shower floors regularly, keep the waste clear, and give alfresco tiles a hose and soft broom before soil bakes on in summer. Don't use a high-pressure washer at close range on grout joints unless the manufacturer approves it.
Stains Need Identification First
Don't attack every mark with the strongest bottle under the sink. Oily kitchen marks need a degreasing approach, rust from metal furniture needs a rust-specific treatment used carefully, and pale salts on the surface can indicate moisture moving through the bed. Each problem has a different cause, so the wrong cleaner can spread the stain or damage grout while leaving the source untouched.
Dark rubber mats and furniture feet can leave marks on pale grey porcelain. Use light-coloured felt or suitable glides, lift rather than drag heavy items, and keep spare offcuts from the original batch for a future chip repair. Store them flat, labelled with the product and batch, where they won't be cracked by stored paint tins.
Check cleaning advice against the manufacturer's sheet so you don't void a warranty with an acidic or abrasive product. Good care is mostly boring. Remove grit, use a neutral cleaner, rinse residue away, and deal with a stain by cause rather than force.
Order Samples and Lock the Spec
Finish with a decision sequence, not another lap of a showroom. You've already worked through coverage, body, grip, layout, substrate and cleaning. Now lock those choices to physical samples and documents so the tile that arrives is the tile you approved.
Shortlist two or three concrete-look faces rather than ten. Include one matt, one honed and one textured option if grip is a concern, then eliminate any tile whose datasheet doesn't approve your intended use. A short list forces comparison on specification instead of letting the prettiest grey win by default.
See the Grey in Your Own Light
Order samples and view them in the actual room with your timber, paint, stone and cabinetry finishes. Screenshots shift grey cool or warm, and showroom lighting rarely matches a south-facing Victorian bathroom at 8 a.m. Move each sample from floor to wall, wet a corner to see how the tone deepens, and check it again at night under your planned lighting.
We offer a sample pack of five for $15 and a free 15-minute design consultation from home, so you can see, touch and feel tiles through the samples service before committing to a project. Use the consultation to compare finishes against your room photos and measurements, not just to pick a colour name. Bring the slip requirement and substrate result with you.
- Check box maths: Confirm the box price and coverage per box on the quote, then reconcile it with your tile count and waste allowance.
- Use a known comparator: For example, Afyon White Matt 600x1200 tiles are sold at $97.20 per box, which is $45 per square metre, so you can see how per-box and per-metre pricing should align.
- Verify batch: Tiles from different batches can differ slightly in colour and size, so have your tiler verify tile size and measurements before placing an order.
- Buy in one batch: Order the full quantity plus waste together, and keep labelled spares rather than hoping a later batch will match.
Trade buyers can use TilesMate Pro for B2B pricing and personalised sourcing, which helps when a project needs consistent batch supply across stages. Home renovators benefit from the same discipline even on one bathroom. Write the product code, finish code, size and batch on the order confirmation.
Attach the Evidence to the Order
Attach four documents or notes to your purchase file: the slip report for the exact finish, the PEI and absorption details, the flatness check result, and the tiler's written installation method. Add the layout sketch with tile direction and movement joints marked. If a discussion arises on site, those pages settle it faster than a memory of a showroom conversation.
That file is the difference between buying a look and specifying a floor. 600x1200 concrete look tiles reward buyers who verify flatness, finish and batch before payment, because the large format leaves nowhere for assumptions to hide. Complete the checks, order samples, lock the spec, and the concrete effect you imagined has a technical basis to survive daily use.
Order your five samples, check the exact finish and flatness before you buy, and use our free design consultation to lock a 600x1200 concrete look specification that suits your room. Visit Tiles Mate Pty Ltd to compare porcelain finishes, clear per-metre and per-box pricing, and Melbourne-based advice for your project.