




600x600 Matt Porcelain Floor Tiles: Buyer's Guide
by Shivam Tayal 31 Oct 2026 0 Comments
The popular advice sounds tidy. Pick a matt tile, get grip for free, and chase the lowest price per square metre. That's how 600x600 matt porcelain floor tiles end up in the wrong room, on the wrong adhesive, and one box short on a Friday afternoon.
Matt is a sheen, not a slip rating. A cheap sticker price also isn't the installed cost. Once you separate the surface finish from the porcelain body, check a tested rating for each room, and count waste, spares and bedding properly, this square format becomes a very sensible floor. Skip those steps and it's an expensive way to learn.
What 600x600 Matt Porcelain Floor Tiles Are
Say you're standing in a showroom holding one tile. It's roughly the scale of a large dinner tray, square enough to feel generous on a floor but still manageable on a domestic trolley. A 600x1200 slab usually needs two people and careful handling. This one doesn't, and that practicality explains much of its appeal for Melbourne renovations.
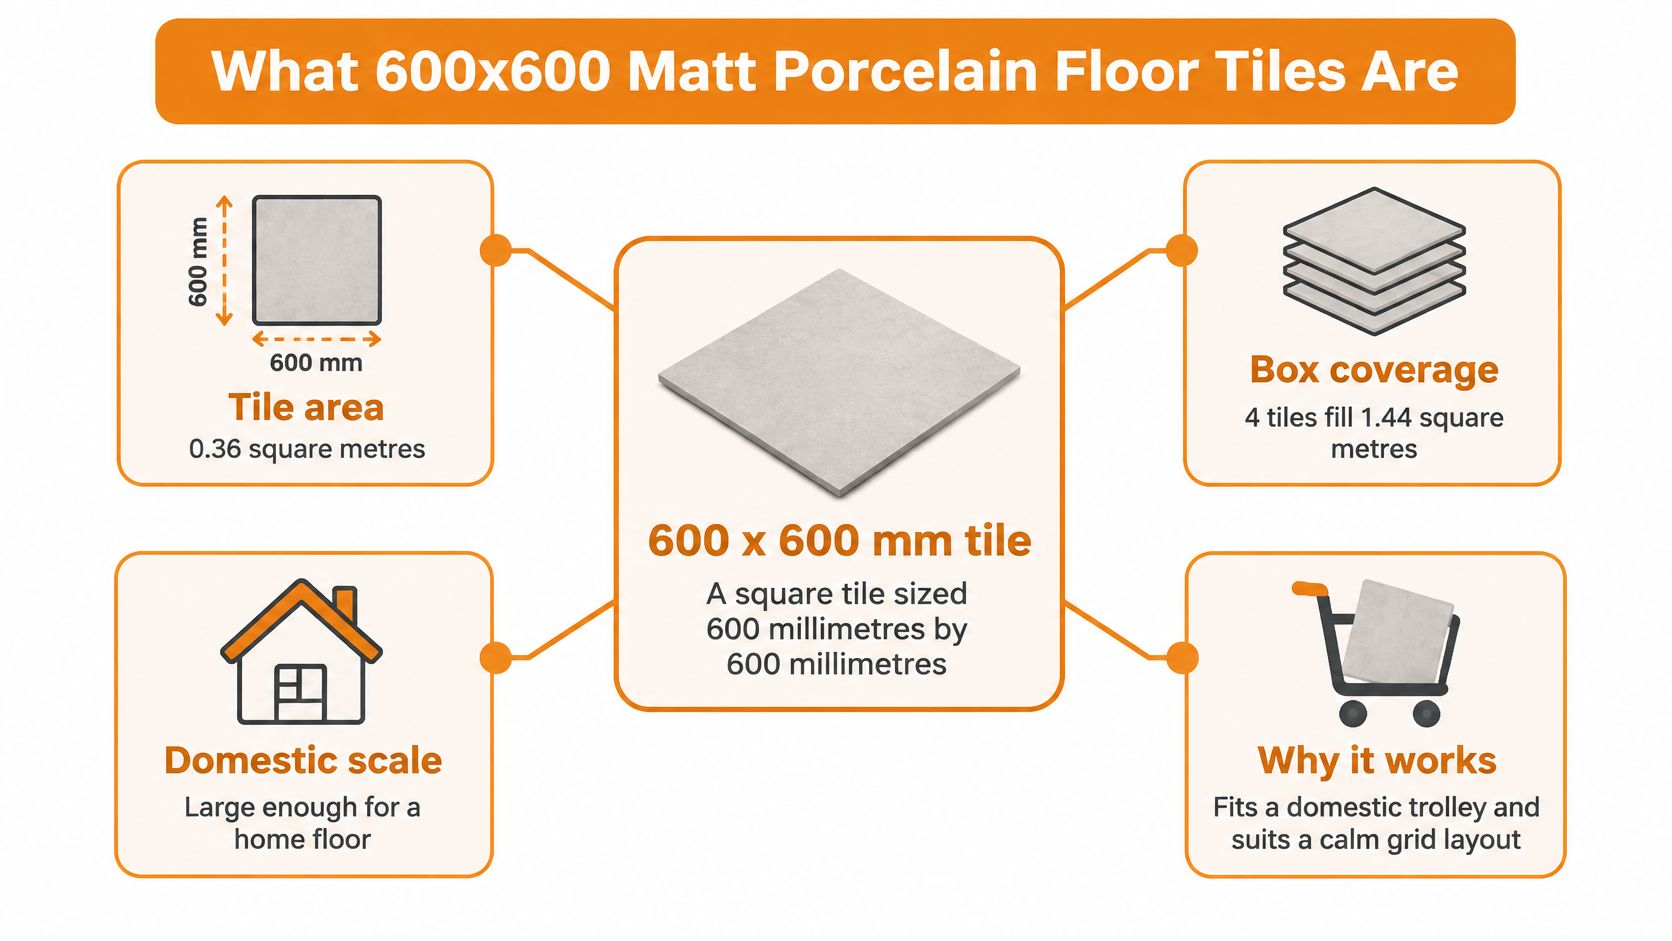
Size first, picture second
One tile covers 0.36 square metres, and four tiles fill a 1.44 square metre box. Porcelain describes the body underneath the stone, concrete or marble look printed on top. The body is fired hotter than ordinary ceramic until the clay becomes dense and hard.
In Australia, the Chalkline floor coverings specification guidance states that AS ISO 13006 Group BIa specifies absorption of no more than 0.5% by mass. That guidance describes Group BIa porcelain as "impervious," with very high moisture resistance and very high wear resistance, suitable for wet areas and able to withstand freeze and thaw cycles.
Why low absorption changes installation
Low absorption is a strength and a warning. The same guidance notes that bonding can be more demanding than with tiles absorbing between 0.5% and 3%, so you can't treat adhesive choice as an afterthought. A dense tile gives the adhesive less open pore structure to grip.
Practical rule: Specify the tile and its adhesive system together, not as two unrelated purchases.
Matt means a low sheen glaze. It softens glare from downlights and sliding doors, and it doesn't show every scuff the way gloss can. It doesn't prove grip, frost suitability for a particular balcony, or compliance in a shower. If you want more background on everyday living with this finish, this guide to matt finish tiles for elegance, durability and practicality is a useful companion read.
Edge type matters too:
- Rectified edges: Cut square after firing, usually laid with a narrow joint around 2 to 3 millimetres for a calm grid.
- Unrectified or cushion edges: Slightly rounded and more size tolerant, but they need a wider joint to look even.
- Directional faces: Stone and marble looks may need their veining turned during a dry lay so every pattern doesn't march the same way.
That distinction between appearance and specification also helps landlords and renovators comparing broader flooring solutions for rental properties, where durability claims need product data behind them. Before you order, read the declared classification, absorption result and intended application on the datasheet. Don't specify from a lifestyle photo, especially in a Victorian home that'll see dry summer dust and wet winter boots in the same hallway.
Best Rooms Indoors and Outdoors
A square tile works best where a calm, repeatable grid helps the room feel settled. Open living areas, kitchens, hallways, laundries and family bathrooms suit that rhythm, particularly when you want one continuous floor rather than a patchwork of small formats.
This open plan example shows how a large matt square carries through adjoining spaces without visual fuss.
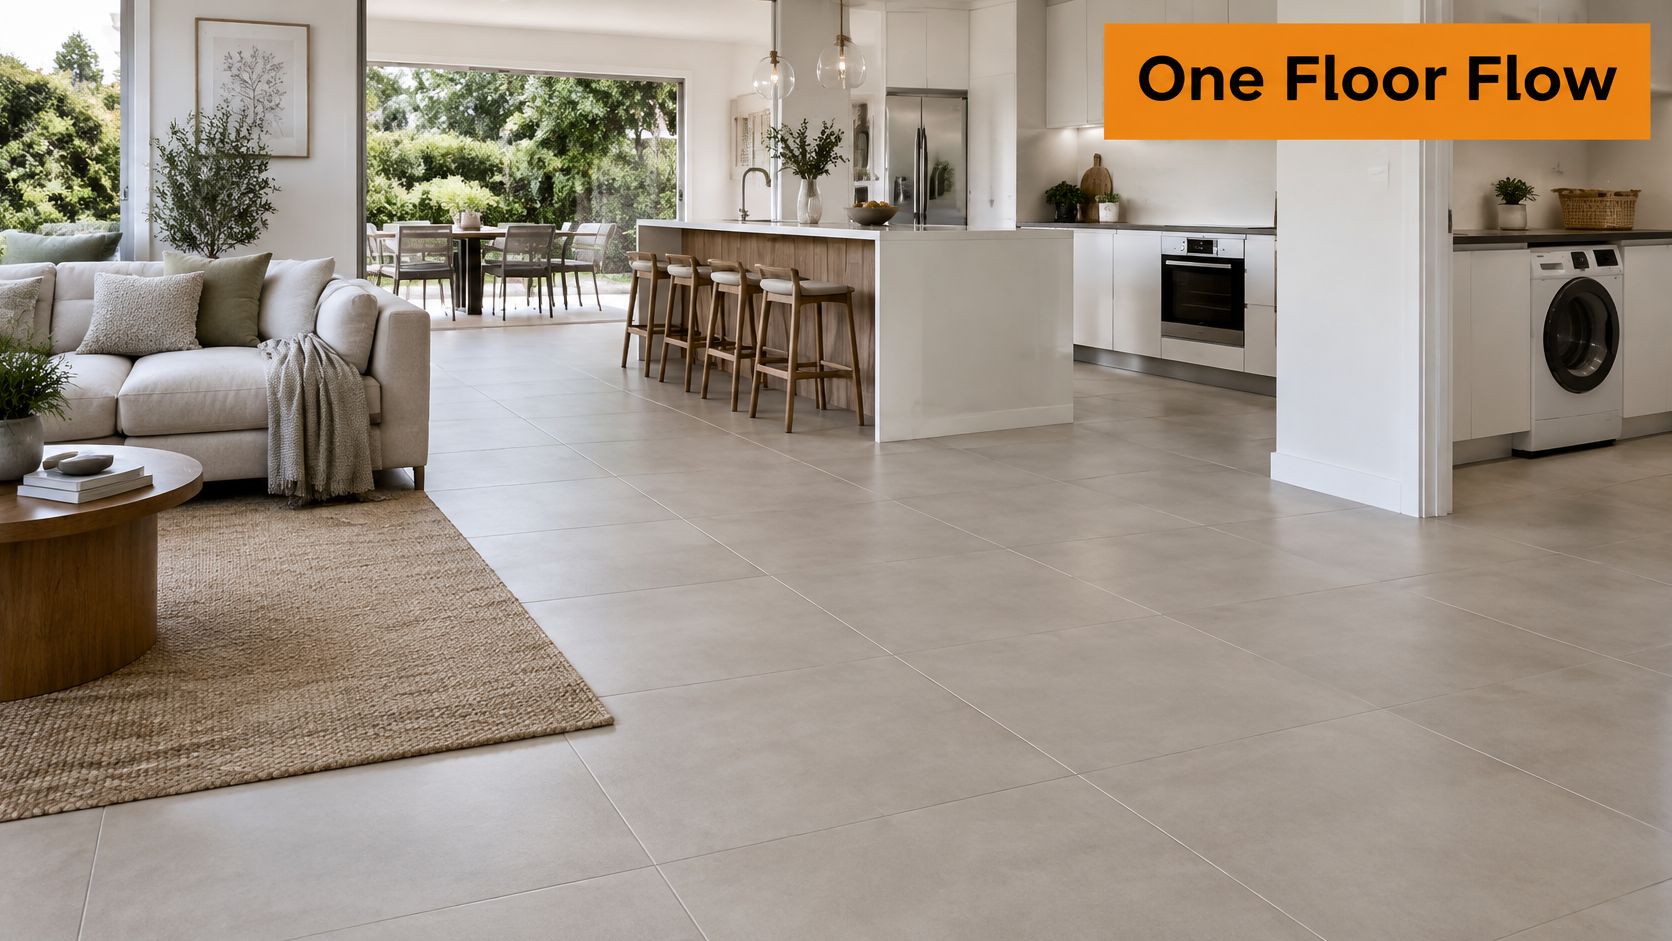
Where the format earns its keep indoors
Indoors, 600x600 matt porcelain floor tiles cope well with chair legs, pet claws, pram wheels and kitchen spills. The matt face hides footprints better than gloss, so a busy kitchen doesn't look dirty an hour after mopping. Running one colour from an entry through to living and kitchen zones also avoids clumsy threshold strips and makes a modest floor plan read as one space.
Bathrooms are a good fit when the selected product carries the right wet area data. The large face means fewer grout joints to scrub than a mosaic, although falls to a waste need careful setting out. In a small ensuite, your tiler may suggest cutting the format down or using a smaller matching tile inside the shower so water drains properly.
The limitations you should accept upfront
- Grout lines every 600 millimetres: The grid is part of the look, even with matching grout.
- Hard underfoot: Dropped mugs rarely survive, and long periods standing at a bench can feel unforgiving.
- Cold in winter: Porcelain feels cool in a Melbourne July unless you've allowed for under tile heating.
- Pale glaze chips: A heavy impact on a very light matt face can show as a bright or dark mark, depending on the body colour.
This short video is worth watching before you lock in a room layout, because scale looks different once furniture returns.
Outdoors, only use a tile whose datasheet names external use for that exact product. An indoor matt tile can still become slick when rain, leaf litter or pool water sits on it, even if the body itself is dense. Pool surrounds and open showers need a purpose made textured face, and you should accept that it'll feel rougher under bare feet and take more effort to scrub.
Cleaning is straightforward because glazed porcelain doesn't need a penetrating sealer on the tile face the way porous stone does. Vacuum grit first so you're not dragging sand across the glaze, then use a damp flat microfibre mop with a pH neutral cleaner. Skip oil soaps, waxes and shine enhancers. They leave a film that dulls a matt finish and can make a well specified floor feel slippery. Grout is different from the tile face, so ask whether your grout product benefits from sealing in a wet or outdoor area.
Keep one labelled spare box from the original order. If a chip happens years later, you'll be glad you didn't rely on finding the same colour and pattern again.
Slip Ratings Room by Room
The same matt square can be right for a living room and wrong for a shower recess. That single decision is what the table settles, and it's where many orders go astray.
Slip rating to request by room
| Room | Conditions | Rating to confirm | Matt does not prove |
|---|---|---|---|
| Living room, bedroom, hallway | Shoes, mostly dry | No set P minimum; check wear class | Grip or outdoor use |
| Kitchen | Shoes, occasional spills | Often P3 if the floor gets wet | Detergent resistance |
| Bathroom floor | Barefoot, occasional water | At least P3 | A tested pendulum result |
| Shower recess | Barefoot, constant water | P4 or P5 | That a floor tile is legal in the shower |
| Laundry | Barefoot, spills and detergent | At least P3 on the datasheet | Grip once soap film is present |
| Alfresco or balcony | Shoes, rain | Commonly R11 or above | That an indoor matt tile is external rated |
| Pool surround | Barefoot, wet and contaminated | Higher P plus the stated R rating | That texture is optional |
Reading P ratings against R ratings
Australian guidance in the DW Tiles guide to quality porcelain tiles distinguishes barefoot wet area P ratings from contaminated surface R ratings. It states that bathroom floors commonly require at least P3, shower recesses may require P4 or P5, and external wet areas generally need R11 or above.
A P rating comes from pendulum testing relevant to wet barefoot areas. An R rating describes performance on a contaminated ramp, usually considered with footwear in mind. They're not interchangeable labels, and a high number in one system doesn't let you invent a result in the other.
A tile described only as matt or non slip hasn't told you enough to specify a wet floor.
Dry living rooms, bedrooms and hallways don't carry a universal P minimum in the table. There, you're mainly choosing matt to soften glare and hide marks. Kitchens sit in between. They're usually shod areas, but water near a sink, oil near a cooktop and a leaking dishwasher can change conditions quickly, so don't assume a dry room rating is enough if your household mops often or cooks with a lot of steam.
Laundries deserve extra caution. Detergent film can make a borderline tile feel slick even when it performed acceptably in clean water. Ask for the datasheet and discuss the actual room use, including whether people walk through in bare feet from a backyard or pool.
One tile rarely serves every wet zone
Colour matching tempts people to run one product from bathroom to shower, then out to an alfresco and pool edge. Resist that shortcut. Specify the shower, external area and pool surround separately, even when you choose a coordinated colour. This guide to non slip outdoor tile flooring helps frame those external questions before you order.
There's also a comfort trade off. Heavily textured surfaces grip better, but they can be harder to mop, less comfortable under bare feet, and more visually variable in strong raking light. Dirt settles into the profile, so a soft nylon brush may do more than a flat mop. That's not a reason to under specify a pool surround. It's a reason to choose texture where safety demands it and a smoother, properly rated surface where it doesn't.
Comparing porcelain with natural stone paving options in Ireland makes the same point in another material. Outdoor performance comes from the tested surface and intended use, not from a rough looking photograph. Obtain the AS 4586 result for the exact product and batch documentation, and refuse to substitute another matt tile just because the colour looks close.
Boxes Coverage and a Realistic Waste Allowance
Do the arithmetic before the style debate. You'll make better colour decisions once you know whether you're buying sixteen boxes or eighteen.
A worked 20 square metre example
Measure the room in metres and multiply length by width. Say the tiled area is 20 square metres. Each 600x600 matt porcelain floor tile covers 0.36 square metres, so a four tile box covers 1.44 square metres before cuts.
A simple rectangle in a straight grid usually needs about 10 percent extra. That takes the order area to 22 square metres. Divide by 1.44 and round up, and you're at 16 boxes, which gives you 23.04 square metres in full tiles before cutting.
A diagonal layout or a plan broken by doorways is closer to 15 percent. That's 23 square metres, still 16 boxes on paper, but with almost no spare once awkward cuts and one breakage are counted. Ordering 17 boxes is safer. At 20 percent, the area becomes 24 square metres, which needs 17 boxes before you add a repair box.
Order quantity for a 20 square metre floor
| Layout | Add to measured area | Area to order | Boxes of 1.44 m2 |
|---|---|---|---|
| Straight grid, simple room | 10 percent | 22 m2 | 16 boxes |
| Diagonal or broken doorways | 15 percent | 23 m2 | 16 boxes, with 17 safer |
| Niches, steps or many cuts | 20 percent | 24 m2 | 17 boxes |
| Repairs after handover | One extra full box | Plus 1.44 m2 | 1 labelled box from the same batch |
What drives waste up or down
- Room shape: L shaped kitchens, angled walls and island benches create offcuts that can't always be reused.
- Set out point: Centring a grid can leave narrow cuts on both sides, while starting from the most visible wall may waste less.
- Pattern direction: Marble look veins and directional stone faces reduce how freely offcuts can be turned.
- Doorways and niches: Every notch around a frame, hob or step increases cutting and breakage risk.
Subtract only separate untiled zones, such as a bath footprint that won't be tiled under. Don't subtract vanities or kitchen islands if tiles will run beneath or tightly around them and cuts will consume material anyway. Always round up to a whole box.
The waste question isn't only about your invoice. The CEFC market report on Australia's waste opportunity cites an Australian analysis of 142 building projects that found average construction waste of 141 kilograms per square metre, with tiles among the largest discarded material categories. Accurate set out, careful cutting and one retained spare box reduce both landfill and the risk of a second delivery in a different dye lot.
Order rule: Buy the repair box with the main order, label it with the room and batch, and store it flat somewhere dry.
Don't plan to buy a shortfall later from another batch. Colour, calibre and vein direction can shift enough to show in the middle of a floor. A spare box looks like over ordering on day one. Five years later, when a plumber lifts two tiles to reach a pipe, it's the cheapest insurance in the whole renovation.
Colour Grout Trims and Laying Patterns
Four concrete schemes will get you further than a mood board full of adjectives. Each one pairs a tile colour with a grout decision, because the joint can either quieten the 600 grid or make it the main event.
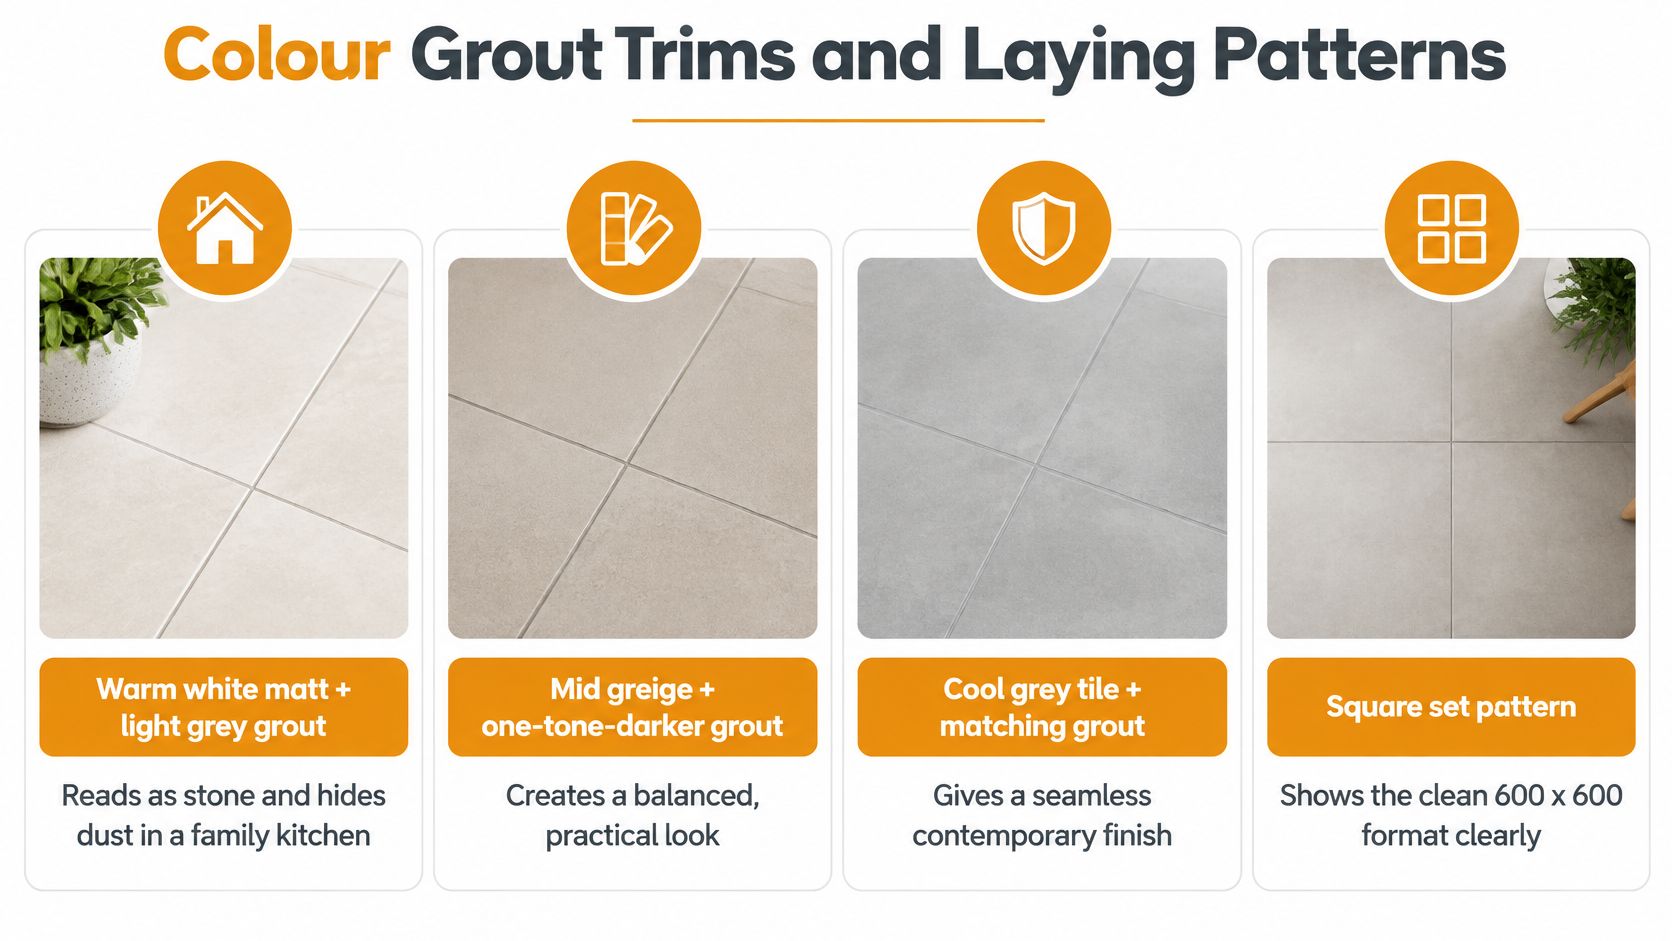
Four schemes that work in real rooms
- Warm white matt with light grey grout: Reads like pale stone and hides dust in a family kitchen. Use a slim metal trim where it meets timber or carpet so the pale edge stays protected.
- Mid greige with grout one tone darker: Helps the grid recede in a small bathroom and doesn't show every splash near a vanity. It suits a straight grid aligned with the longest wall.
- Charcoal matt with matching grout: Strong in an alfresco, but only when that product carries the external rating you've already confirmed. Pair it with a purpose made transition at sliding doors so the exterior tile can step down for drainage.
- Soft concrete look with near matching grout: The calmest choice for open plan living because the joints almost disappear. Keep furniture and rugs warmer in texture so the room doesn't feel flat.
Grout width follows the edge. Rectified 600x600 matt porcelain floor tiles usually sit at about 2 to 3 millimetres, while cushion edges need a wider joint to absorb size variation. Choose a flexible grout suited to the substrate movement, particularly over timber based floors or heating. A narrow joint isn't automatically better. If the slab moves or tiles vary slightly, a too tight joint leaves nowhere for tolerance.
Patterns ranked by forgiveness
A straight grid is the least wasteful and the most forgiving layout. It's also easiest to set out so cuts at opposite walls stay balanced.
A one third offset can look relaxed, but it may highlight lippage if a tile face is slightly bowed, because the high middle of one tile meets the lower edge of the next. Ask your tiler to dry lay and check with a straightedge before committing.
A 45 degree diamond feels generous in a square room and hides walls that aren't perfectly parallel. It costs the higher waste allowance, so don't choose it after ordering for a straight grid.
For marble look faces, open several boxes and dry lay a small area. Turn some tiles so veins don't all point in one direction, and move any repeated pattern away from its twin. Then take the sample and a grout stick outside in daylight and back inside under the room's own downlights. Matt colours shift more than people expect between those two settings.
Trims should match the edge condition, not just the tapware. Use a metal or porcelain angle where tile meets a lower floor, proper pool coping only at water, and a movement joint profile where the specification calls for one. A neat trim can't rescue a bad set out, but the wrong trim can chip, trap water or create a trip lip at a doorway.
How to Lay Them Without Lippage
A 600 square is manageable for one competent tiler, but it telegraphs every dip in the substrate. Lippage, where one edge sits higher than its neighbour, usually starts before the first tile is opened.
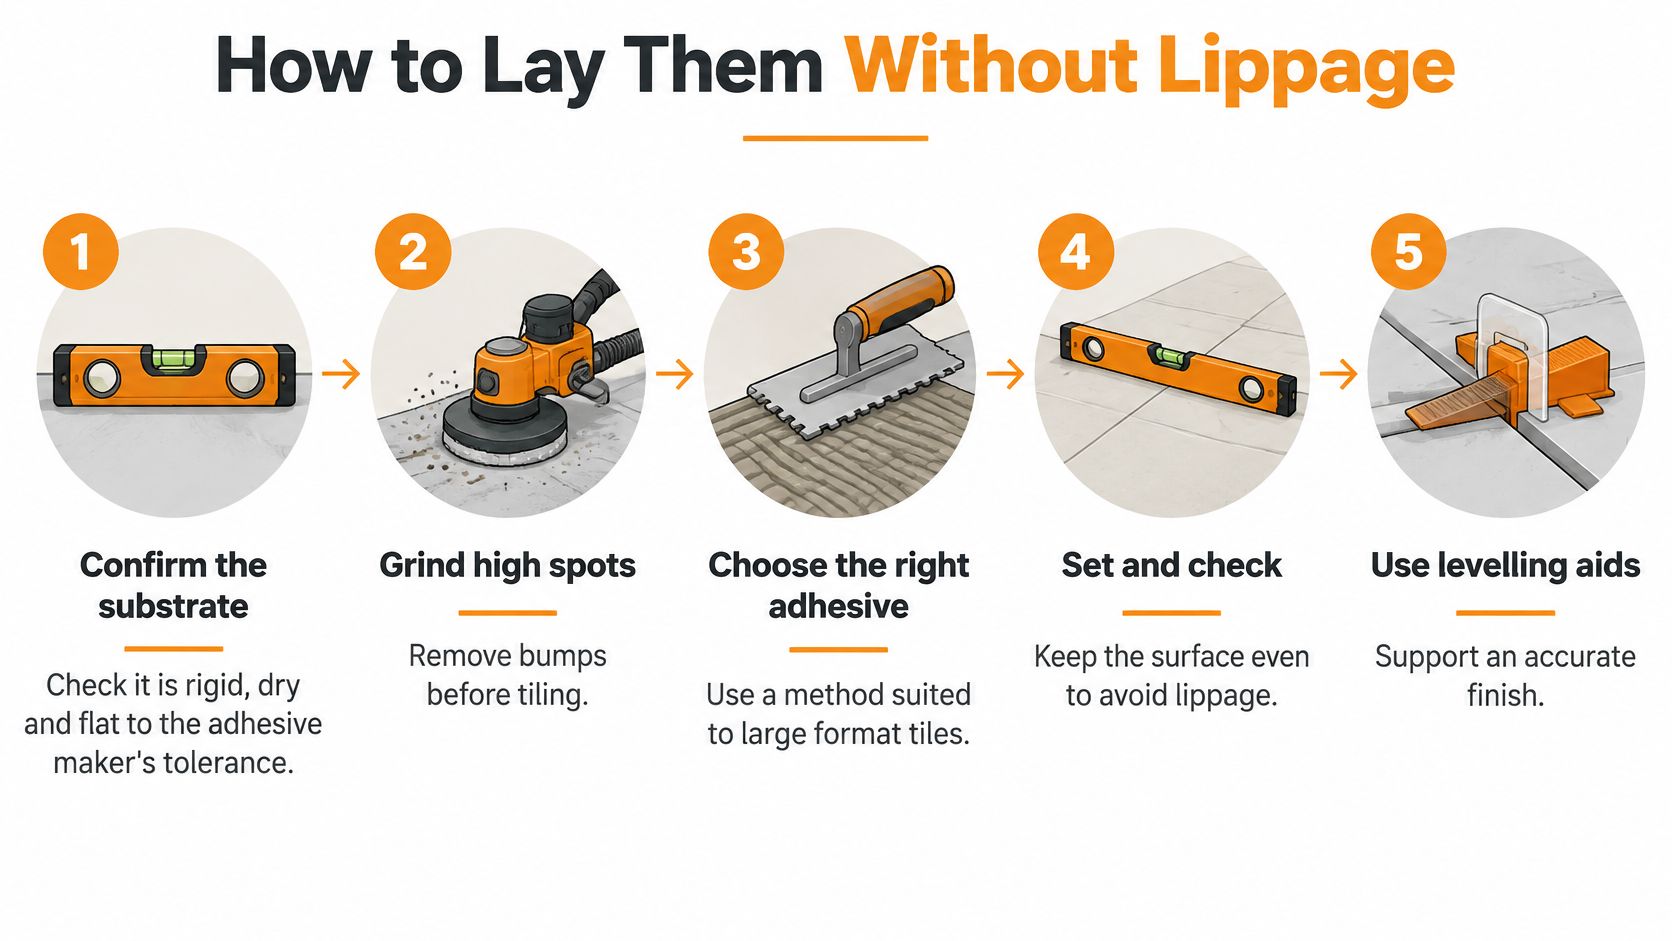
The bedding sequence
- Confirm the substrate: It must be rigid, dry and flat to the adhesive maker's tolerance. Grind high spots and fill low areas with a suitable levelling product instead of hoping a thick adhesive bed will hide them.
- Prepare and prime: Follow the adhesive sheet for the actual substrate, whether that's concrete, fibre cement sheet or an approved waterproofing membrane. Choose a deformable adhesive suited to low absorption porcelain.
- Check the cartons: Open several boxes, compare colour and size, and plan the mix before adhesive goes down. Tiles from different batches can differ slightly in colour and size, so we recommend having your tiler verify all measurements before placing an order.
- Back butter and comb: Spread adhesive on the floor in one direction with the specified notched trowel, then apply a thin layer to the back of each tile. This helps achieve continuous contact and reduces hollow rings under corners.
- Set from the control line: Work from the most visible wall or a carefully squared grid line. Keep joints consistent and use a levelling clip system on rectified tiles while still checking with a straightedge.
- Leave movement joints: Keep perimeter gaps, changes of plane and required field joints free of rigid grout. Fill them with the specified flexible sealant so heating, timber movement or a long open plan run doesn't crack the grout.
- Wait before grouting: Let the adhesive cure for the time on its datasheet. Grouting too soon can trap moisture, disturb tiles and leave haze ground into a matt face.
These porcelain tile installation tips reinforce the same sequence for readers who want a second practical reference.
Failures and the step that prevents them
Hollow spots often come from spot bonding or combed adhesive that has skinned over before the tile was placed. They can crack under a fridge foot or a dropped cast iron pan. Tap checking during installation is easier than replacing a tile after grout has cured.
Colour banding happens when one batch is laid in the first half of a room and another batch in the second. Mix tiles from multiple cartons as you go, unless the manufacturer directs a specific pattern sequence.
Outdoor set out follows the same respect for falls, bedding and movement, which is why the Bare Roots Landscape Solutions paver guide is a useful cross check on preparation thinking for external hard surfaces. Indoors, the test is simpler. Run a straightedge across several joints in raking light before grouting. If your fingertip catches an edge now, socks and chair legs will find it later.
Price the Order and Book Melbourne Delivery
Judge value as installed cost, not the lowest sticker in a search result. A tile that saves a few dollars per square metre can cost more once extra cuts, a second delivery, levelling compound or a replacement balcony tile are added.
In 2025, MyHomeware listed Noble Light Grey stone look matt porcelain 600x600mm tiles from Kai Ming at AUD 34 per m². In 2025, Builders Discount Warehouse listed a 600x600mm glazed porcelain matt tile box containing 1.44 m² and four tiles at AUD 57.60, equivalent to AUD 40 per m².
Published 600x600 matt porcelain prices
| Tile | Box price | Per m2 | Notes |
|---|---|---|---|
| Noble Light Grey stone look matt, 2025 listing | AUD 48.96 equivalent for 1.44 m2 | AUD 34 | MyHomeware listing of Kai Ming |
| Glazed porcelain matt 600x600, 2025 listing | AUD 57.60 | AUD 40 | Box stated as 1.44 m2, four tiles |
| Altair Bianco Embossed Matt 600x600 | AUD 43.20 | AUD 30 | Tiles Mate |
| Alpine Grey GripTech 600x600 | AUD 43.20 | AUD 30 | Tiles Mate; confirm the slip sheet |
At Tiles Mate, Altair Bianco Embossed Matt 600x600 tiles are sold at $43.20 per box, which is $30 per square metre. Alpine Grey GripTech 600x600 tiles are sold at $43.20 per box, which is $30 per square metre. Shortlist GripTech when your room needs documented wet or external performance, then confirm that rating on the batch datasheet before buying. A cheaper indoor matt isn't a saving if it has to come up again.
Build the real order total
Multiply the per square metre price by the boxed area you're ordering, including the waste allowance and repair box. Then add adhesive for low absorption porcelain, grout, trims, levelling clips, waterproofing where required, substrate preparation and the tiler's labour. That total lets you compare two 600x600 matt porcelain floor tiles fairly.
Order a five tile sample pack, view the tiles in the actual room, and have your tiler confirm set out and carton variation before the full order is locked. Trade buyers can use TilesMate Pro for B2B pricing and sourcing. We deliver across Melbourne, so ask our team to confirm stock and delivery timing for your postcode before you book the tiler, not after the old floor has been ripped up.
Order your sample pack from Tiles Mate Pty Ltd, check the colour and slip datasheet in the room where the tiles will be laid, and have your tiler confirm box quantities before delivery is booked. Our Melbourne team can help you compare 600x600 matt porcelain options, trade pricing and stock timing so the floor you install is the floor you meant to specify.