




600x600 Terrazzo Look Tiles: Rooms, Slip and Pricing
by Shivam Tayal 01 Nov 2026 0 Comments
Would you choose the same terrazzo-look tile for a living room and a rain-soaked patio just because the colour matches? The pattern might be identical, but the surface finish, tested grip and maintenance demands can make them very different choices.
For Melbourne renovators, 600x600 terrazzo look tiles offer a practical way to introduce a speckled, stone-like floor without commissioning poured terrazzo. The important decisions aren't just chip colour and price. You need to know what the tile is made of, how its exact finish performs when wet, and what your tiler must do beneath and between the tiles.
What a 600x600 Terrazzo Look Tile Is Made Of
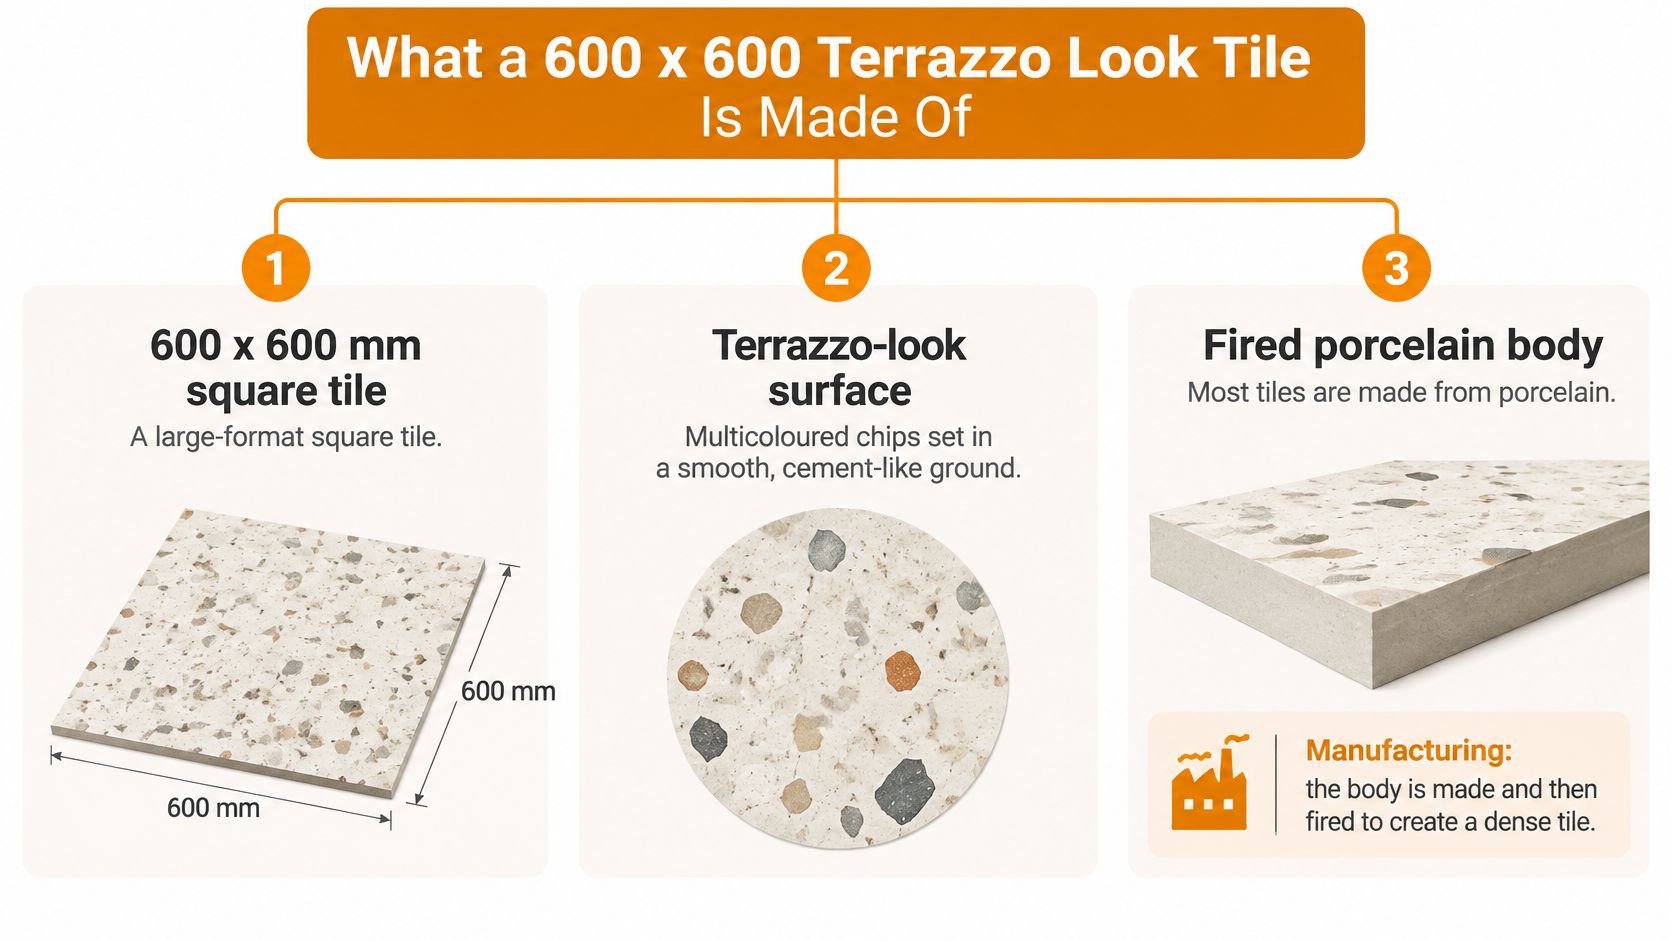
A 600x600 terrazzo-look tile is a square manufactured tile with multicoloured chips pictured or incorporated into a cement-like background. Most contemporary products in this category are fired porcelain, rather than pieces cut from a poured terrazzo floor.
Manufacturers press mineral powders, including clay and feldspar, into a tile body and fire it to produce a dense material. Depending on the product, the aggregate effect comes from a printed surface or coloured material incorporated during manufacture. Our guide to porcelain composition and tile types explains the distinction between the body and its decorative surface.
The appearance isn't the material
Traditional terrazzo combines stone fragments with a binder, then exposes the aggregate through grinding and polishing. The Council of Australasian Museum Directors' account of terrazzo describes the marble-and-cement composition behind that familiar appearance. A porcelain imitation reproduces the visual effect, not necessarily its depth or repair possibilities.
The finish changes how you experience that pattern:
- Gloss reflects light strongly and needs particular caution wherever water reaches the floor.
- Matt softens reflections, but doesn't prove that the tile has suitable wet grip.
- Honed describes a smooth, low-sheen appearance, not a safety classification.
- Textured or structured surfaces add relief that may improve traction, subject to testing.
Don't assume visible chips create texture. A heavily speckled tile can feel completely smooth.
Before considering colour, identify the body, the finish and the tested slip rating. Those details distinguish a decorative match from a suitable specification.
Slip Ratings and Outdoor Use in Victoria
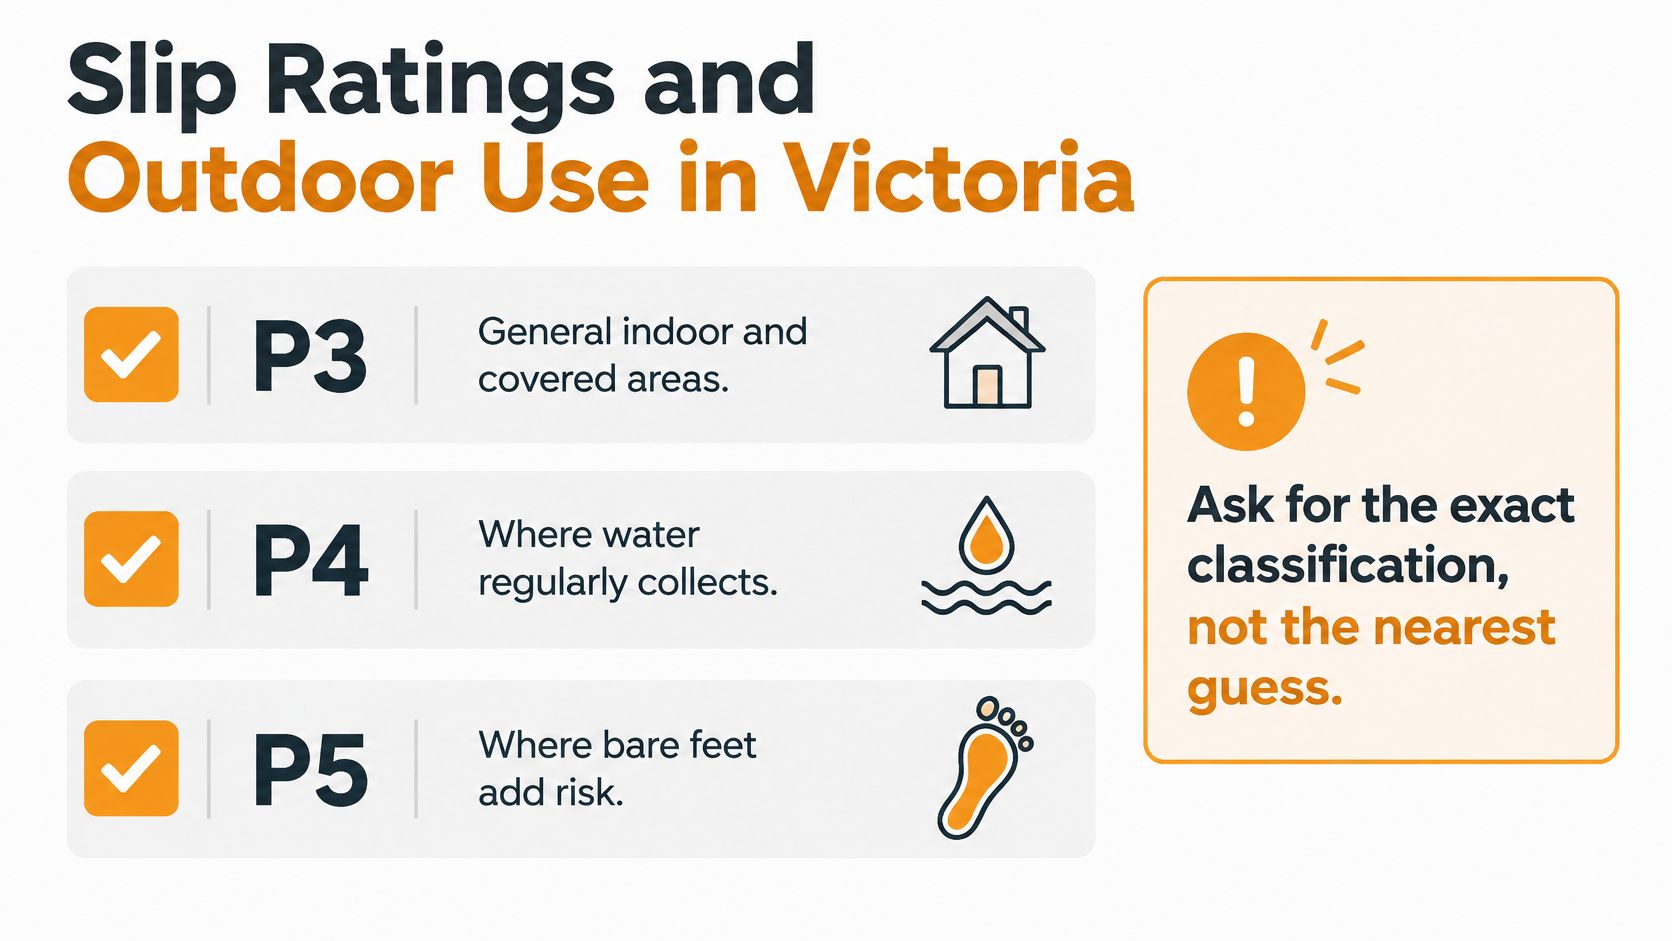
A terrazzo pattern doesn't tell you whether a floor will be safe when wet. Neither does a product name containing grip, outdoor or matt. You need the AS 4586 wet-pendulum classification for the exact finish you're buying.
Australian wet-floor guidance commonly uses P3 or higher for domestic bathroom floors, with P4 or P5 often appropriate for more demanding wet locations, subject to the application and project specification; CSIRO's pedestrian-surface testing service provides Australian Standards-based testing and accelerated wear assessment. Wear testing matters because a newly manufactured surface and a well-used floor may not perform identically.
Match the test to the exposure
Treat the classifications as selection guidance, not automatic approval for every location. A wet-pendulum result doesn't replace a project-specific assessment of barefoot use, gradients, drainage or the consequences of falling.
A covered alfresco isn't necessarily dry. Wind-driven rain, garden watering and water carried from a pool can all reach beneath a roof. An exposed patio needs assessment for regular weather exposure, while a sheltered dining area may face a different combination of contaminants and footwear.
Practical rule: Assess the wettest realistic conditions, not the conditions on the day you inspect the tile.
Fewer grout joints don't automatically make an outdoor floor safer. Texture, drainage and cleaning matter more than the visual simplicity of a large tile.
Leaves can break down into slippery residue. Algae can develop in persistently damp spots, while soap and detergent can leave films indoors. Damaged grout can also trap dirt and interrupt drainage. Our guide to slip-resistant outdoor tiles explains the broader selection considerations.
Carry a specification checklist
Ask the supplier to confirm:
- Product identity: Exact tile code, colour and finish.
- Slip evidence: The classification and supporting test document for that finish.
- Approved use: Written confirmation of indoor or outdoor suitability.
- Drainage design: Required falls and how they'll meet outlets.
- Joint specification: Grout width and movement-joint arrangement.
- Ongoing care: Cleaning methods that won't leave residue or damage the surface.
If the document names another finish in the collection, it doesn't settle your purchase. Keep the product specification with your renovation records so your builder, tiler and supplier are working from the same information.
Room-by-Room Suitability for Terrazzo Look Tiles
Choose the finish for the room's exposure, not just its name. A family bathroom with a separate shower presents a different problem from an open wet room where water spreads across the floor.
The following are starting ratings to request, not universal legal minimums or guarantees of suitability. Tile Touch's terrazzo outdoor collection guidance distinguishes general-use P3 surfaces from higher-traction P4 and P5 options for more demanding wet applications; final selection still requires the exact product test and project assessment.
Recommended finish and slip rating by room for 600x600 terrazzo look tiles
| Room or location | Recommended finish | Minimum rating to request | Selection note |
|---|---|---|---|
| Bathroom floor | Matt or structured | P3 starting point | Avoid high-gloss on wet floors |
| Shower recess | Textured matt | P4 starting point | Request the test for the exact finish and assess barefoot use |
| Laundry floor | Matt | P3 starting point | Expect water and detergent spills |
| Kitchen floor | Matt | P3 starting point | Check the sink-to-dry-zone crossover |
| Living room | Matt or polished | No wet-use minimum proposed for a dry room | Assess any connection to wet areas |
| Hallway | Matt | P3 starting point where wet shoes are expected | Assess the entrance connection |
| Entry from outside | Structured matt | P3 starting point | Wet shoes bring in water |
| Covered alfresco | Textured matt, outdoor-rated | P4 selection target | Confirm outdoor approval and rain exposure |
| Exposed patio or pool surround | External-grip finish | P5 selection target | Verify documentation and project requirements |
| Feature wall | Any suitable wall finish | No pedestrian slip rating needed | Confirm wall and substrate suitability |
Consider where water travels
Start with the wettest location and trace how people move through it. Someone leaving a shower may step onto the bathroom floor with wet feet. Children coming from a pool may carry water through an alfresco and into the kitchen.
That doesn't mean every connected room needs an aggressive external texture. It means the designer should assess transitions rather than treating each room as an isolated label.
A polished living-room tile can suit a dry interior, but it's a questionable choice for a frequently wet entrance. For walls, grip is irrelevant, while tile weight, adhesive compatibility and substrate preparation remain important.
Large tiles also need special attention inside shower recesses. The tiler must form drainage falls without leaving raised corners or ponding. An attractive floor plan isn't enough if the chosen tile can't follow the required drainage geometry.
Sizes, Layout and Joint Planning for 600x600
The appeal of a square terrazzo-look format is the broad field it creates. Compared with smaller modules, fewer grout lines interrupt the aggregate pattern, particularly when the grout colour sits close to the tile background.
The trade-off is lippage, where one tile edge sits higher than its neighbour. Larger tiles bridge more of the substrate, so an uneven base or a bowed tile can become obvious under light from a window.
Compare the grid before choosing
Our listed sizes include 600x600, 600x1200, 300x600 and 750x1500, giving you square and rectangular grids to compare. Availability of a size doesn't mean every terrazzo-look design comes in that format.
Use the room proportions to test the choice. A square grid can look calm in an open kitchen, while a rectangular format may emphasise the length of a passage. Our large-format tile guide covers the installation considerations behind these choices.
- Choose the focal line: Align the layout with a prominent doorway, island or main sightline.
- Test the cuts: Dry-lay a row across the room and shift the starting line to avoid awkward slivers.
- Inspect the edges: Non-rectified tiles have slightly rounded edges and minor size differences, so plan an accommodating grout joint.
- Check drainage early: Confirm that wet-room tiles can follow the falls before fixing begins.
Don't assume every joint is interchangeable
A grout joint separates adjacent tiles. A movement joint allows parts of the installation to move. They serve different purposes, even when careful colour selection makes them look similar.
Choose a straight grid when you want aligned joints and a quiet background. Consider an offset layout only after checking the manufacturer's permitted arrangement and tile flatness. A busy aggregate print won't hide raised edges or poorly planned perimeter cuts.
How to Lay 600x600 Terrazzo Look Tiles Step by Step
A sound installation starts beneath the visible surface. Use these checks to discuss the work with your tiler, particularly where waterproofing, drainage or structural movement makes the job unsuitable for casual DIY.
Prepare and set out
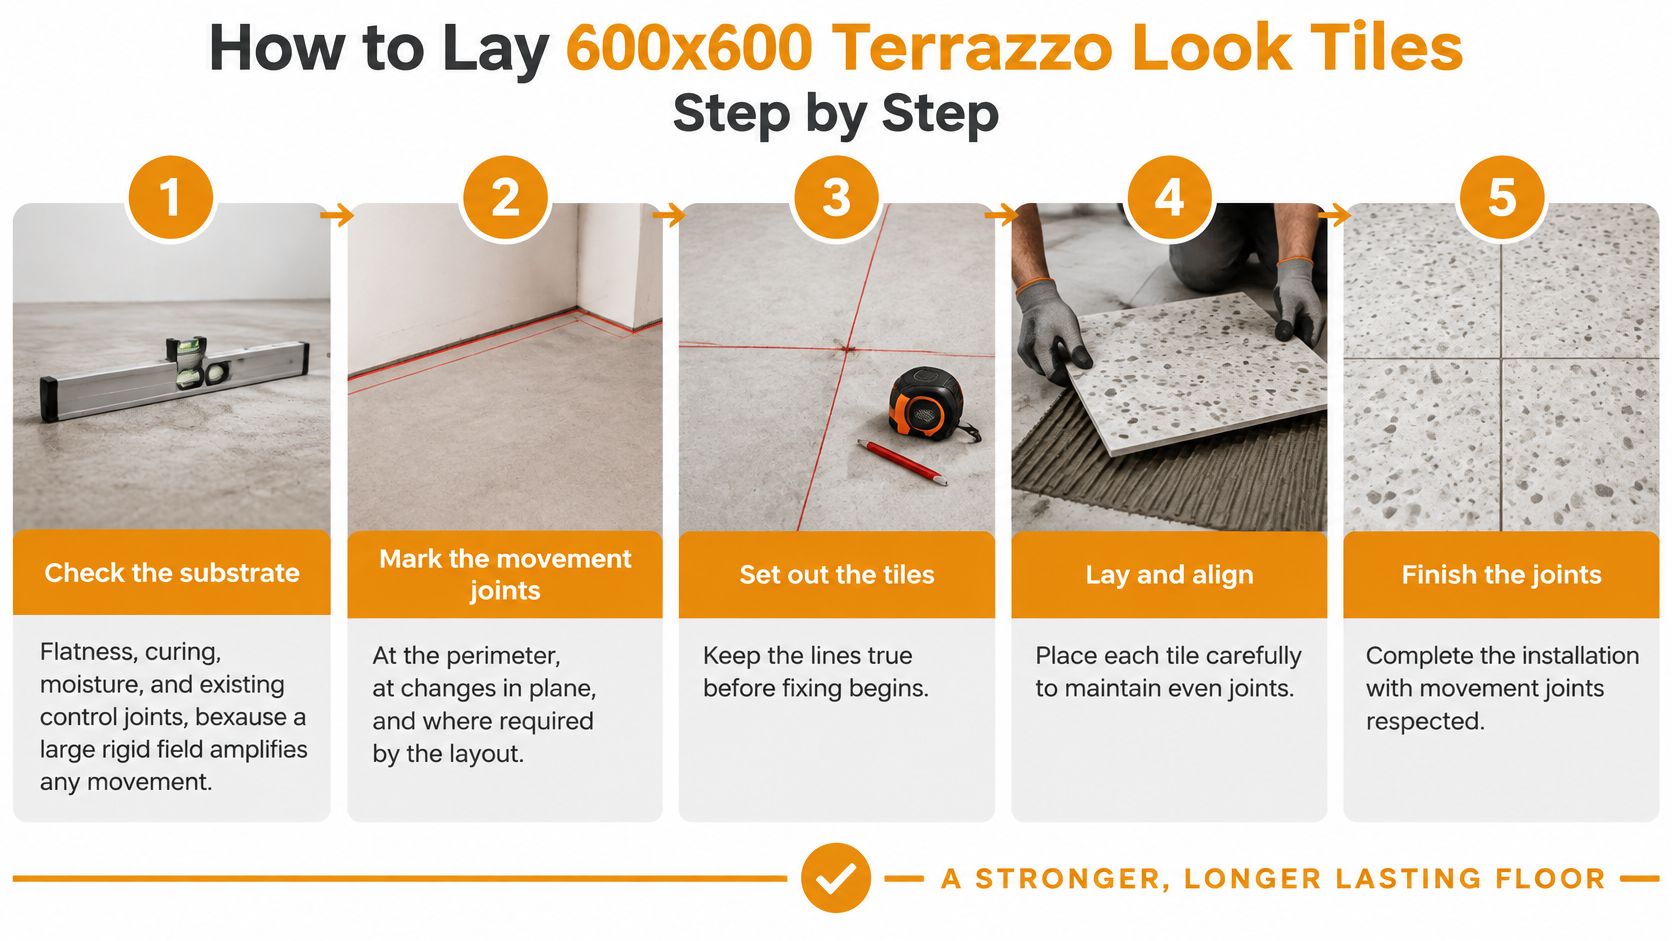
- Check the substrate. Use a straightedge to identify high and low spots, then check curing, moisture, cracks and existing control joints. Correct the base with a compatible preparation system rather than expecting tile adhesive to solve every irregularity.
- Mark movement joints before laying. Locate them at perimeters, changes in plane, penetrations, restraining elements and substrate control joints, continuing structural joints through the tile assembly. The RAK Ceramics technical guidance supports approximately 4–5 m indoors and 3 m outdoors as planning guidance, with final spacing determined by exposure and the specified system rather than treated as a universal rule.
- Dry-lay the pattern. Open cartons, distribute different print faces and check the cuts at doorways, walls and floor wastes. Mark reference lines so the layout stays aligned as work moves across the room.
Fix and finish
- Apply a compatible adhesive. Select the adhesive for porcelain, the substrate and the intended exposure, then use a notched trowel suited to the required coverage. Comb the adhesive consistently, back-butter where needed and lift tiles during installation to verify contact rather than assuming the underside is fully supported.
- Bed and align each tile. Move tiles across the adhesive ridges to collapse them, checking joint width and adjacent edges as you go. Levelling clips can help maintain alignment, but they can't flatten a defective substrate or justify pulling tiles out of their adhesive bed.
- Grout the standard joints only. Allow the adhesive to cure before grouting, and use a grout compatible with the tile and service conditions. Keep movement joints free of rigid grout and complete them with the specified flexible sealant system.
- Clean after the grout has set. Remove residue using the grout manufacturer's approved method, followed by suitable routine cleaning. Don't attack stubborn haze with an aggressive chemical before checking compatibility with the tile, grout and metal fittings.
A neat grout line isn't proof of a sound installation. The preparation, adhesive coverage and flexible joints matter just as much.
Inspect for consistent joints, unwanted lippage and drainage without ponding. A hollow sound when tapped warrants investigation, but tapping alone can't prove either adequate bonding or failure. In wet rooms, the intended falls take priority over making the entire floor perfectly level.
Maintenance, Lifecycle and Real Terrazzo Compared
Maintenance and lifecycle: porcelain terrazzo look against real cement or resin terrazzo
| Factor | 600x600 porcelain terrazzo look | Real cement or resin terrazzo |
|---|---|---|
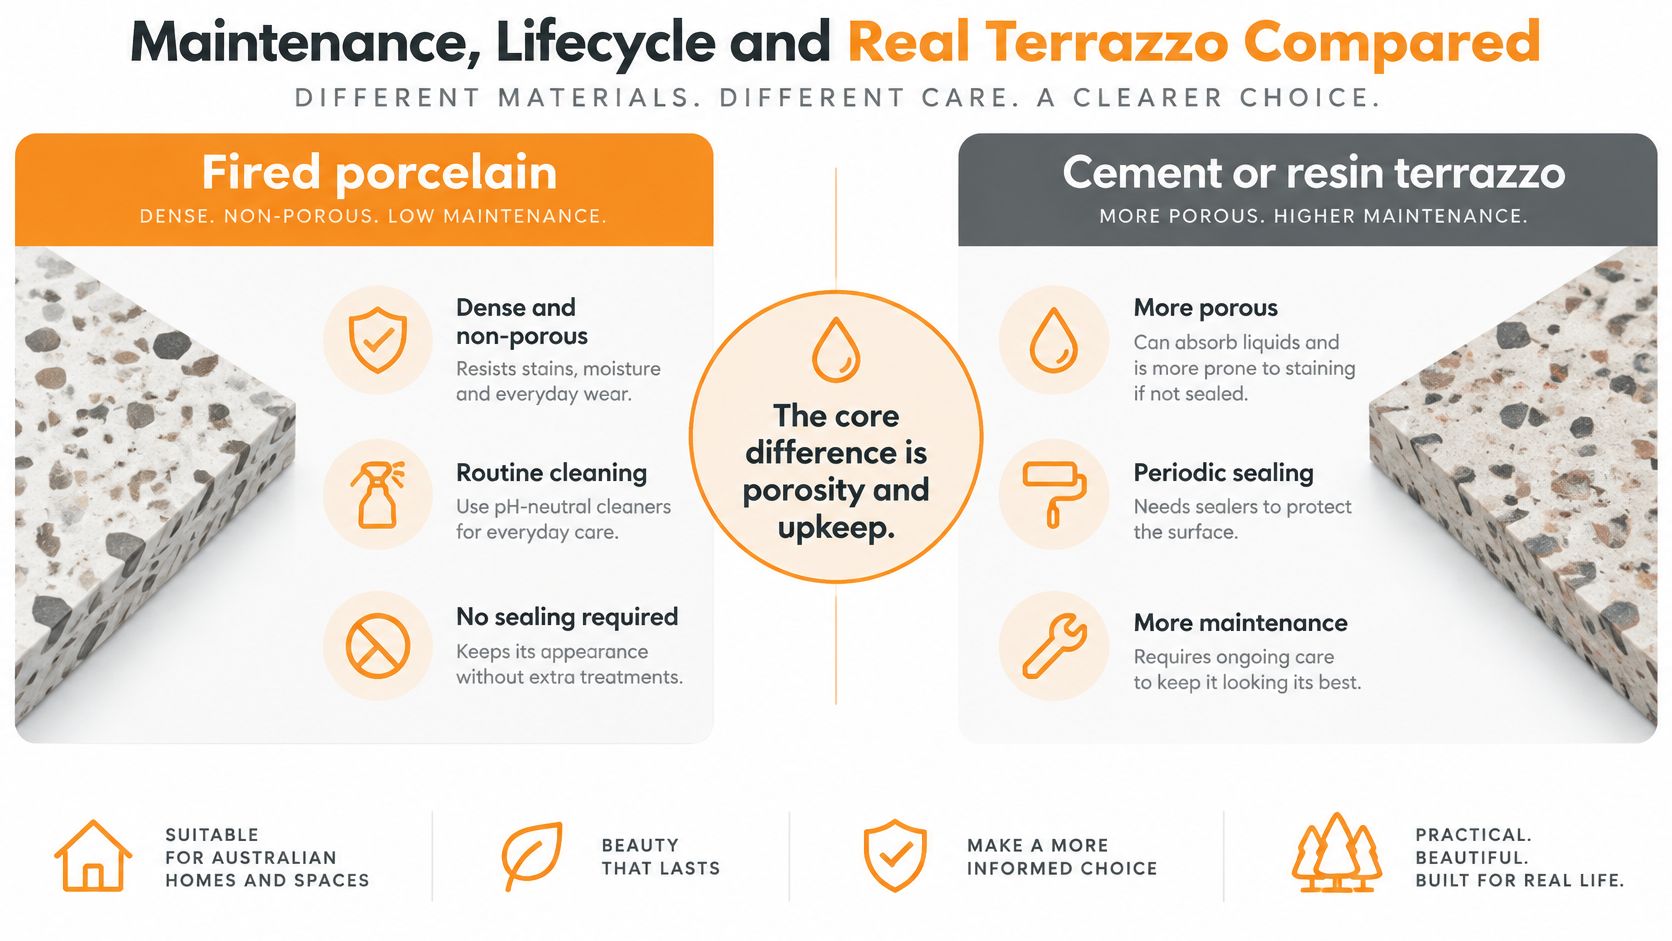
| Porosity | Dense and non-porous | More porous; binder and treatment matter |
| Sealing | Generally not required for the porcelain body | Periodic sealing may be needed |
| Routine cleaning | pH-neutral cleaner | Compatible cleaner and careful stain management |
| Repairs | Replace individual damaged tiles | Can often be refinished or repaired |
| Pattern repetition | Digital print can repeat visibly | Unique aggregate distribution |
| Lifespan | Assess installation quality, service conditions and replacement availability | Assess installation quality, service conditions and refinishing potential |
| Manufacture, transport and demolition impact | Factory manufacture, freight and eventual removal | Material production, transport, pouring, grinding and eventual removal |
The core distinction is porosity and upkeep. The Blue Space's terrazzo-look product guidance describes dense fired porcelain maintained through routine pH-neutral cleaning rather than periodic sealing, while real terrazzo requires closer attention to its binder, sealing and stain management.
Low maintenance isn't a sustainability verdict
Porcelain can reduce ongoing sealer use, but manufacturing, freight and eventual demolition still count. Real terrazzo may allow grinding, refinishing or local repairs that extend its useful life. Neither material deserves an environmental advantage without considering the actual product and installation.
Porcelain also falls short visually when repeated print faces become obvious across an open-plan floor. Inspect a spread of tiles, not just a small sample. Check whether distinctive dark chips appear in exactly the same position on neighbouring pieces.
Keep replacement options: A spare carton from the original batch can make a future repair less disruptive and easier to match.
Make upkeep manageable
- Remove grit: Sweep or vacuum before it becomes abrasive underfoot.
- Clean without residue: Use a pH-neutral product at its recommended dilution and rinse when required.
- Inspect the joints: Check grout and flexible sealant regularly for cracks, gaps or persistent staining.
- Store the details: Keep spare tiles, batch labels and cleaning instructions together.
Textured finishes may need a soft brush to reach their recesses. Don't choose a surface you're unwilling to clean properly, especially where outdoor debris or bathroom residue will collect.
Compare Prices and Order Samples Before You Buy
Listed prices per m² for 600x600 terrazzo look tiles
| Tile | Size | Price per m² | Listed by |
|---|---|---|---|
| Beaumont Terrazzo Beige Textured | 600x600mm | AUD 39.95 in 2026 | Beaumont Tiles |
| Desmond Coral | 600x600mm | AUD 57.00 in 2026 | Tile Touch terrazzo collection |
| Bourke Grey | 600x600mm | AUD 63.00 in 2026 | Tile Touch Bourke Grey listing |
| Pols White Spanish | 600x600mm | AUD 140.00 in 2026 | Tile Touch Pols White Spanish listing |
These listed prices are comparison points, not installed quotations or promises of current availability. Differences can reflect the body, finish, manufacturing process and supplier. A higher price doesn't establish a higher slip classification.
Calculate the tile purchase from the measured area plus an allowance for cuts and the proposed layout. Then include substrate preparation, waterproofing where required, adhesive, grout, flexible joints, labour and delivery. A low tile price won't compensate for an unsuitable base or an expensive layout correction.
Buy evidence before committing to quantity
- Shortlist suitable finishes. Eliminate products that lack a defensible specification for the actual room. Don't spend time comparing colours that can't meet the intended use.
- Inspect physical samples. Our samples service lets you see and touch tiles before choosing. Check the background colour beside cabinetry, paint and tapware in both daylight and artificial light, rather than relying on a screen.
- Request the supporting documents. Obtain the slip-test result for the exact code and finish, together with installation and maintenance information. A verbal assurance isn't a substitute for a matching specification.
- Have the tiler verify the order. We recommend checking all measurements before purchase because tiles from different batches can differ slightly in colour and size. Confirm quantities, carton identification and the plan for keeping replacements before installation begins.
A sample helps with colour and feel, but it won't reveal the full range of printed faces or prove wet-area suitability. Ask to see a broader product spread where pattern repetition matters, and keep the selected sample available when the delivery arrives.
Choose the finish that passes the room assessment first, then compare price. That order protects you from buying an attractive tile you can't confidently use where you intended.
Tiles Mate Pty Ltd offers tile samples and selection support for Melbourne renovations, helping you compare finishes before committing to a floor. Visit Tiles Mate Pty Ltd with your room measurements, wet-use locations and preferred terrazzo colours to discuss suitable options and the specifications to verify.