




Hybrid Flooring Herringbone Guide for Melbourne Homes
by Shivam Tayal 25 Oct 2026 0 Comments
The most popular advice on hybrid flooring herringbone is to start with the pattern. Pick an oak tone, point the zigzags at the window, and trust the click edges. That order is backwards in a Melbourne house.
Short angled boards create more joints and more cuts than a straight run. A damp slab, a hump you can barely see, or a laundry the building rules treat as a wet area will undo a careful layout. A waterproof label does not settle those questions, and a sound figure printed on a brochure does not travel into a different apartment ceiling.
What works is specifying the floor before you fall for a sample. Confirm the substrate, the room classification and the product's own install guide. What does not work is assuming a rigid core behaves like tile, or like solid parquetry, in every room.
What Hybrid Herringbone Flooring Actually Is
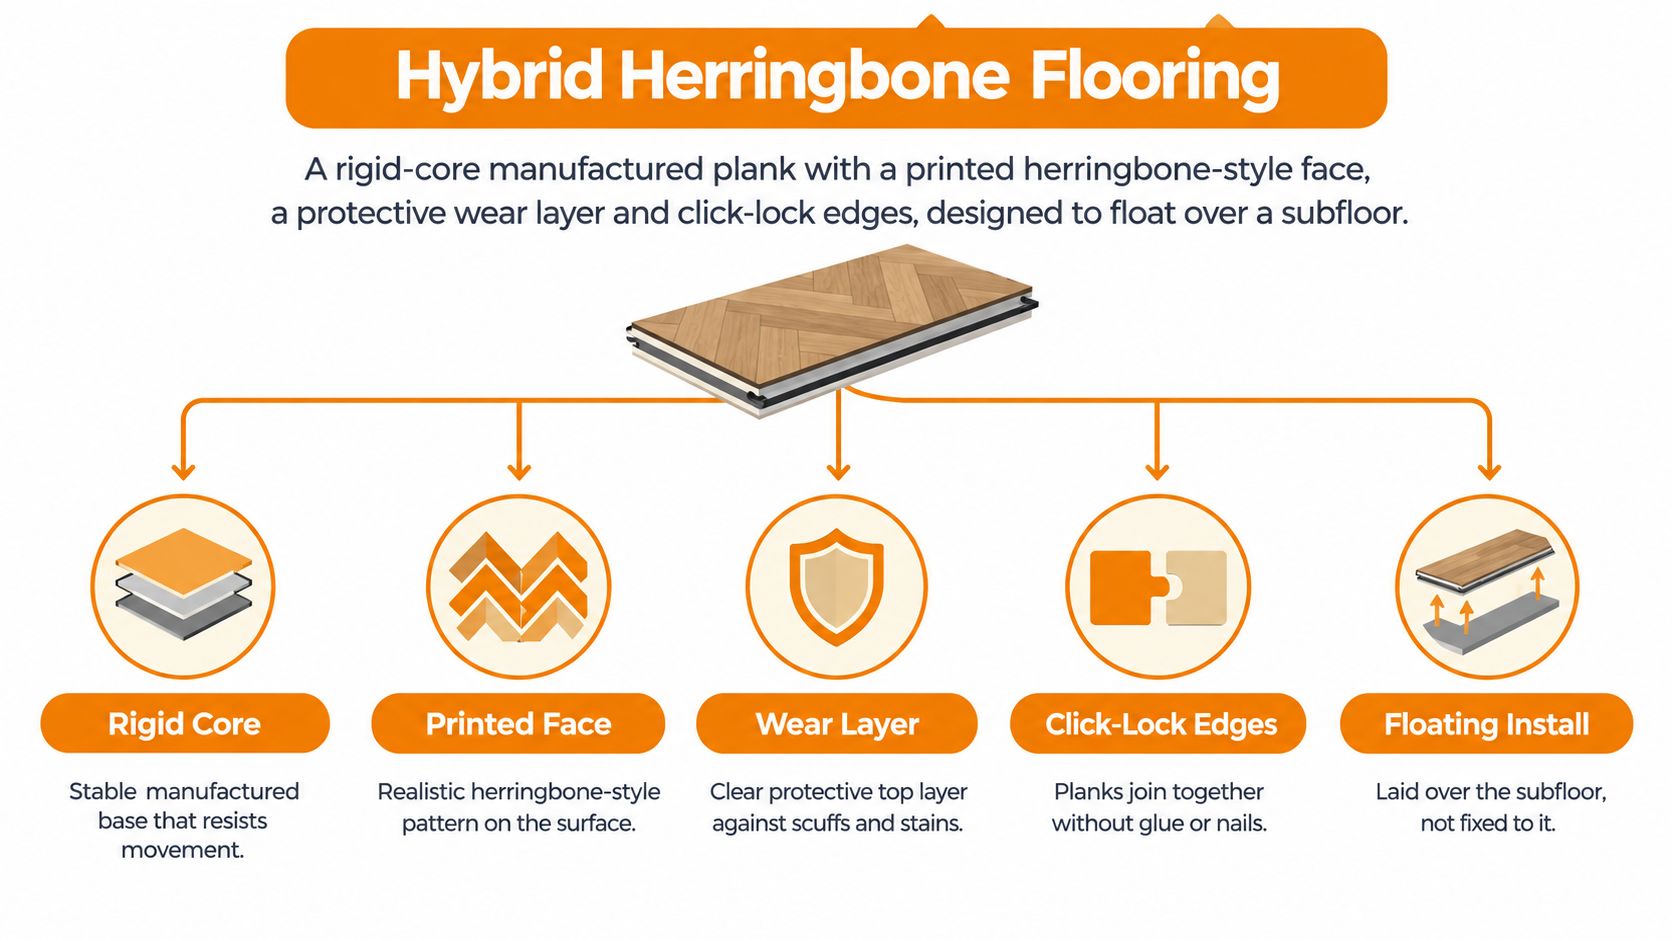
Hybrid flooring herringbone is a rigid-core manufactured plank with a printed herringbone-style face, a protective wear layer and click-lock edges, designed to float over a subfloor. It is not nailed down as the default method. The floor sits on the substrate and moves as one sheet inside an expansion gap.
Think of a laminated bench top. A stable core keeps the surface flat so the decorative face does not warp the way a thin skin would on its own.
From the bottom up, the stack is straightforward.
- Backing: The underside against the underlay or slab, and the first surface to meet residual moisture or grit.
- Rigid core: The manufactured base that holds the plank square and limits cupping.
- Decorative print: The herringbone-style image, usually a timber look, across the face.
- Wear layer: A clear film over the print that takes scuffs before the picture does.
Rectangular A and B boards meet at approximately 90 degrees and form a broken zigzag. Chevron boards are different, because their ends are cut so the joints run to continuous points. European parquetry arranged rectangular timber in alternating directions from the sixteenth century, and Versailles helped popularise geometric parquet in the seventeenth century, as this chevron and herringbone guide sets out. In Melbourne's Victorian and Edwardian houses that geometry can reinforce period character, while the manufactured core suits a current renovation. If you are still comparing formats, a plain guide to hybrid flooring is the right side reading before you lock in a pattern.
Misconception: Hybrid herringbone is not solid timber parquetry, and it is not automatically suitable for every wet area. Slab moisture, flatness and room classification decide that, not the pattern name.
Plank Sizes and Layouts at a Glance
Plank size controls two things on site: how busy the zigzag reads and how many cuts you make per square metre. Common brackets look like this:
| Plank size (mm) | Best room size | Visual scale | Trade-off |
|---|---|---|---|
| 600 x 120 | Small bedrooms, studies, tight halls | Fine, busier zigzag | More pieces and more cuts per square metre |
| 750 x 150 | Typical living rooms and main bedrooms | Balanced, readable pattern | A safe middle if the room is neither tiny nor vast |
| 900 x 180 | Open-plan living and wide halls | Bold, fewer repeats | Can overwhelm a small room and waste more on cuts |
A herringbone field should span several boards across the room width. Small rooms suit smaller planks, because a 900 mm board leaves too few repeats and the diagonals feel cramped. Open-plan spaces suit the larger sizes, where a fine plank starts to read as texture rather than pattern. For the geometry behind these layouts without the sizing maths, this herringbone flooring overview is a useful companion.
Thickness, borders and direction
Rigid-core hybrid planks commonly fall around 5 to 8 mm, and the exact figure changes from product to product, so confirm it on the spec sheet for every line you are pricing. Thinner boards keep the step modest at doorways and over existing floors. Thicker boards feel firmer underfoot but raise junctions with tiles, carpet and original timber, so measure every threshold before you order.
Three layouts cover most Melbourne homes. A full-room herringbone is the simplest and the most forgiving on waste. A herringbone field with a straight border strip calms the diagonals where they meet skirtings. A contrasting border frames the field and suits a formal living room, though every extra mitre adds cuts and height planning.
Run the pattern toward the main
Subfloor Checks That Make or Break Herringbone
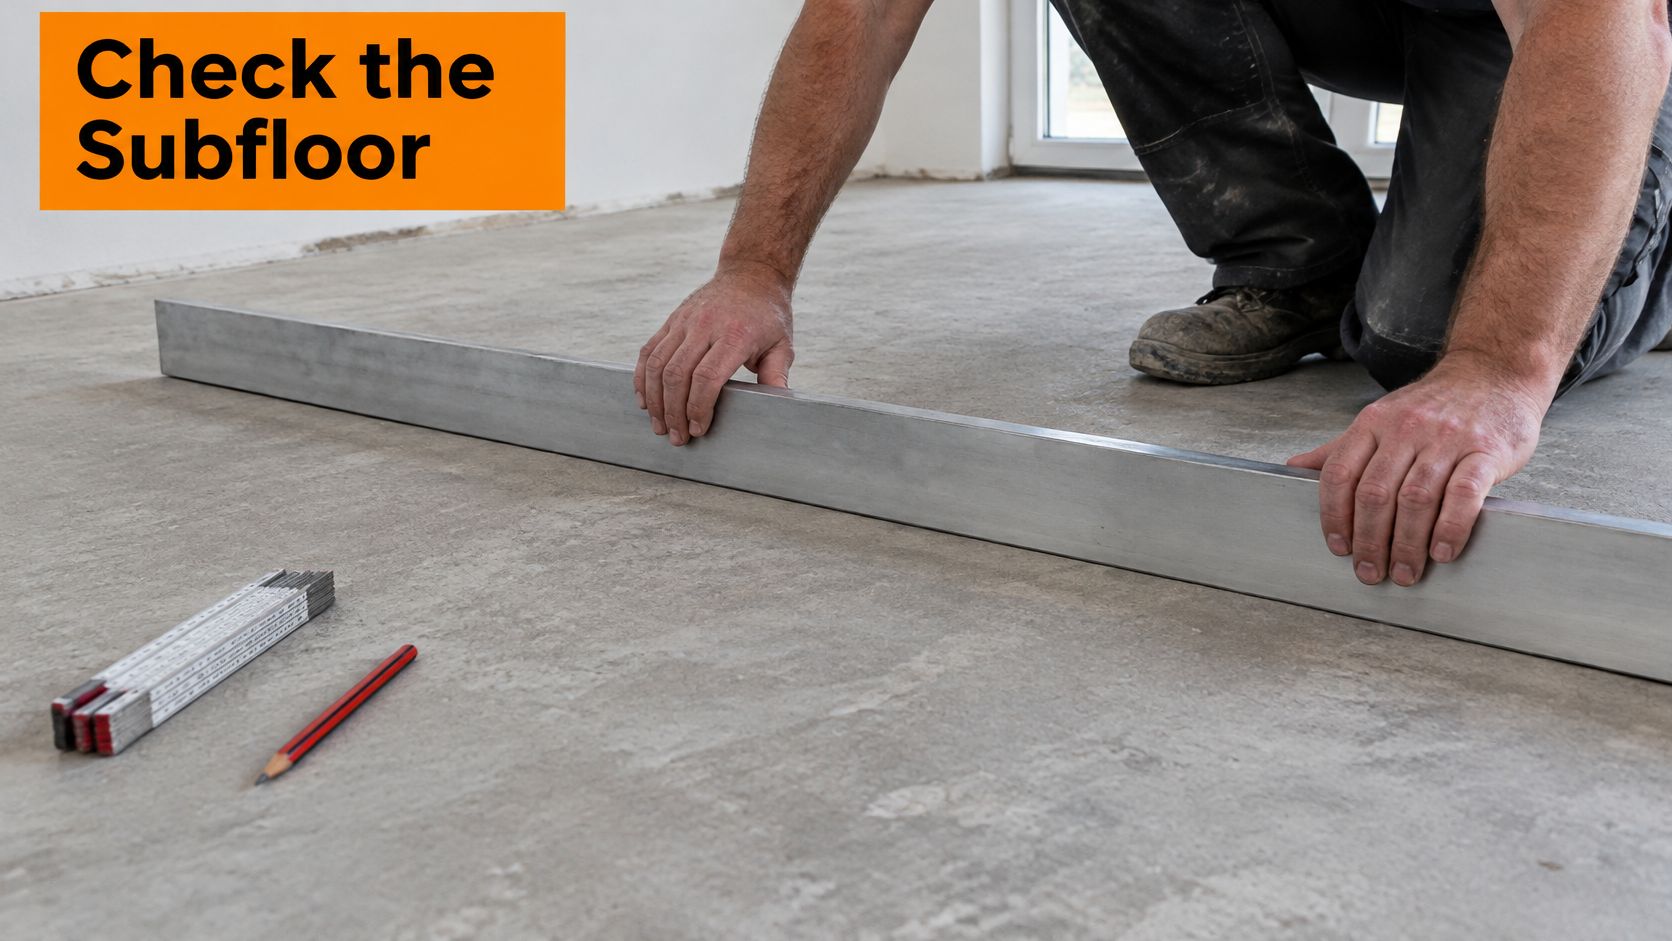
Herringbone punishes shortcuts in the floor you cannot see. Short angled boards create more joints, more cuts and more direction changes, so a small high spot shows at every crossing. The same hump often disappears under a long straight plank. On Melbourne slabs, winter damp and new-build moisture are the usual culprits, not a weak click.
| Check | Threshold or target | How to test | Why it matters |
|---|---|---|---|
| Flatness | No more than 3 mm variation over a 3 m radius | Long straightedge at several angles | Herringbone exposes high spots at every joint |
| Concrete moisture | Roughly 2.5 to 4.5% over 24 hours (one guide, confirm for your product) | Moisture test before delivery | Moisture drives edge opening and mould risk |
| Existing tiles and grout lines | No hollows or height steps at transitions | Sight-line and tap test | Grout depressions telegraph through planks |
| Underlay and membrane | Product guide states whether a moisture barrier is needed | Read the install guide and any builder's film requirement | Attached acoustic underlay is not a moisture barrier |
Product guidance commonly requires a clean, dry, structurally sound and flat substrate. One Australian herringbone guide sets the 3 mm over a 3 m radius limit, while another targets roughly 2.5 to 4.5% concrete moisture over 24 hours, and separate guidance warns that attached acoustic underlay is not a moisture barrier and that a builder's film may still be required for warranty, as set out in this parquetry click install guide. Treat those figures as a prompt to open your own guide, not as a universal pass mark.
Test before the delivery arrives. Residual moisture is common in new slabs, extensions and houses that sit cold through a Victorian winter. Laying over existing tiles adds grout-line dips and height steps at doorways. Hollowing under a tap test means the tile is a poor base, even if the surface looks even. A practical note on hybrid flooring over tiles covers that junction in more detail.
If any check fails, fix the subfloor first. You cannot hide a flatness or moisture problem by nudging planks.
Call a levelling contractor when the straightedge fails in more than one direction, and a moisture tester when the slab is new, below grade, or has a history of damp. That preparation is part of the design cost. Skipping it is how warranties get refused after the pattern is already on the floor.
Where Hybrid Herringbone Works and Where It Does Not
| Room | Suitable? | Condition to check |
|---|---|---|
| Living room | Yes | Flat, sound slab, and only the underlay the product allows |
| Bedroom | Yes | Acoustic underlay helps soften footfall where the guide permits it |
| Hallway and entry | Yes | Plan transition strips and expansion gaps at doorways |
| Kitchen | Yes, with care | Generally not an NCC wet area, wipe spills promptly and protect sink and dishwasher zones |
| Laundry | Check with certifier | Often a wet area with a floor waste, so deemed-to-satisfy may not apply |
| Bathroom and en suite | Not without compliant waterproofing | Wet areas need a waterproofing system, and plank joints are not sealed sheet |
| Apartment or townhouse beside or below another dwelling | Yes, with a tested assembly | Specify the full tested floor build-up for sound |
| Outdoor or covered alfresco | No, unless the maker rates it | Interior product, check the manufacturer before any exterior use |
Kitchens are generally not classified as wet areas under the National Construction Code. Bathrooms, laundries and rooms with floor wastes often are. The Queensland Building and Construction Commission explains that hybrid planks are not sheet flooring with sealed joints, so they do not satisfy the deemed-to-satisfy path for water-resistant wet areas such as bathrooms and sanitary compartments. A performance solution may be possible, but the builder or owner-builder should confirm it with the building certifier before installation, which this QBCC note on planks in wet areas states directly. The code still requires wet-area building elements to be protected by a waterproofing system. Surface water resistance, a slab membrane, a bathroom waterproofing system and NCC compliance are four different things.
For layout ideas once the room is actually allowed to take a hard floor, Jennifer Gilmer Kitchen & Bath design tips are a useful design read. They do not replace a certifier's written view of your laundry or en suite.
Pre-purchase checks for wet rooms
- Name the room classification. Ask whether this space is a wet area, especially if it has a floor waste.
- Ask which compliance path is proposed. Deemed-to-satisfy or a performance solution. A product label is neither.
- Confirm perimeter and joint detailing. Plank joints are not a sealed sheet, so the waterproofing has to be designed around that fact.
- Get written certifier approval where the room is wet. DIY responsibility does not shrink because the plank clicks together.
Sound between dwellings
The National Construction Code addresses both airborne and impact-generated sound between dwellings, and acceptable-construction notes treat plasterboard, insulation and the rest of the build-up as part of the solution. A manufacturer-published Australian herringbone example reports L'nT,w 41 and FIIC 69 for one assembly, yet those values describe that tested construction, including substrate, underlay, ceiling and installation, not every home, which is why the NCC sound insulation provisions have to be read against the actual floor. Changing the slab, backing, perimeter, ceiling void or junctions can change impact transmission. For a Class 2 project, or any dwelling beside or below another, coordinate with the building surveyor and an acoustic consultant before you order. Nominal thickness and a stuck-on underlay are not a compliance claim. In a detached house, a flat subfloor and a permitted underlay still matter, because loose click joints click.
How to Install Hybrid Herringbone Step by Step
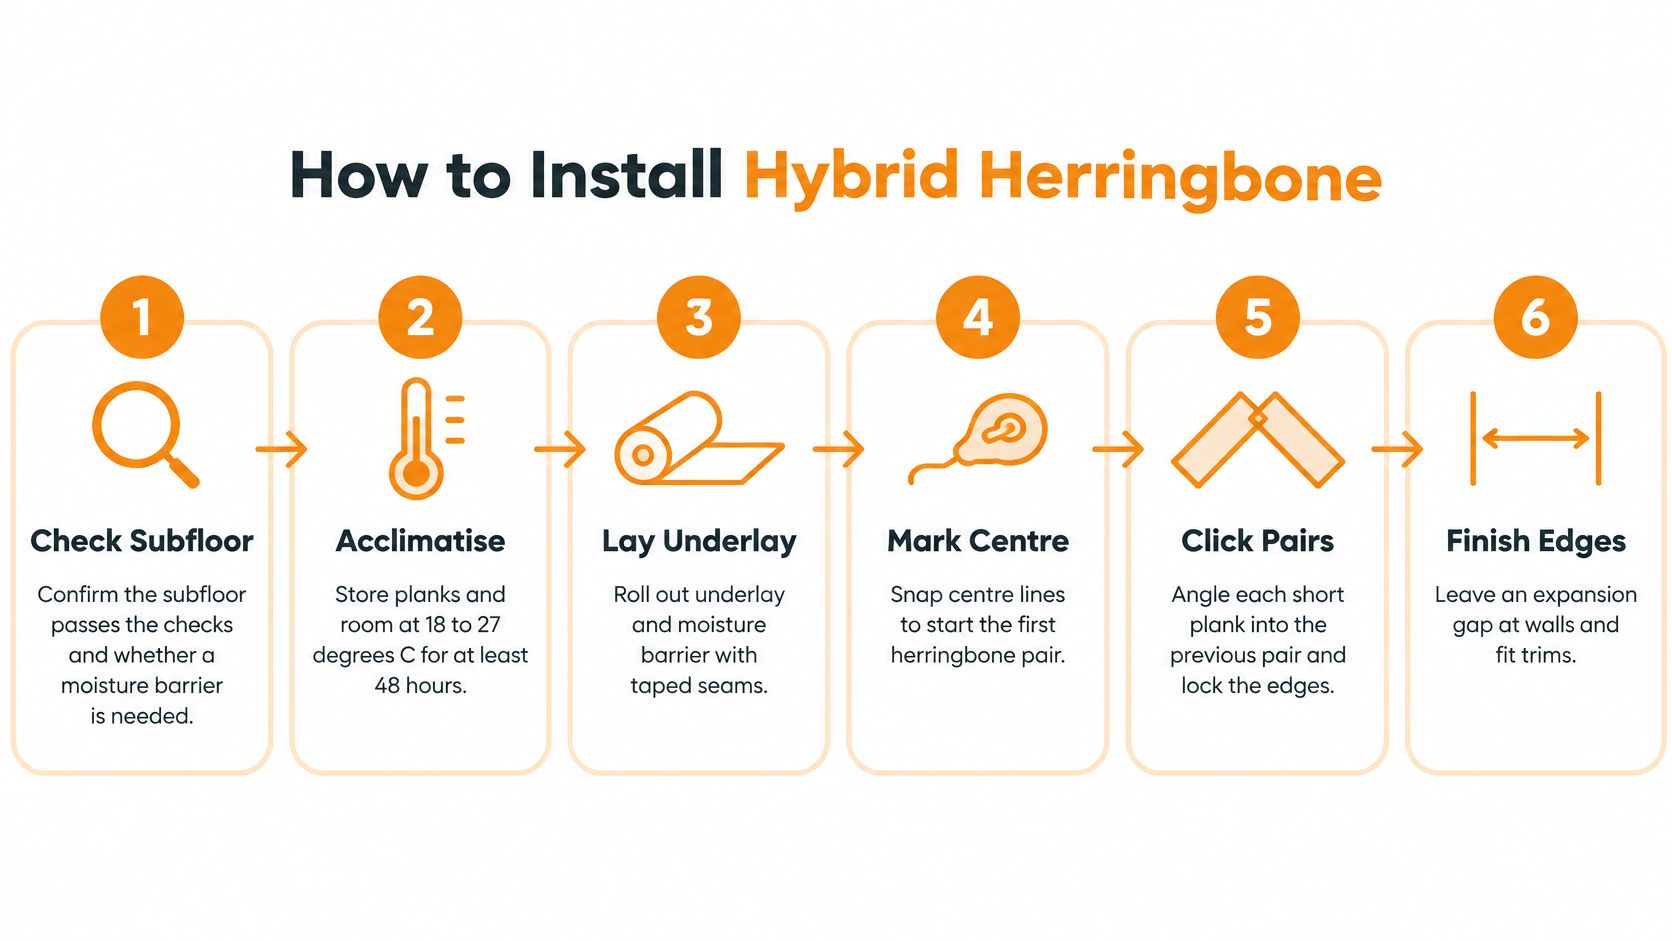
A herringbone floor usually shows its first mistake at the far wall. Treat the sequence as substrate and guide compliance first, pattern second: if the flatness, moisture and perimeter rules from earlier are not settled, the zigzag will only make the error easier to see.
- Confirm the subfloor and the membrane. The earlier flatness and moisture checks have to pass, and the product guide has to say whether a separate moisture barrier is required under that floating system. Use the product's own instructions, such as this hybrid herringbone installation guide, rather than assuming every click-lock plank follows the same rule. Residual slab moisture can move into joints or backing and drive edge opening, mould risk or lock stress.
- Acclimatise the room and the planks to the guide. One guide may call for a steady room around 18 to 27°C for at least 48 hours, the same range through installation, and 24 hours afterward; treat that as an example, then copy the exact range from your product's sheet. Cold garages and hot north-facing rooms both push boards outside the range the locks were tested in.
- Read the underlay and gap rules for this product. Some guides ban extra underlay. Others require it. Note the expansion gap at walls, pipes and doorways before the first cut. Herringbone has little spare tolerance once the perimeter pieces are trimmed.
- Dry-lay from the centre line. Set out the A and B arrangement and look at it from the doorway. Do not lock a board until the zigzags sit square and the border widths are acceptable on both sides.
A short install walk-through helps if you want to see the angle of the lock before you start.
- Lock the first pair on the manufacturer's sequence. Keep that pair as the square reference for the whole room. A twisted start grows into a curve by the far wall.
- Work outward and recheck square every few rows. Short rows hide drift until the skirtings no longer run parallel with the cuts.
- Cut perimeter pieces with a fine-tooth blade. Test each offcut against its neighbours and keep the expansion gap clear of debris. Forcing a tight piece is how ends lift.
- Fit transitions, then cover the gap. Doorway trims take the height change. Refit skirting or a quadrant over the gap without pinning the floating floor to the wall.
- Walk the floor and store spares. Feel for proud joints. Keep spare planks from the same batch, because a later repair from a new lot rarely matches.
DIY is realistic on a single flat, sound room if you are patient with the dry-lay. Large open plans, contrasting borders and any floor that must meet a tested acoustic build-up usually justify an installer. The pattern does not forgive a rushed first row.
Caring for Hybrid Herringbone and Fixing Common Faults
Daily care is ordinary and strict. Dry-mop or vacuum with a soft head. Skip steam mops and standing water. Felt pads under chairs, and a mat at the entry, stop grit from sanding the wear layer. Direct sun through glass can fade a printed face in patches, so film, blinds and rugs you rotate matter more than another coat of cleaner.
The broken zigzag hides light scratches across the B pieces better than a long board does. It also makes a gap or a lifted end obvious, because your eye follows the joint.
On the spec sheet, durability sits in three places: wear-layer thickness, the residential traffic rating, and the locking system. A rigid core copes with room-temperature swings better than solid timber. It still moves if the slab stays damp or a wet appliance leaks.
| Fault | Likely cause | Fix |
|---|---|---|
| Gaps between planks | Humidity swings, or planks not brought to room conditions | Check room humidity and expansion gaps, and consult the installer before refitting |
| Lifting or swollen edges | Moisture from the slab or standing water | Find and stop the source, dry the area, replace damaged planks |
| Scratches and dents | Grit, chair legs, heavy furniture | Felt pads, entry mats and rugs, replace single planks if the product allows |
| Fading or sun bleaching | Direct sun through glass | Window film, blinds and rotating rugs |
| Hollow or clicking sound | High or low subfloor spots, or compressed underlay | Re-check flatness, replace or add underlay only as the product permits |
Where a repair stops being cosmetic
If one plank is damaged, check whether that product allows a single-board replacement, and use a spare from the original batch. Colour shifts between production lots. A hollow tap or a click that returns after you have cleaned the joints points back to the substrate. That is a flooring professional's job, not a furniture pad.
Budget, Samples and Your Next Steps
The per-square-metre plank price is the smaller part of an honest budget. I have quoted herringbone jobs across Melbourne where the boards were the cheapest line on the page. Levelling compound, a moisture membrane and doorway trims did the most damage to the total. Floors get chosen inside much larger renovation budgets, and that is exactly why preparation and compliance belong on the same quote as the planks, not in a footnote underneath them.

| Cost item | What it covers | Planning figure |
|---|---|---|
| Flooring material | Per m2 price or per box on product pages | Compare per m2 at the same specification |
| Waste allowance | Offcuts from angled herringbone cuts | Extra material, and more again for small rooms, borders and many doorways |
| Sample pack | Five physical samples | A modest fixed pack price, viewed in your own light |
| Design consultation | Layout and product questions from home | Free for a short session |
| Underlay and trims | Underlay, expansion trims, transition strips | Product and room dependent |
| Subfloor preparation | Levelling and moisture membrane | Separate installer quote, not a guess inside the plank price |
| Installation labour | Per m2 or per job | Written quotes that isolate substrate work |
Where budgets usually slip
Waste is the first gap. Angled cuts throw away more material than a straight lay, and a small room or a bordered field throws away more again.
The second gap is the slab. Levelling compound, a moisture membrane and doorway trims rarely appear on the product page, yet they decide whether the pattern sits flat or telegraphs every hump in the concrete. Ask every quote to split material, waste, preparation and labour so you can compare like with like. A quote that hides substrate work inside a per-metre rate is a quote you cannot measure against anything.
A practical Melbourne sequence
- View samples in the actual room. A five-piece pack at a modest fixed price lets you set the print beside existing tiles and check it in north light. A free short design consultation from home is enough to test a layout before you commit.
- Measure, then classify the room. If a laundry, bathroom or floor waste is involved, confirm the wet-area status with the certifier before the order.
- Test and level before delivery. Damp winters raise slab readings. Boards sitting in a garage do not fix that.
- Match the install guide and order spare material. Offcuts, a locked spare row and same-batch repairs all come out of that extra.
- Book the installer or lock the DIY plan. Confirm dates directly. Acoustic or bordered rooms should not be a weekend experiment.
In the next 48 hours, list material, waste, underlay, trims, preparation, labour and delivery on one page. If the preparation line is blank, the budget is not finished.
Tiles Mate Pty Ltd supplies herringbone hybrid flooring alongside tiles from its Melbourne store and online range, with sample packs and practical flooring guides for local renovations. If you are specifying a floor for a Victorian home, start with the slab and the room rules, then compare planks in your own light. Visit Tiles Mate Pty Ltd to order samples or talk through a layout before you buy.