




LED Shaving Cabinets: Design and Compliance Guide
by Shivam Tayal 08 Oct 2026 0 Comments
“Bathroom safe” is not a compliance category. A mirror can have sealed LEDs, a demister and a polished product page, yet still be unsuitable for the wall position you've chosen in a Melbourne bathroom. The decisive details are the wet-area zone, complete IP rating, cable entry, driver, switching arrangement and final electrical connection.
That matters because an LED shaving cabinet sits inside a substantial renovation decision. Australian renovation sources citing Housing Industry Association figures place the average bathroom renovation at approximately A$26,000 in 2023, with smaller projects around A$8,000 and major or premium work at A$35,000 or more. Melbourne renovation estimates commonly sit between approximately A$10,500 and A$21,000, depending on scope and specification. See the Australian bathroom renovation cost benchmarks before treating the cabinet as an isolated purchase.
Why Most Bathroom Lighting Plans Fail Compliance
A shaving cabinet is both storage furniture and a fixed electrical fitting. Treating it like an ordinary mirror creates problems late in the project, especially when the electrician discovers that the cabinet's internal socket, driver or cable entry doesn't suit its location.
The marketing phrase “water resistant” tells you very little. It may describe the mirror surface or LED module rather than the assembled cabinet. It doesn't confirm that the enclosure, switches, power supply and wiring arrangement meet the requirements for a particular bathroom zone.
Practical rule: Choose the wall position first, identify the applicable electrical zone, then approve the cabinet. Don't reverse that order.
Before ordering, give your electrician the cabinet's installation drawing and technical certificate. Include the distance from the shower or bath, mounting height, supply requirements, driver position, internal power points and control method. A qualified lighting installation electrician can assess the fitting as part of the complete bathroom electrical plan, rather than relying on a product description.
The expensive mistake is usually made early
Renovators often coordinate tiles, vanity dimensions and tapware in detail, then leave the shaving cabinet until the final stage. That approach fails when the selected unit needs a different wall cavity, a hardwired connection or a compliant location outside a restricted zone.
The cabinet also affects other trades. A recessed model needs a correctly sized cavity and clear backing structure. A surface-mounted cabinet changes the finished projection above the vanity. A model with a demister, USB charging or an internal GPO adds more electrical and maintenance questions than a simple illuminated cabinet.
Compliance must sit beside design
A well-designed cabinet should frame the vanity, support grooming and provide useful storage without crowding the room. But appearance comes second to suitability. The right product is the one whose electrical assembly can be installed legally, whose light performs accurately and whose dimensions work with the finished tile surface.
Read every specification sheet as a trade document. Look for the full IP code, not a vague bathroom-safe claim. Confirm whether the driver is accessible, whether the unit is designed for fixed wiring and whether the included accessories change the electrical requirements. That discipline prevents a stylish purchase from becoming a variation, replacement or inspection failure.
Decoding Lumens, Kelvin and CRI for Grooming
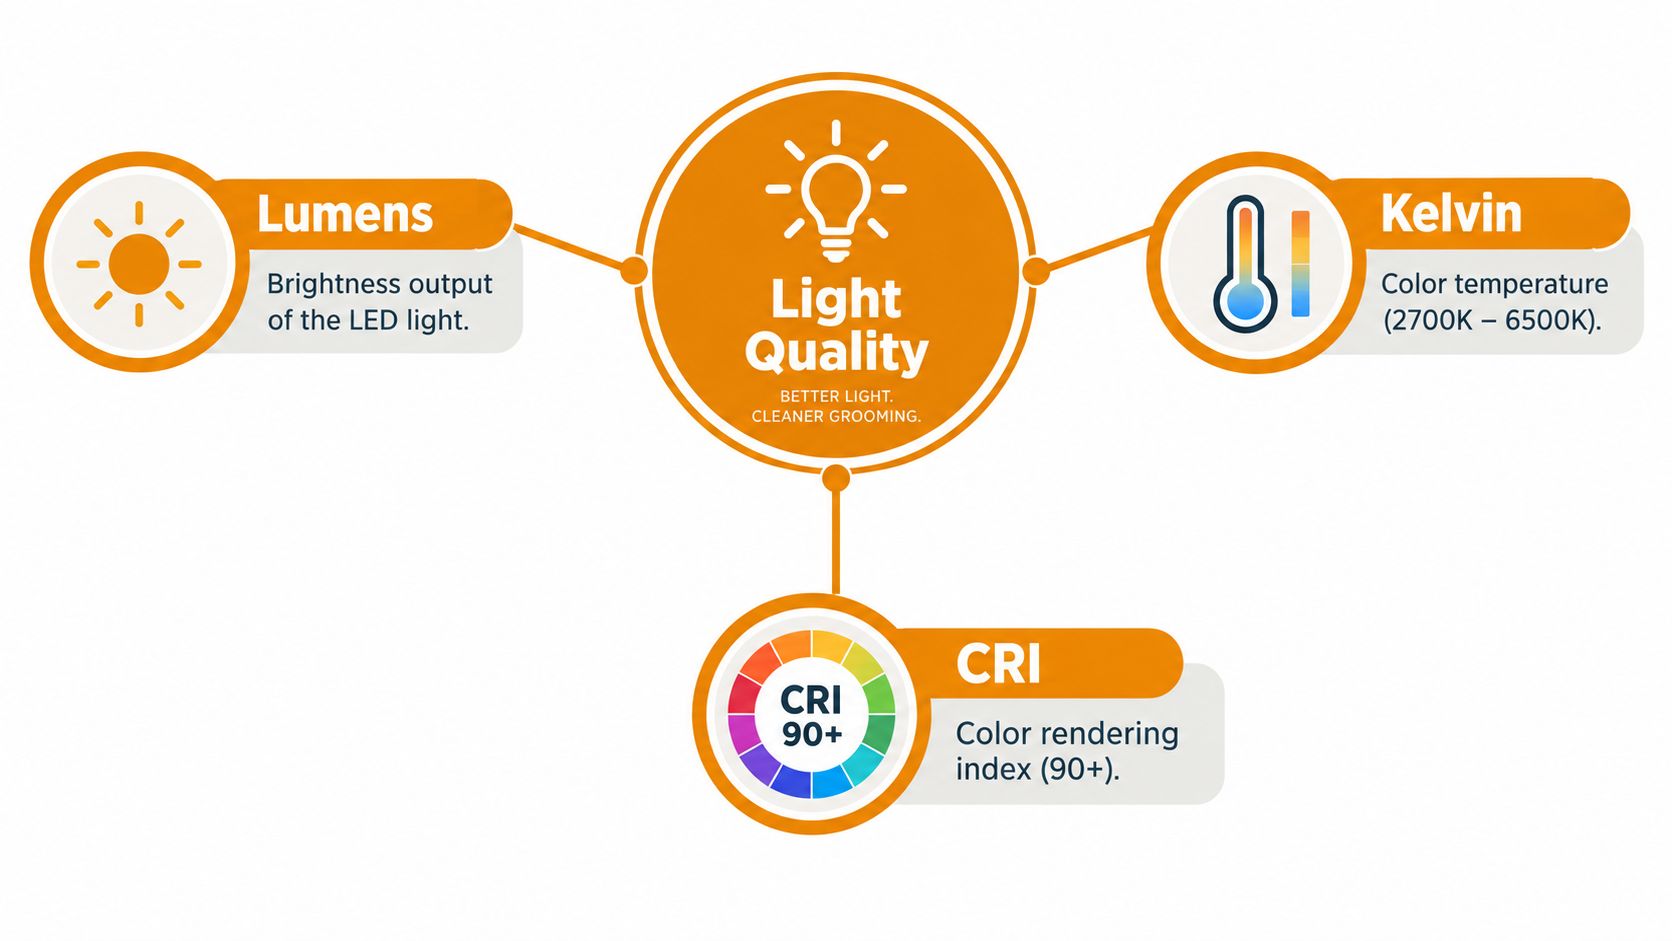
Wattage tells you how much power a cabinet draws, not how well it lights your face. Lumens, Kelvin and CRI deserve your attention instead, particularly when the cabinet will sit above a carefully selected tile scheme.
Lumens show delivered brightness
Lumens measure visible light output. Ask for the cabinet's measured lumen output rather than relying on wattage. Products with similar power consumption can deliver different usable brightness because their LEDs, diffusers and drivers perform differently.
The diffuser shapes the result. A bright strip concealed behind a narrow edge can create glare and hard shadows. A broader front-facing diffuser spreads light more evenly across the face. For shaving, skincare and makeup, choose even illumination around the reflection rather than a sharp halo designed mainly to attract attention in a showroom.
Check what the stated lumens describe. Figures measured at the LED chips exclude losses through the diffuser and housing. The complete-cabinet output gives you a more useful indication of the light reaching the room.
Kelvin controls the visual mood
Colour temperature is measured in Kelvin. Lower values create a warmer appearance, while higher values look cooler and more blue. For a neutral bathroom, specify around 3,000 to 4,000 K, paired with strong colour rendering. The Australian lighting guidance supports assessing lighting efficiency and performance rather than selecting a fitting by appearance alone.
This range generally suits white porcelain, warm stone, timber-look finishes and common Melbourne bathroom palettes. Very cool light can make warm beige tiles appear dull or grey. Warm light can soften whites and alter your judgement of grout, foundation and skin tone.
Coordinate the cabinet's colour temperature with other vanity lighting where possible. Different light sources can make the same tile appear inconsistent across the room.
CRI protects colour decisions
CRI, or colour-rendering index, measures how reliably a light represents colours compared with a reference source. For makeup and grooming, specify CRI 90 or above, the range typically recommended for accurate skin tones.
A mirror can look sharp and bright while still rendering colour poorly. Low CRI may flatten the veining in a Calacatta-look tile, push warm white towards yellow or make skin appear uneven. The result affects decisions about paint, grout and finishes.
Take tile samples into the bathroom and inspect them beneath the cabinet at its intended colour temperature. This practical check exposes shifts that showroom lighting can hide. For related product considerations, compare the cabinet's features with guidance on LED mirror design and lighting.
A reliable product sheet should state lumen output, colour temperature, CRI, dimming behaviour and whether the light is flicker-free. If it only promises “bright LED”, choose another cabinet.
Navigating Australian Wet Area Electrical Zones
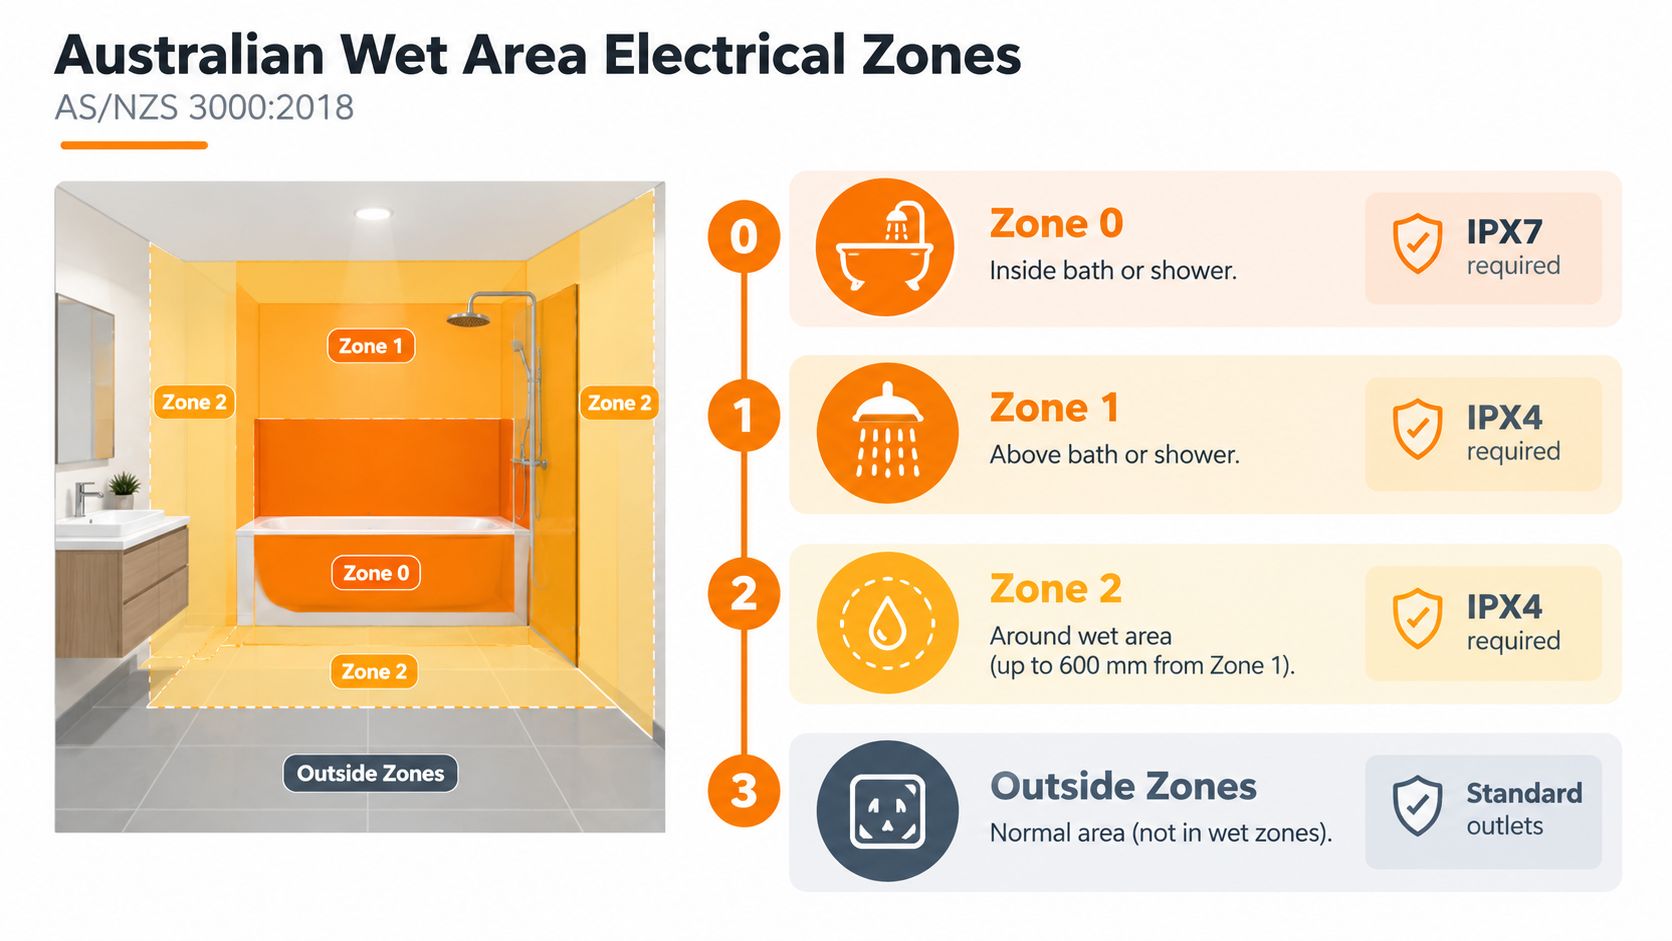
Australian bathroom electrical work is governed by location, not by the product label. AS/NZS 3000:2018 divides wet areas into zones, and the cabinet's position determines which requirements apply. The practical classifications are summarised in the AS/NZS 3000 bathroom zone guidance.
Start with the physical location
Zone 0 is inside a bath or shower basin. Zone 1 covers the area above the bath or shower, while Zone 2 extends 600 mm horizontally beyond Zone 1. Equipment exposed to splash conditions generally needs at least IPX4 protection, while Zone 0 requires IPX7 and suitable low-voltage design.
For a cabinet above a vanity, measure from the shower or bath to the cabinet edges, not just to the centre of the mirror. A shower screen, fixed barrier or unusual bathroom geometry may affect the applicable zone. Don't assume that a vanity wall is automatically outside the wet area.
Read the IP code correctly
An IP rating describes protection provided by the assembled enclosure against solids and moisture. IP44 or IPX4 is a baseline where Zone 2 exposure applies, while IP65 gives stronger protection against dust and water jets and is preferable where direct spray is possible.
The rating must cover the complete electrical assembly. That includes the cabinet housing, switches, LED driver and cable-entry points. An IP-rated LED strip cannot make a poorly sealed cabinet compliant.
Ask the supplier for:
- Complete enclosure rating: Confirm the stated IP code applies to the assembled cabinet, not only the LED module.
- Driver location: Check whether the driver sits inside the cabinet, behind it or in an accessible remote position.
- Cable entry: Confirm how the cable enters the enclosure and whether the seal remains effective after installation.
- Accessory compliance: Treat GPOs, USB outlets, demisters and touch controls as additional electrical components requiring assessment.
Confirm the connection method
Fixed wiring, RCD protection and installation by a licensed Victorian electrician are essential. A cabinet with an internal socket may create tighter requirements than a cabinet that only contains lighting. In some bathroom locations, outlets are restricted to compliant shaver outlets or specific RCD-protected arrangements, so the cabinet's accessories must be checked with the installation position.
A cabinet can be beautifully sealed and still be the wrong product for the wall you selected.
Before the tiles are fixed, record the cabinet dimensions, mounting height, zone distance, supply voltage, driver arrangement and certification. The electrician should approve the installation method before the purchase becomes irreversible. Never treat a cabinet installation as a simple DIY hanging job when it contains fixed electrical equipment.
Choosing the Right Cabinet Depth and Storage Layout
The best cabinet depth is determined by movement around the vanity, not by the largest storage volume available. In a narrow Melbourne ensuite, a deep surface-mounted unit can make the room feel tight and place doors closer to your face. In a generous family bathroom, that same depth may provide useful capacity without creating an obstruction.
Recessed and surface-mounted models
A recessed cabinet sits partly inside the wall cavity and gives a cleaner projection. It suits new construction or a renovation where the wall can be opened, but the cavity must be checked for studs, plumbing, electrical cables and structural constraints. Don't assume every existing wall can accept a recessed box.
A surface-mounted cabinet is easier to install and preserves the wall structure. It's often the safer choice for a finished room, but its projection must be coordinated with the vanity, basin and door swing. Place painter's tape on the wall to represent the cabinet edges and walk through the room before approving the size.
Storage should follow the routine
Adjustable shelves are more valuable than a visually large interior that only accepts one bottle height. Allocate the most accessible shelf to daily grooming items, keep electrical accessories away from splash-prone storage and check that the door opening doesn't collide with a tap or adjacent wall.
An integrated GPO can be convenient for a shaver or toothbrush, but it also increases compliance and maintenance questions. Demister pads improve visibility after a shower, yet they add another powered component. Choose those features because they solve a real routine problem, not because the product page lists them.
For broader cabinet planning, the guide to bathroom cabinet layouts and storage is useful when coordinating the shaving cabinet with the vanity and surrounding joinery.
Mirror configuration matters
Single-door cabinets suit compact walls and keep the visual line calm. Double-door layouts can give better access across a wider vanity, but the hinges and centre join need to align with the user's standing position. Frameless glass creates a lighter appearance, while a framed cabinet can introduce a deliberate contrast against the tile.
Measure the finished wall, not the plasterboard alone. Include tile adhesive, tile thickness, silicone joints and any trim. A cabinet that fits the rough opening may still look wrong once the tile layout is complete.
Matching Cabinet Finishes to Melbourne Tile Trends
A shaving cabinet should relate to the tile's visual weight. A thin black frame against a quiet white wall creates definition. The same frame against heavily veined marble-look porcelain and a dark mosaic can become another competing border.
Use contrast with control
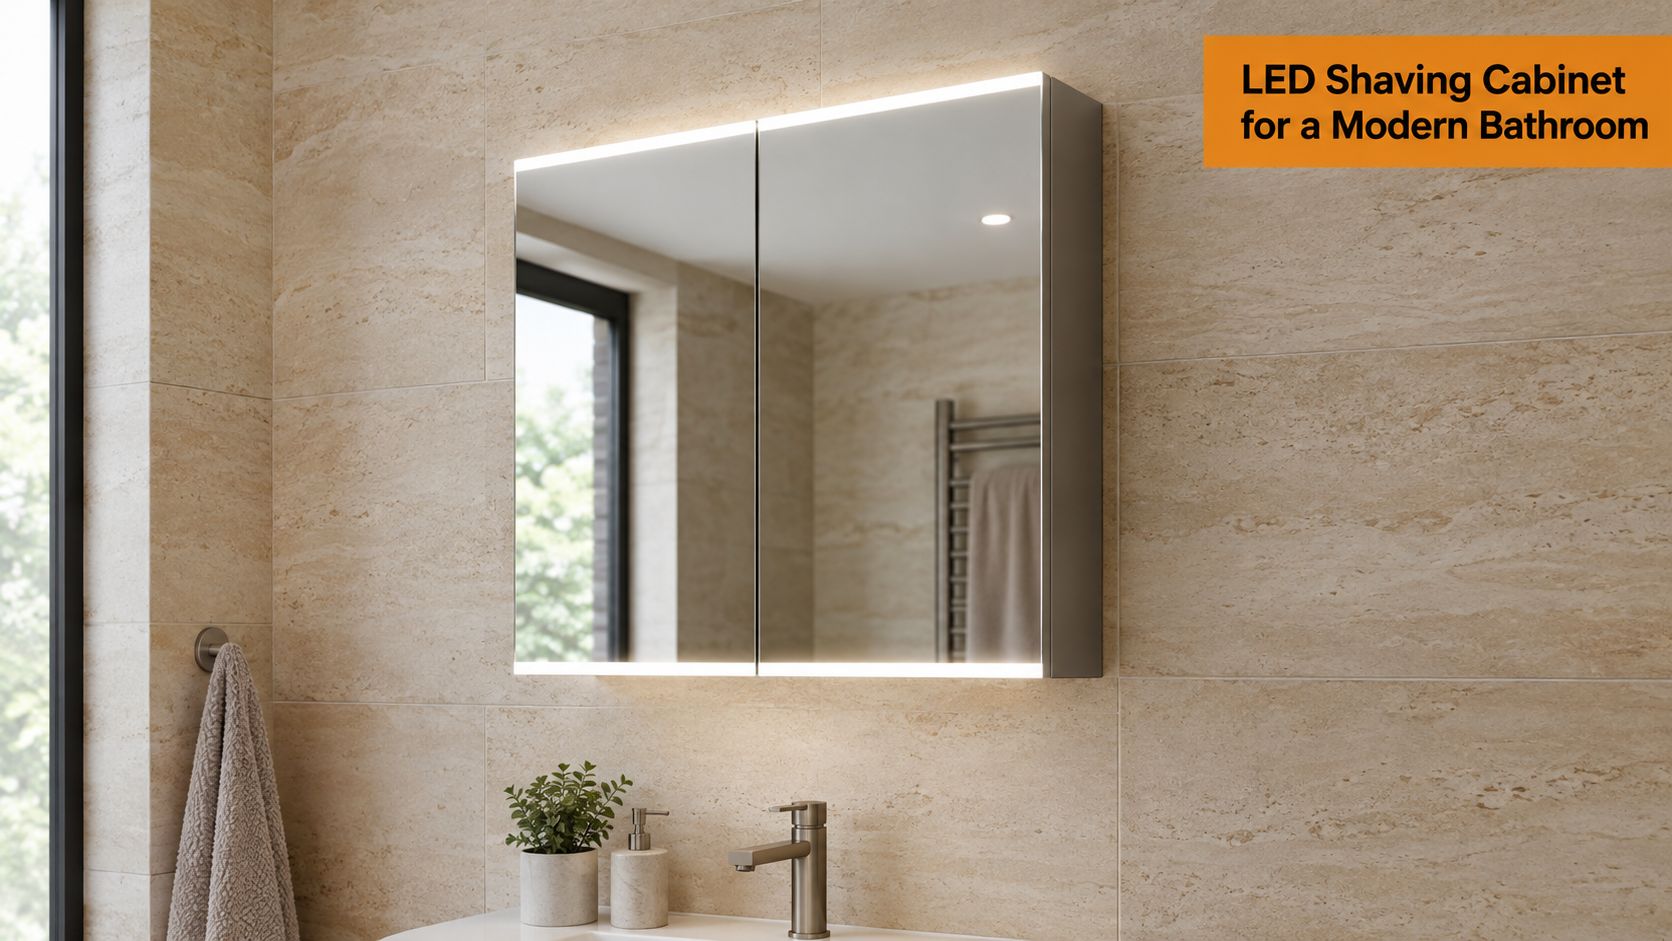
Matte black works particularly well beside Calacatta marble-look porcelain when the room already includes restrained black tapware, handles or shower hardware. Keep the grout and accessories organised so the cabinet reads as a deliberate anchor rather than an isolated dark rectangle.
Brushed brass is warmer and more decorative. It can sit comfortably with natural stone mosaics, creamy porcelain and timber-look cabinetry, especially when the metal appears elsewhere in the room. Gunmetal offers a quieter alternative where black feels too stark but chrome looks too bright.
Balance texture and scale
Kit-kat walls, herringbone mosaics and textured feature tiles already create strong rhythm. Pairing them with an ornate cabinet frame can overload the vanity wall. A simple frameless or slim-framed cabinet lets the tile provide the texture, while a more substantial frame can work against large-format slabs with fewer joints.
Large-format 600x1200 slabs create broad surfaces that favour clean cabinet lines. Align the cabinet with the vanity centreline and, where practical, work with the tile joints rather than cutting through a prominent vein. A designer should approve the elevation before the tiler starts, particularly when the mirror overlaps a feature pattern.
Let the light support the finish
The cabinet's colour temperature changes the perceived warmth of the entire wall. Neutral light helps assess whites, greys and veining without pushing the room too warm or too blue. CRI also matters here, because a low-quality light can make a carefully selected tile appear unlike the sample used during the design stage.
Sample the metal finish beside the actual tile, grout and tapware. Chrome, brushed nickel, gunmetal and stainless steel can look similar online but behave differently beside polished or matt surfaces. The correct pairing is the one that repeats a finish with intention, not the one that matches every element exactly.
Evaluating Energy Efficiency and Long Term Costs
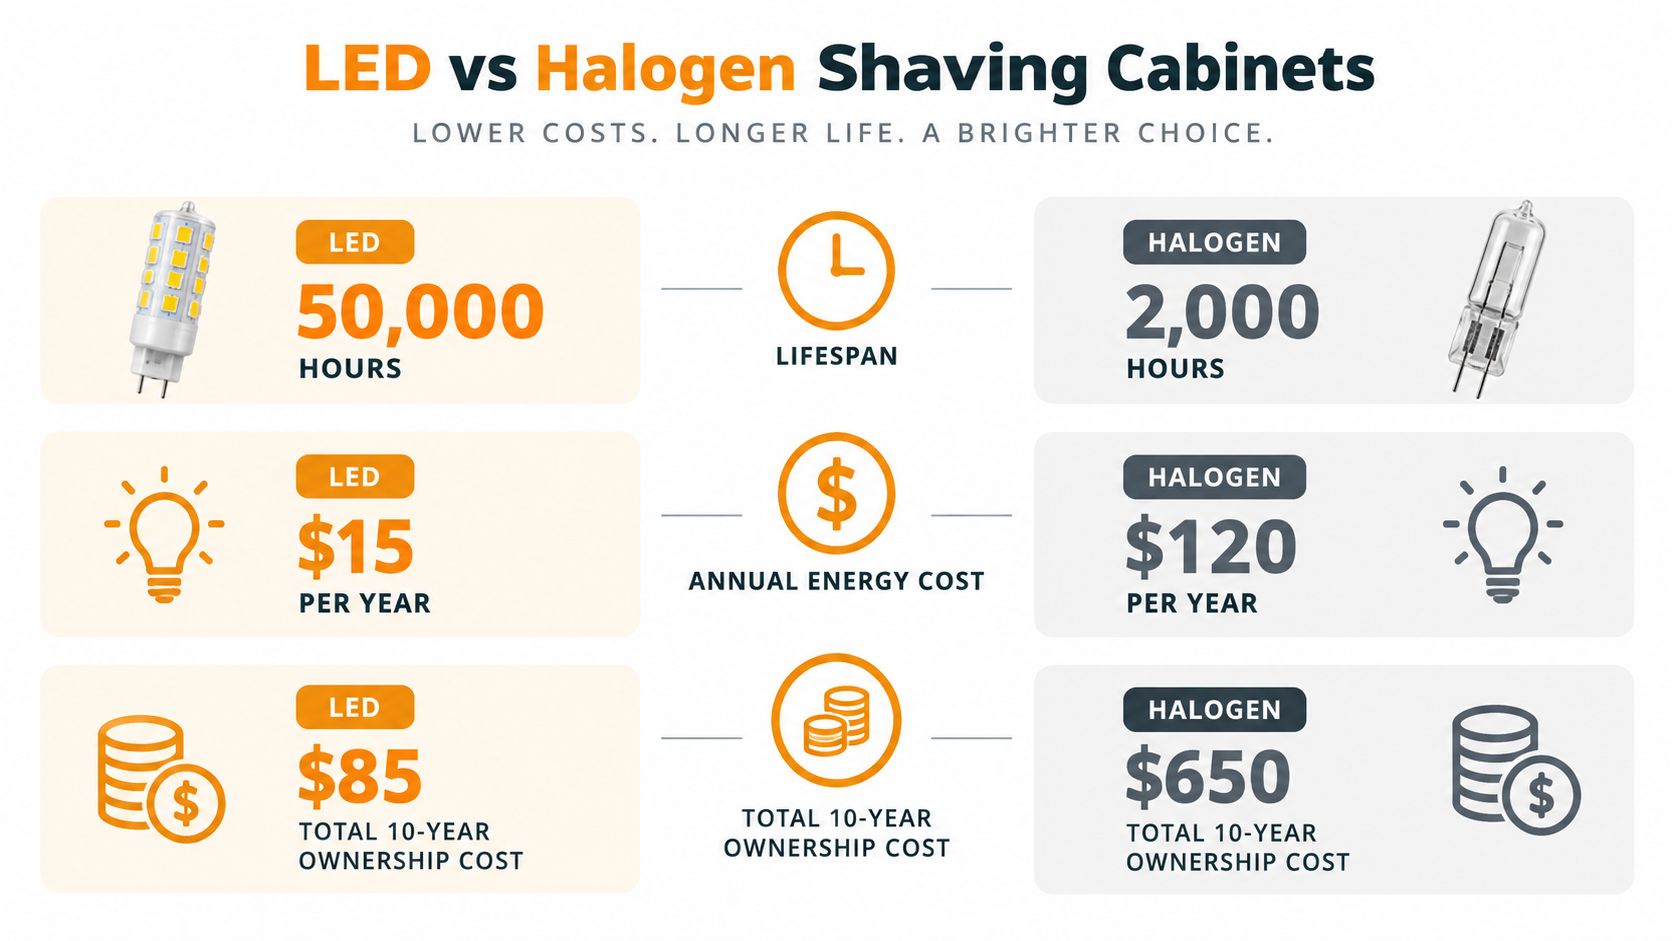
An LED shaving cabinet should be judged over its service life, not only at the checkout. Australian renovation guidance states that LED lighting can use approximately 75% less energy than traditional bulbs, and some LED products are rated for up to 50,000 hours of operation. These benchmarks are discussed in Australian bathroom renovation lighting guidance.
Efficiency is more than a lower power figure
LEDs convert electrical input into visible light more efficiently than halogen sources, producing less heat for an equivalent lighting task. That matters inside a cabinet, where thermal stress can affect the driver, wiring and surrounding materials.
A cabinet used for grooming is usually operated frequently, so lower consumption has a practical advantage. However, don't compare products solely by watts. Confirm that the lower-powered cabinet delivers useful lumens, suitable colour quality and even illumination across the face.
At an illustrative usage rate of three hours per day, a 50,000-hour rated life represents roughly 45.7 years of operating time before reaching that stated rating. The calculation is only a benchmark. Heat, switching cycles, driver quality, ventilation and installation conditions affect real-world service life.
The driver determines whether the cabinet is serviceable
Manufacturers sometimes quote the lifetime of the LED chips while the driver remains the component most likely to need attention. Ask whether the driver is replaceable and accessible without destroying the cabinet or removing finished tiles.
Look for:
- Replaceable driver: A serviceable driver can prevent a complete cabinet replacement when the power supply fails.
- Thermal management: Aluminium profiles and sensible ventilation help move heat away from the LED assembly.
- Maintained output: A specification should clarify whether the claimed performance relates to initial output or expected output over time.
- Dimming quality: Flicker-free dimming is more useful than a touch control that only changes brightness harshly.
A cheap cabinet with a sealed, non-serviceable driver can cost more to own if the entire unit becomes disposable. Spend the budget on the electrical core, diffuser, driver access and thermal design before paying for novelty controls.
Trade Sourcing and Installation Best Practices
A smooth trade installation starts before the cabinet reaches site. The builder or designer should approve the exact model, finish, dimensions, electrical schedule and delivery timing while the wall and tile plan can still change.
Begin with procurement. Confirm stock, lead time, carton dimensions and whether the supplier supports trade purchasing. Open the package promptly on delivery and photograph the mirror, frame, corners, hinges and electrical accessories before the cabinet enters storage. Transit damage becomes harder to resolve once the packaging has been discarded or the unit has been moved between trades.
Coordinate the rough-in before waterproofing and tiling
Give the electrician the manufacturer's installation instructions before rough-in. Confirm the cable route, mounting height, driver position, isolation method and any separate supply required for a demister or internal outlet.
The cabinet should be checked against the finished wall, not only the framing. The tiler needs the final cabinet dimensions and elevation so the cuts, grout lines and feature tile alignment support the mirror. If the unit is recessed, the cavity and backing must be complete before waterproofing stages are closed.
A practical sequence is:
- Approve the product: Confirm the cabinet, finish, dimensions, accessories and compliance documents.
- Set out the elevation: Mark the vanity centreline, cabinet edges, tile joints and finished heights.
- Complete electrical rough-in: Have the licensed electrician verify the supply, protection and connection method.
- Tile and finish carefully: Protect the mirror location and keep the mounting surface flat.
- Install and test: Check doors, shelves, demister, lighting levels, switches and any internal outlet.
- Handover documentation: Keep the installation instructions, electrical paperwork and warranty information with the project records.
For adjacent mirror choices, compare the visual and functional approach in the guide to the LED arch mirror, but don't substitute an aesthetic reference for electrical approval.
Trade businesses should also document completed work with clear project photographs and service descriptions. Guidance on optimizing Google Business Profile for electricians can help electrical contractors present their bathroom lighting capability accurately to local customers without making unsupported compliance promises.
Tiles Mate Pty Ltd offers Melbourne homeowners and trade professionals curated porcelain, natural stone, mosaic and flooring options, with samples, design advice and trade sourcing through TilesMate Pro. Visit Tiles Mate Pty Ltd to coordinate tile colour, finish and format with an LED shaving cabinet that performs safely and looks intentional.