




Vertical Stack Subway Tiles: Size, Grout and Rooms
by Shivam Tayal 14 Nov 2026 0 Comments
Two shower walls can wear the same white subway tile and still look nothing alike a year later. One reads as a clean, deliberate grid. The other reads as a grid that got away, with grout lines that lean a few millimetres across the height of the wall.
The difference is rarely the tile. It's the layout, the joint width, and what sits behind the tile. So before you fall for a colour, ask the less comfortable question. What is the tile doing on that wall?
For a vertical stack, the answer is narrower than most renovation videos suggest. The tile is the finish. It is not the waterproofing, it is not a way to straighten a crooked wall, and it is not forgiving of a rushed set-out. Understand those three limits and the pattern becomes one of the most dependable looks you can put into a Melbourne bathroom, kitchen or laundry. Ignore them and the same pattern displays every error at once.
What a Vertical Stack Actually Does
A vertical stack turns subway tiles into a precision grid. Each tile sits directly above the one below it, with no sideways offset. The grout lines run continuously up the wall, while the tile's long edge runs vertically. In a running bond, by contrast, each course shifts sideways, like bricks.
That regular grid gives the wall a taller, more ordered feel. Its effect depends on the tile size and the wall around it: vertical lines can draw the eye upward, but they cannot change the room's actual dimensions.
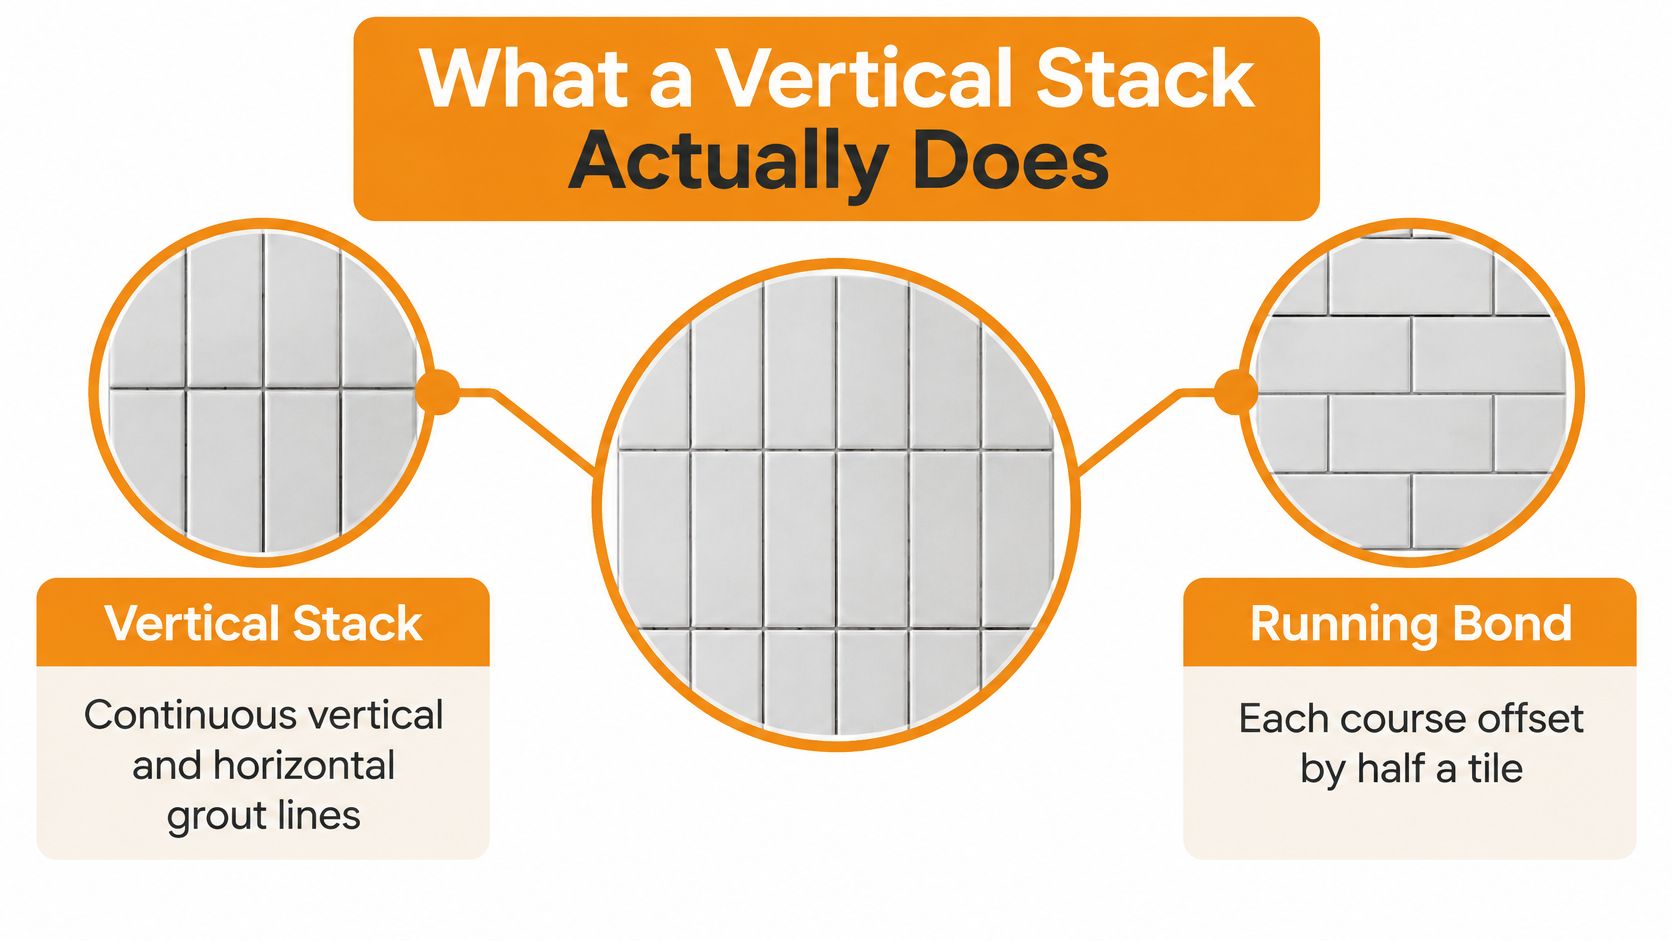
Small alignment errors stand out because the joints form long, uninterrupted lines. A slight lean that might disappear in a staggered pattern can become obvious across a stack, much like a crooked column in a ruled grid. Careful setting-out is part of the look, not an optional finishing touch.
The pattern is contemporary; glazed wall tile has a longer history in Australian public buildings, where washable surfaces and reflected light are useful. Today, a vertical stack gives that familiar material a more geometric arrangement. It remains a finish layer only: the tile does not replace waterproofing or correct an uneven wall.
Sizes Finishes and Grout Joints to Choose
Lock the size and the joint before you fall in love with a colour. The format sets how many cuts the set-out will need, and the joint width decides how loud every later decision becomes.
| Tile size | Look on the wall | Best use | Grout joint | Finish |
|---|---|---|---|---|
| 75 × 300 mm | Tall modern grid with fewer cuts | Showers, splashbacks, laundries | About 1.5 mm if pressed or rectified | Gloss for light, matt to hide spots |
| 50 × 200 mm | Denser vertical lines, smaller scale | Powder rooms, niches, short returns | 1.5 to 2 mm if pressed | Gloss; avoid heavy texture |
| 100 × 300 mm | Calmer stack, stronger verticals | Feature walls, long laundry walls | About 2 mm for pressed tile | Matt or satin |
| 75 × 150 mm | Classic subway proportion on end | Half-height bathroom walls | 1.5 to 2 mm if pressed | High-gloss white or coloured gloss |
| Extruded subway | Softer edges and slight size variation | Utility walls that can take a wider joint | Up to 6 mm where extruded tile allows | Matt; set the joint before ordering |
Which row to pick
75 by 300 mm is the modern Australian default. It's tall enough to build a clean grid quickly, and short enough that a standard 900 mm shower wall doesn't end up with a sliver at the ceiling. If you're tiling one bathroom and want the pattern to read immediately, start there.
Reach for 50 by 200 mm when the wall is short, or when a niche or a narrow return needs a denser rhythm so the grid doesn't dissolve into two lonely columns. It also suits powder rooms, where you're looking at the wall from close range.
100 by 300 mm does the opposite job. Fewer joints across a long laundry wall or a feature panel reads quieter and more architectural, and it hides minor substrate variation better than a narrow format because there's less grout to align.
Turning a classic 75 by 150 mm subway on end gives you the traditional proportion with a graphic tilt. It suits half-height walls and older bathrooms where a full-height grid would feel too contemporary.
Why the joint width isn't a free choice
Pressed tiles, particularly rectified ones cut to perfectly square edges, will take a tight joint because their edges are sharp and their size is consistent. Extruded tiles have rounder edges and small dimensional variation, so the joint usually needs to open up to keep the lines looking straight. Specify that width with the manufacturer or supplier rather than copying a photograph, because the photograph tells you nothing about the tile's edge.
Finish then decides how the wall behaves in use. Gloss bounces light around a windowless bathroom and makes a small room feel brighter, but it shows water spots and every wipe. Matt hides spots and reads softer, which suits laundries and utility walls where nobody is styling the room.
The rule that saves arguments: a narrow joint makes the stack read as one continuous panel; a wide joint turns every line into a feature. Decide which of those two walls you want before the tiler arrives.
Once the size and joint are fixed, colour gets much easier, and our guide to the best grout colour for white tiles picks up exactly there.
Rooms That Gain From the Stack
Walk a house in the order most renovations get tiled and each room answers a different question about whether the stack earns its place.
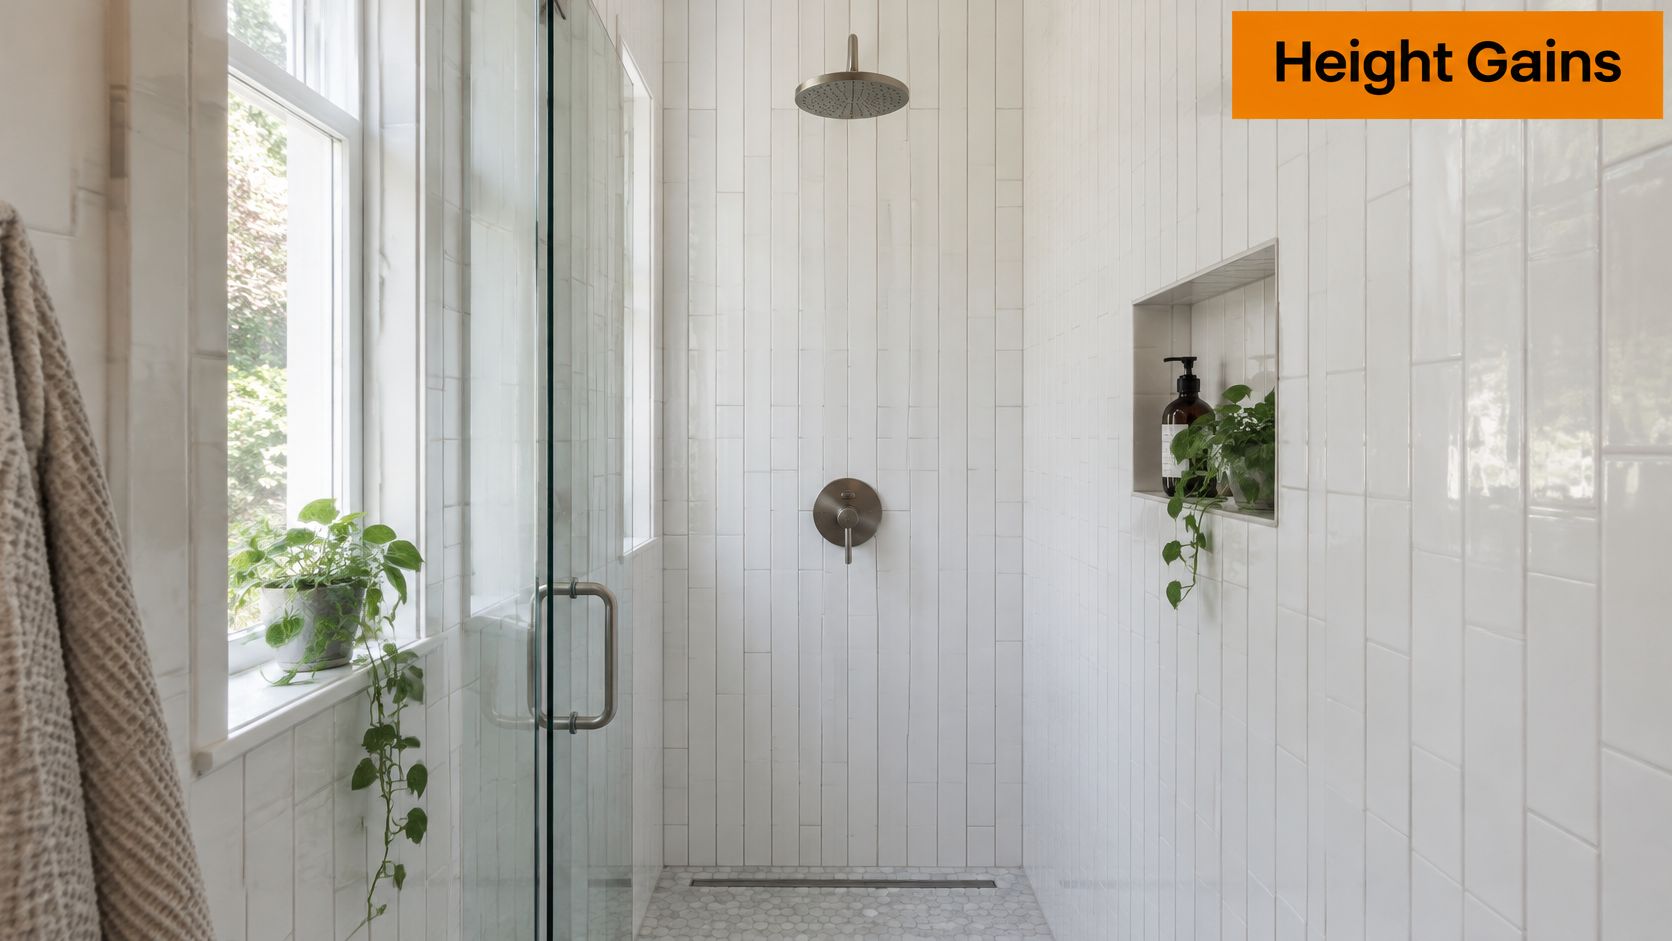
The shower gains most when the stack runs full height. Pale gloss plus continuous vertical joints makes a 900 mm footprint feel considerably less compressed. The limit is the floor. Subway is a wall format, and a wet floor needs a slip-rated surface, which in most residential bathrooms means a matt or lappato finish that stays easy to clean while offering enough grip.
The kitchen splashback is the cleanest use of the pattern in the whole house. Run it from benchtop to the underside of the overhead cabinets and the cabinet line hides your top cut, while the vertical joints echo the cabinet stiles. For how the tile meets benchtop, rangehood and window, modern kitchen splashback tiles covers the junctions that catch people out. Stop the tile at a deliberate line rather than letting it die into a random patch of plaster.
Here's the same principle applied to a narrow vertical strip, which is where this layout does its best work.
The laundry wants a matt stack to roughly door height. Spray, detergent and wet hands need a washable surface, and nobody needs showroom shine next to the dryer.
Powder rooms and small ensuites with little natural light gain the most from gloss, because each vertical joint catches and returns whatever light gets in.
A half-height wall in a family bathroom, stopped on a trim or shadow line, gives you the graphic look without tiling every square metre in the room.
Where the stack fights you
- Out-of-plumb old walls: a stack makes the lean obvious, where running bond would disguise it.
- Floors: wrong format, wrong slip rating, wrong place for a wall tile.
- Tiny patches between mismatched finishes: the grid has nothing to align to and reads as a repair.
- Very short splashbacks: if you can only fit one or two courses, the vertical pull disappears.
The test before you commit is simple. If you can name the top boundary and the side boundaries of the tiled area, the room is ready for this layout. If the tile is expected to stop wherever it runs out, it isn't.
Colours Joinery and Metals That Pair
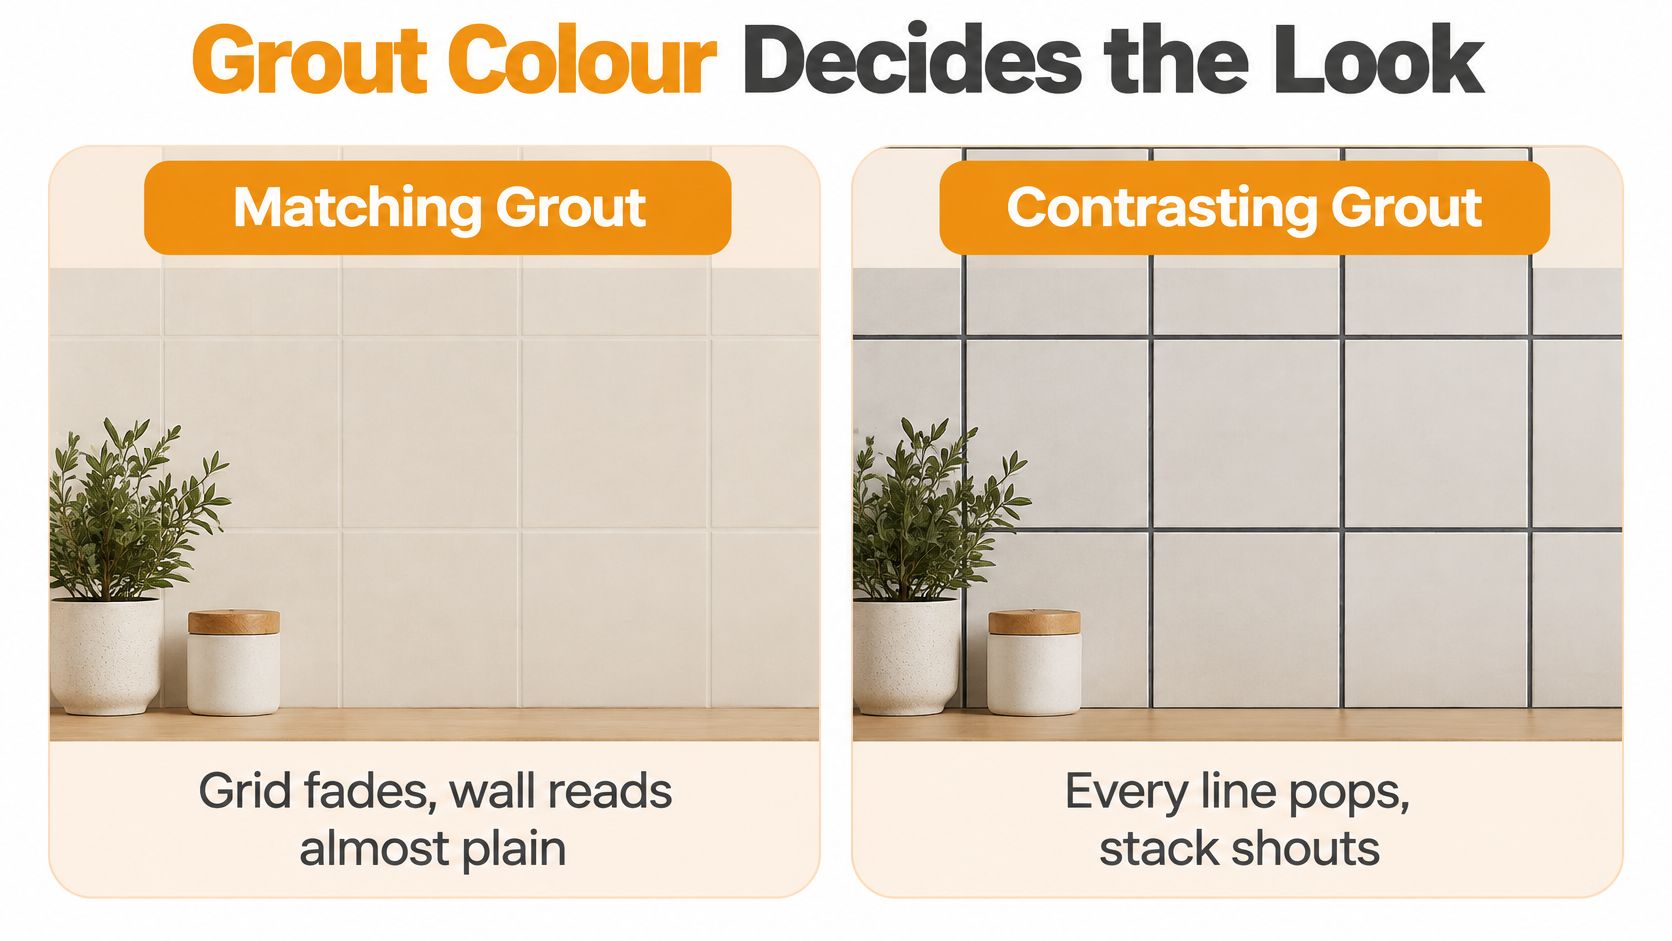
Grout colour, not tile size, decides whether the stack whispers or shouts. A grout close to the tile body quiets the grid until the wall reads almost plain. A contrasting grout turns every joint into a drawn line, which is striking on one feature wall and exhausting across a whole bathroom.
The pairings that hold up
| Wall colour | Grout tone | Joinery | Metal |
|---|---|---|---|
| Crisp white gloss | Warm white or light grey | Timber or soft grey flat-panel | Chrome or brushed nickel |
| Bone or warm white matt | Matching bone | Oak or walnut | Aged brass |
| Soft sage or blue-green | Slightly deeper than the tile | White shaker | Unlacquered brass |
| Charcoal or black gloss | Charcoal to soften, light grey for a graphic grid | Pale timber or white | Matte black or chrome |
| Marble-look white | Grey close to the veining | Warm white or oak | Brass or nickel |
White gloss with a warm white or light grey grout, timber or soft grey flat-panel joinery and chrome or brushed nickel is the safest combination in a small bathroom. Nothing competes, and the vertical lines do the work on their own.
Bone or warm white matt with a matching bone grout lets the tile recede completely, so oak or walnut joinery and aged brass carry the warmth instead. This is the combination that stops a modern stack feeling cold.
Soft sage or blue-green with grout a shade deeper than the tile, white shaker doors and unlacquered brass reads classic rather than trend-led. The deeper grout keeps the grid legible without turning it into a stripe.
Charcoal gloss needs a decision. Charcoal grout softens the grid into a near-solid dark surface. Light grey grout makes the grid the entire point. Both work, but they produce different rooms.
Watch the cleaning maths. Pure black grout on white tile in a shower looks sharp on day one and shows every missed wipe from day thirty onward. If the wall is in a wet area, ask yourself who cleans it and how often.
Marble-look white is the one wall that needs restraint. Choose a grey grout close to the veining so the stack doesn't fight the stone pattern underneath.
Then pick one contrast only. Either the grout stands out or the metal does. Doing both at once is what makes a carefully chosen wall look noisy.
Wet Area Limits and Everyday Care
Can a perfectly straight stack of subway tiles keep a shower dry? Only as a finish. Water treats cement grout the way it treats a fine sieve: the joints look closed, and moisture still travels through them into the wall behind. Vertical stack subway tiles are the finish layer, not the waterproofing system, and narrow continuous joints can look sealed while water passes straight through them.
The National Construction Code permits tiles on walls when they're used with an appropriate substrate listed for wet-area construction. Australian tiling guidance states plainly that a tiling system without a membrane is not waterproof, as set out in the NCC wet area waterproofing provisions. The wall has to be designed and built as a compliant wet-area system before the first tile is fixed: a compatible sheet or masonry substrate, membrane detailing at junctions and penetrations, and room for movement. The pattern you choose does not change any of that. None of it can be added later without pulling tiles off.
Questions to ask before the tiler starts
AS 3740:2021 is the domestic reference for bathrooms, ensuites, laundries and shower recesses. It sets requirements for membrane coverage, substrate preparation, junction detailing and application methods. Shower-wall waterproofing is commonly specified to at least 1800 mm in height, and a floor with a waste needs a fall of at least 1:100, as summarised in this explanation of what AS 3740 requires under tiles. Ask who is applying the membrane, and when. Ask for photographs of the membrane before tiling, including the mixer and niche penetrations.
A few limits only become obvious once the tiles are already on the wall.
- Grout is not a movement joint. Corners, wall-to-floor junctions and the edges of penetrations need silicone, not cement grout.
- Retiling over a failed wall solves nothing. An attractive existing surface can hide a substrate that has already taken on water.
- Mixers and niches are the weak points. They need coordinated penetrations between tiler and plumber, not a hole cut after the fact.
If you suspect water has already been getting behind a wall, find hidden water leak detection is work for a plumber with moisture testing equipment. A tiler with a scraper cannot diagnose it.
Keeping the wall clean in a Melbourne bathroom
Condensation does more long-term damage than splashing. Where a bathroom has no natural ventilation, the building code requires a mechanical exhaust fan that discharges to outdoor air, and it should run long enough after use to clear humidity, so check the requirements with your builder or certifier. That airflow is what reduces the persistent humidity behind mould, grout discolouration and swollen moisture-sensitive wall linings.
Wipe gloss with a neutral cleaner. Keep acidic products away from cement grout. Reseal cementitious grout when water stops beading on it, and replace discoloured silicone rather than coating it. The tile is only the finish, so the habit that matters is looking after the membrane, the joints and the fan, not polishing the glaze and assuming the wall is dry.
How to Set Out a Straight Stack
How can a vertical stack stay straight from the first tile to the last? Treat it as a precision grid: small alignment errors show quickly along the continuous joints, so each step needs a clear reference line.
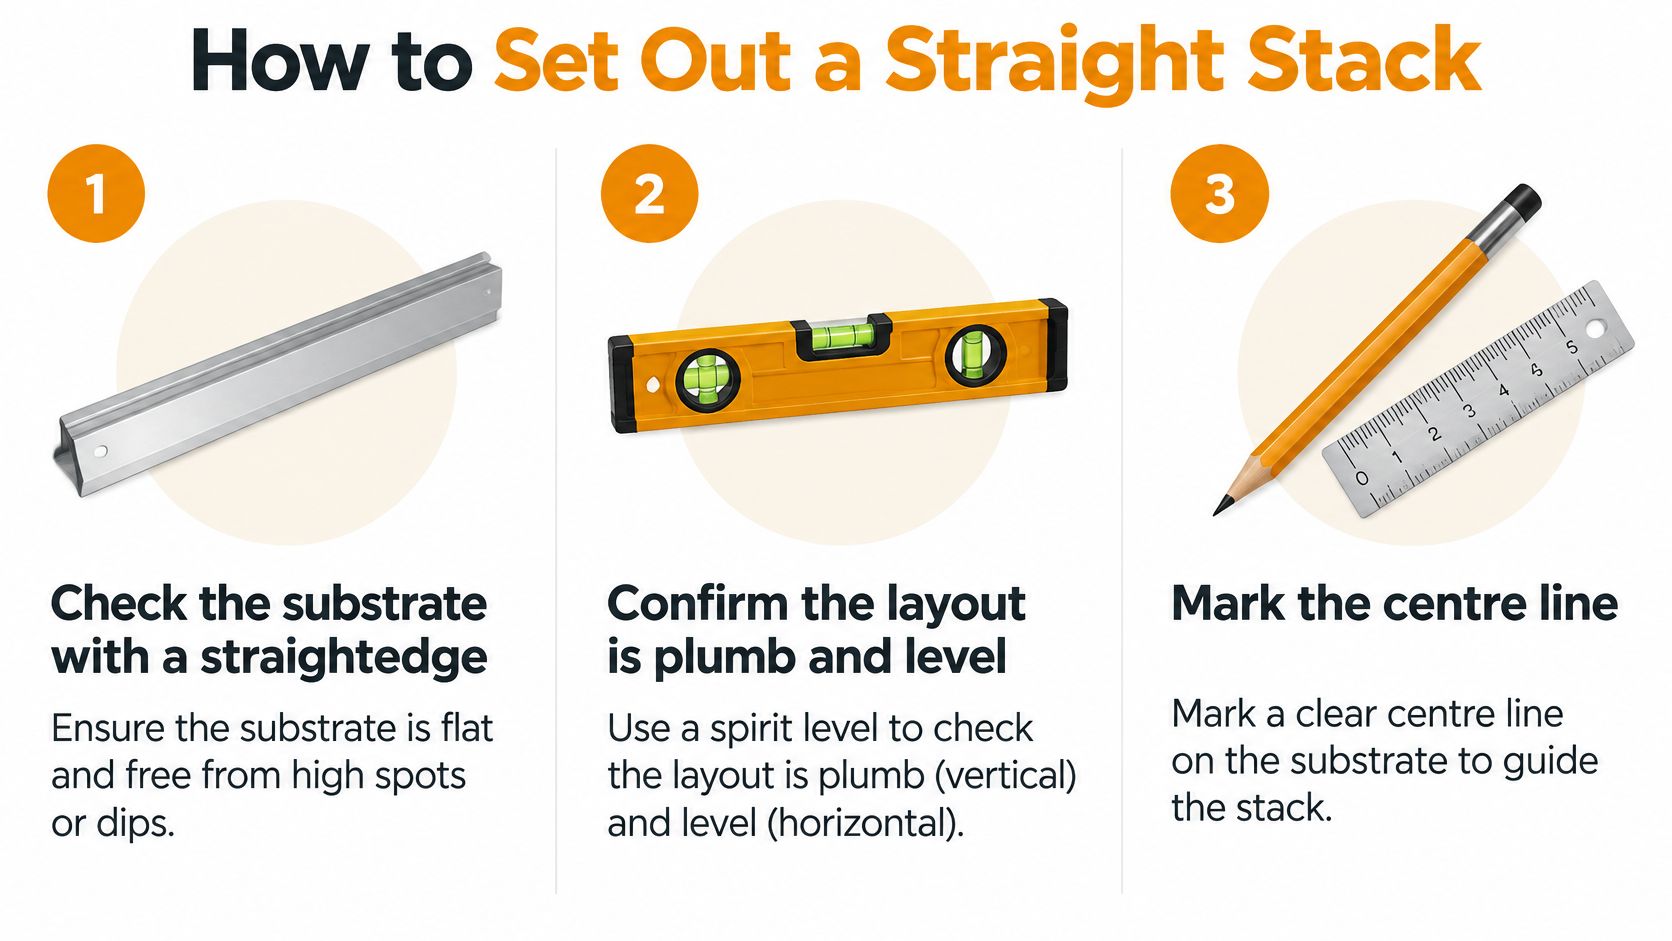
The pre-start checks, in order
- Check the substrate with a straightedge. Confirm the wall is flat and plumb before setting out. A tile follows the surface beneath it; adhesive and a neat grid cannot correct a wavy wall.
- Set a laser datum and balance the starting cut. Plan the layout around corners, door reveals and niches so the edges finish on a full tile or a deliberate cut, not a narrow sliver. Adjust the starting point before fixing the first course.
- Confirm the tile type and joint guidance. Joint width should suit whether the tile is pressed or extruded and follow the manufacturer's recommendations. Allow for the tile's actual size and edge, rather than assuming every nominally identical tile will line up the same way.
- Check how the joints will read. A small offset repeated from course to course can make a continuous vertical line appear to lean. Use the datum as the reference for each column, rather than relying on a hand-held spirit level.
- Use a levelling system only where it is suitable. On narrow formats such as 75 by 300 mm, clips and wedges can help control lippage when the substrate and adhesive allow them. They cannot pull a wavy wall straight.
- Aim for consistent adhesive coverage. Uneven coverage can leave tiles rocking or sitting proud, making lippage more visible along the vertical joints. Choose the notched trowel and wall tile adhesive suited to the substrate.
- Check batch measurements before ordering. Tiles from different batches can vary slightly in colour and size. Have your tiler verify the measurements before you place the order.
Practical rule: check plumb as each column is set. A straight first column does not prevent later columns from drifting.
Plan external corners, window and door reveals before laying begins. Bullnose or square-edge trims should suit the tile and joint, while the layout should leave a deliberate finish at each edge. The stack is the visible finish layer, not the waterproofing; the waterproofing system beneath it must do that job.
Order Samples Before You Lock the Layout
Australia's tile imports grew 15.58% from 2023 to 2024, according to 6Wresearch's Australia tiles market analysis. A wider shelf means more near-identical whites, and the difference between two of them usually comes down to edge, body and batch rather than colour.
Shortlist two sizes, not five. Take your 75 by 300 mm default plus one alternative from the table above, in the finish you've already chosen. Deciding between six formats is a way of avoiding the decision.
Look at physical samples on the actual wall. Morning light and evening light are different rooms. Hold the sample against the cabinet door and next to the tapware, because a screen will not show you gloss glare or tell you how loud the joint will read.
Then check the edge. Rectified tiles are precisely cut to have perfectly square edges, giving a sleek, modern and uniform look, and that's the edge a narrow stack needs. A non-rectified tile with slightly rounded edges and minor size variation needs a wider joint and more careful planning during installation.
Price it by the square metre and by the box, then add waste. About 10 per cent is the working figure, more where niches, windows and outlets create offcuts. As a current shelf example, White Gloss 75 by 300 mm Wave subway tile is $60 per square metre, which is $68.88 per box.
Write the joint width and the waterproofing scope down before you pay. Sample tiles can be ordered so you can see and touch them before choosing, and a free 15-minute design consult lets you check the format against your wall measurement rather than guessing from a photo. Trade buyers can ask about TilesMate Pro for B2B pricing.
Tiles Mate Pty Ltd is a Melbourne tile store in Truganina with subway tiles in 50 by 200 mm and 75 by 300 mm, sample tiles you can see and touch before you commit, and a free 15-minute design consult you can take from home. Bring your wall measurements, your ceiling height and the joint width you've settled on with your tiler, and we'll help you check the size against the set-out rather than the other way around. Visit Tiles Mate Pty Ltd to order a sample pack or book a consult before the first tile is fixed.