




Basin Mixer Buying Guide for Australian Bathrooms
by Shivam Tayal 23 Sep 2026 0 Comments
You've chosen the basin, vanity and tiles, and the room is starting to look like the bathroom you imagined. Then the mixer is installed. The spout sits too close to the rear edge, water hits the ceramic at the wrong angle, and every handwash leaves a fan of droplets across the stone. Or the fitting is so visually small above a vessel basin that the whole vanity feels out of balance.
A basin mixer is a small fixture, but it controls three things you notice every day: water direction, temperature and visual proportion. In a Melbourne renovation, it also needs to suit the basin type, vanity height, tile finish, plumbing layout and Australian compliance expectations.
Introduction to Basin Mixers and Why Choice Matters
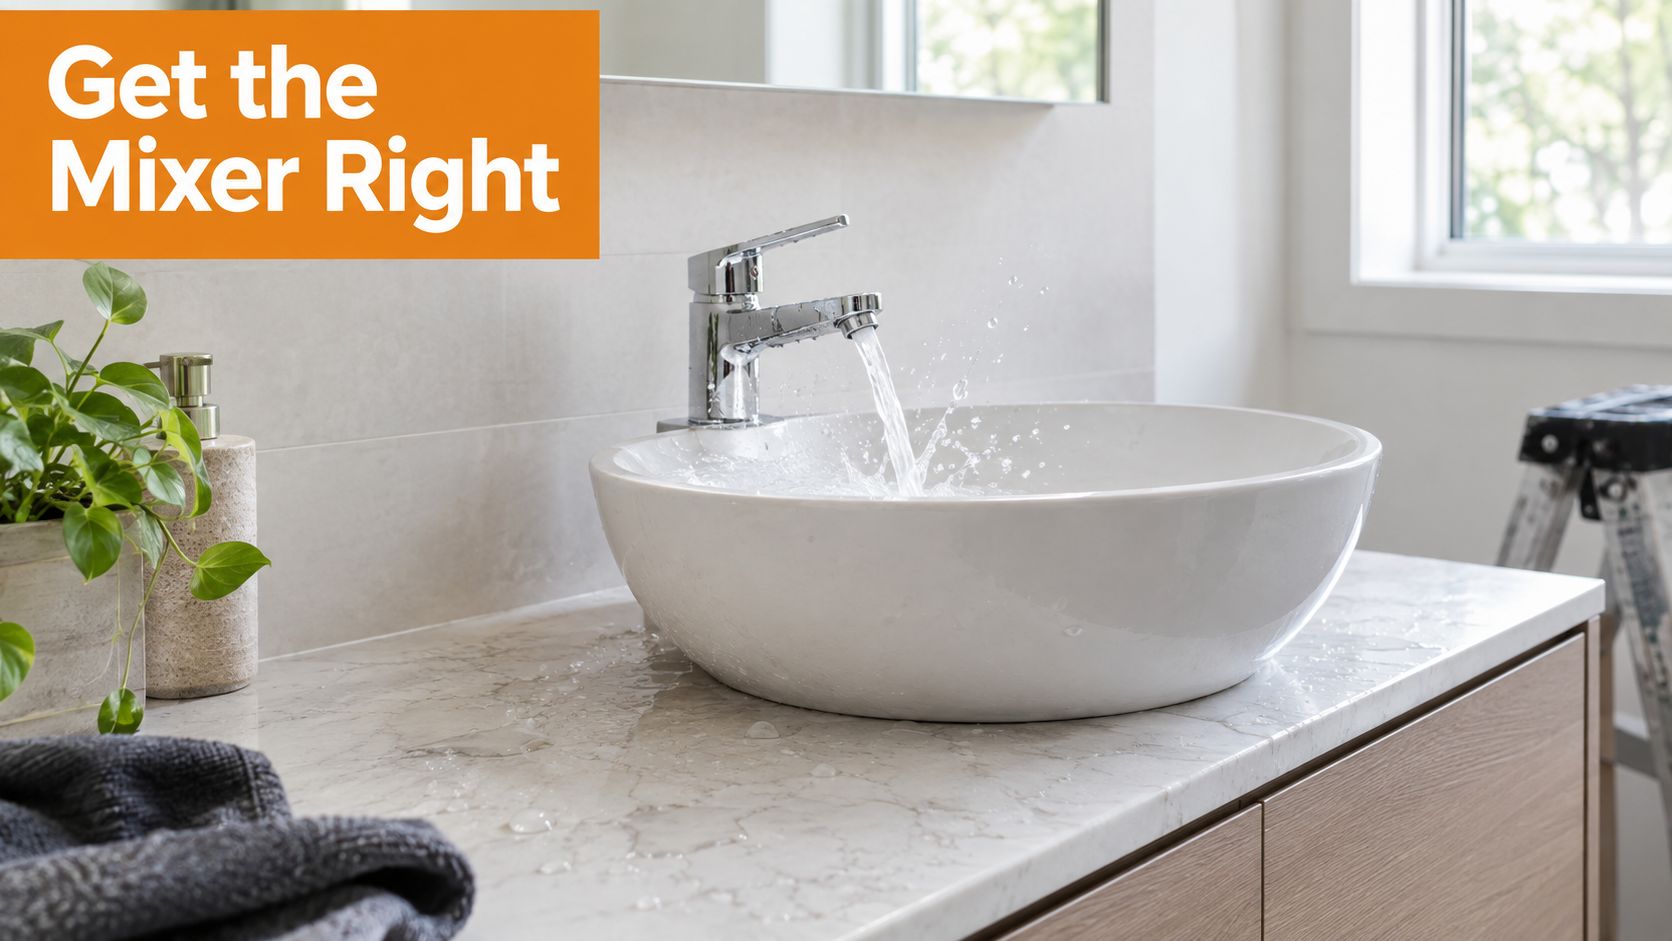
The easiest way to understand the importance of a basin mixer is to look at what happens when the match is wrong. A short, low spout can work beautifully with an inset basin, where the water outlet sits close to the bowl. Put that same mixer behind a deep vessel basin and the water may land too near the back, creating splashback and an awkward reach.
The opposite problem is just as common. A tall mixer placed beside a shallow basin can make the stream fall from an uncomfortable height. The fitting may look impressive in a showroom, yet feel harsh and noisy in daily use. The basin and mixer should behave like a spoon and bowl. Their shapes need to work together, not merely look attractive separately.
Practical rule: Choose the basin and mixer as a pair, then check how both sit against the vanity, splashback and tile layout.
For homeowners, the decision affects comfort and the risk of rework. For designers, builders and plumbers, it affects clearances, rough-in positions and whether the selected fixture can be installed without adapting the finished surface. A coordinated choice also protects the intended style. A sculptural waterfall mixer may suit a restrained stone scheme, while a high-contrast matt black fitting can become too dominant beside busy mosaic tiles.
Australian buyers also need to treat efficiency and compliance as part of the selection, not as paperwork added at the end. Australia's basin mixer market was estimated at US$74.671 million in 2021, projected to reach US$94.754 million by 2025 and US$149.181 million by 2033, with a projected 5.837% CAGR over the forecast period, according to Cognitive Market Research's basin mixer market report. That scale reflects an established fixture category used across renovations and new builds.
This guide focuses on the practical match. You'll learn what happens inside a mixer, how the main types differ, how to judge height and reach, what WELS ratings mean, and which checks prevent a stylish new vanity from becoming a daily source of frustration.
What a Basin Mixer Is and How It Works
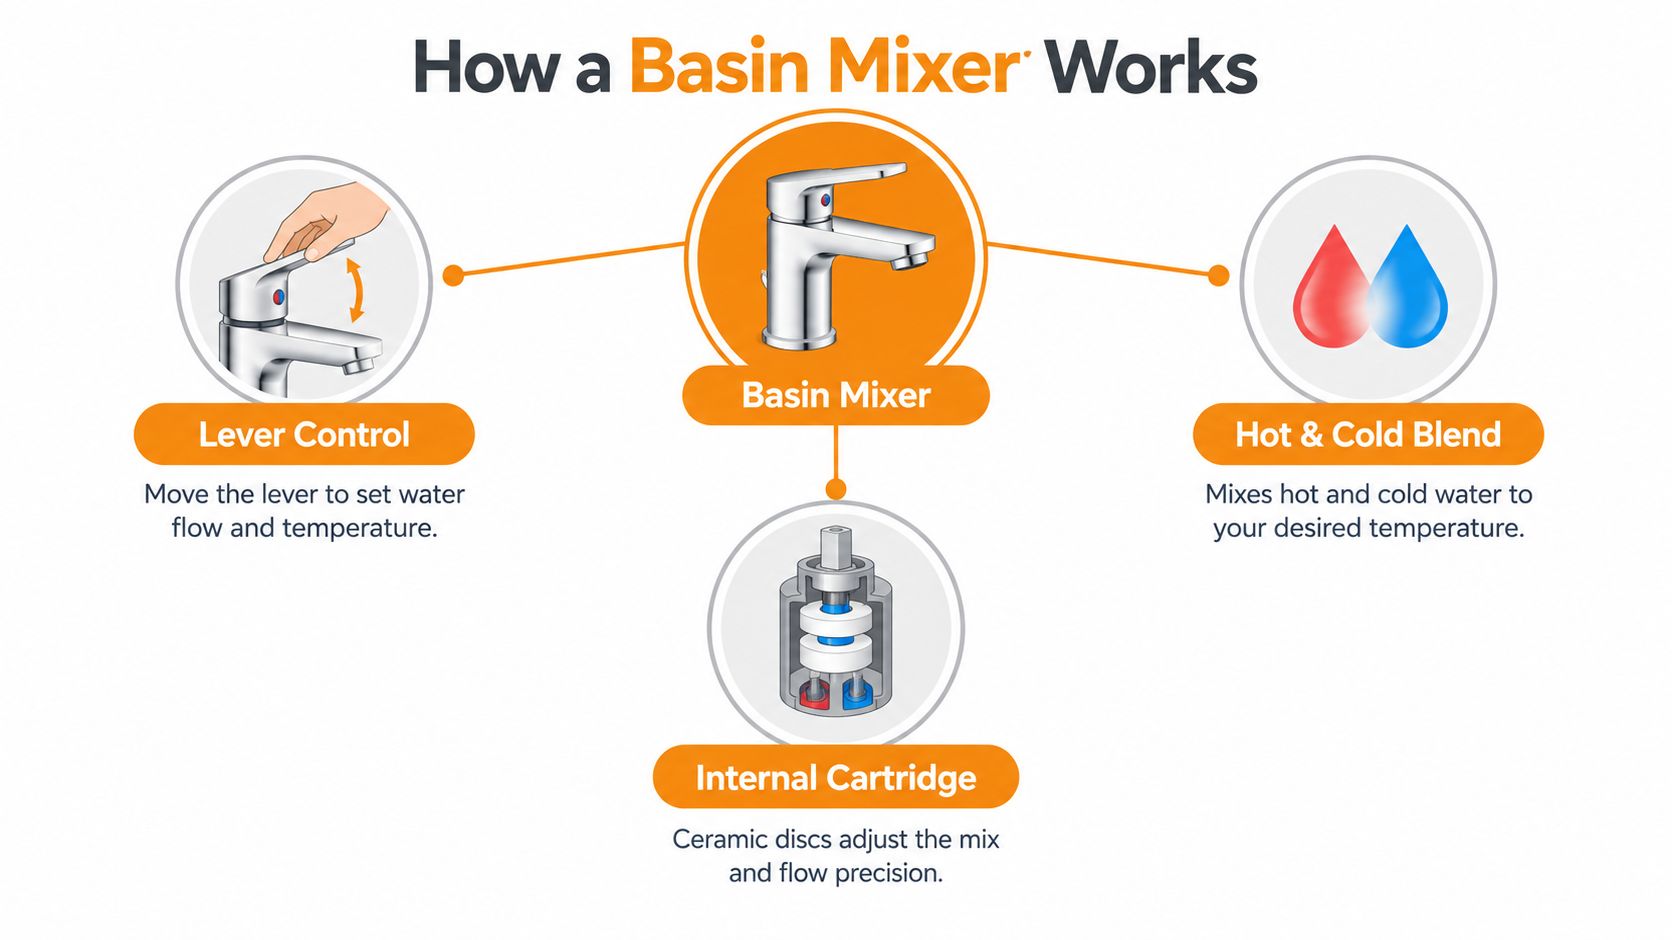
A basin mixer combines hot and cold water inside one tap body and delivers the blended stream through a single spout. Most familiar models use one lever, so you can lift it to start the flow and move it sideways to adjust temperature.
Think of the mixer as a traffic controller. One water line brings hot water, another brings cold water, and the cartridge controls how much of each stream enters the outlet. Move the lever towards one side and the blend changes. Lift it higher and the opening increases, allowing more water through.
The cartridge does the fine control
Inside the body, a ceramic disc cartridge manages both temperature and flow. Two precisely shaped ceramic surfaces move against each other. As the lever changes position, their openings line up differently, controlling the hot and cold mix and the volume leaving the spout.
This design gives the lever its familiar smooth action. It also explains why a mixer can become stiff or drip when the cartridge is worn, damaged or affected by debris. The cartridge isn't just a hidden replacement part. It is the component that determines how accurately the fitting responds to your hand.
Many Australian basin mixers use a 35 mm ceramic disc cartridge, a format associated with smooth modulation and wear resistance in local tapware listings. The Mondella Cadenza basin mixer listing at Bunnings shows how cartridge size, flow rating and local compliance information are commonly presented together.
The connection between the tap and the basin
A deck-mounted basin mixer sits through a hole in the basin or vanity top. Australian tapware guidance commonly references a 35 mm basin hole, which means the hole must be checked before ordering rather than assumed from appearance. The mounting surface also needs enough space for the fixing hardware and flexible supply connections below.
For a wall-mounted model, the mixer body connects to plumbing concealed behind the tiles. That arrangement gives a clean bench, but the outlet position, wall depth and finished tile thickness must be resolved before waterproofing and tiling.
Australian documentation commonly identifies tapware through AS/NZS 3718, WaterMark and WELS information where applicable. These markings help the buyer and installer confirm that the product is intended for use in local potable-water plumbing systems. A basin mixer therefore combines a simple user interface with a carefully specified internal mechanism and a regulated installation context.
Main Types of Basin Mixers Compared
Different mixer types solve different layout problems. A compact powder room may favour a straightforward single-lever model, while a vessel basin on a thick stone vanity may need a tall deck-mounted fitting or a wall-mounted alternative.
| Mixer Type | How It Operates | Best Basin Match | Watch Out For |
|---|---|---|---|
| Single-lever | One lever controls flow and temperature | Inset, semi-inset and many under-counter basins | Check lever clearance against the wall or splashback |
| Dual-handle | Separate hot and cold controls | Traditional or wider vanity layouts | Needs more bench space and coordinated adjustment |
| Wall-mounted | Body and spout connect through the wall | Vessel and minimalist basin arrangements | Requires accurate rough-in before tiling |
| Waterfall | Water exits across an open or shaped outlet | Feature vanities with a suitable bowl depth | The open stream can increase splash if the landing point is wrong |
| Sensor | An electronic sensor activates water flow | Public, accessible or hygiene-focused settings | Needs power or battery planning and maintenance access |
Single-lever mixers
The single-lever basin mixer is the practical default because it offers quick one-handed operation and a clean silhouette. It works well where the basin has a conventional tap hole and the user wants simple temperature control.
Dual-handle mixers
Dual-handle designs suit period-inspired bathrooms and layouts where separate controls are part of the visual language. They can also help create a more symmetrical composition, but the basin and vanity need enough width to prevent the fitting from feeling crowded.
Wall-mounted and waterfall options
A wall-mounted mixer frees the vanity surface and can look especially calm against large-format tiles. Its success depends on the outlet reaching far enough into the basin without placing the stream too close to the front or rear edge.
Waterfall mixers create a broader visual stream and can make a feature of handwashing. They need a basin with suitable depth and a landing area that won't turn the open flow into constant splash.
Sensor models
Sensor mixers reduce touch points and can suit specialist residential or commercial applications. They're less forgiving during a renovation because the installer must plan the power source, access and service requirements before the wall or vanity is closed.
For a broader look at tapware selection and bathroom coordination, this tapware guide for bathroom projects offers useful context. Shortlist by installation conditions first, then compare handles, profiles and finishes.
Materials Finishes Sizing and Style Matching
A good basin mixer needs the right internal construction, surface treatment and physical dimensions. The visible finish attracts attention, but the body, cartridge and connection details influence whether the fitting remains dependable after installation.
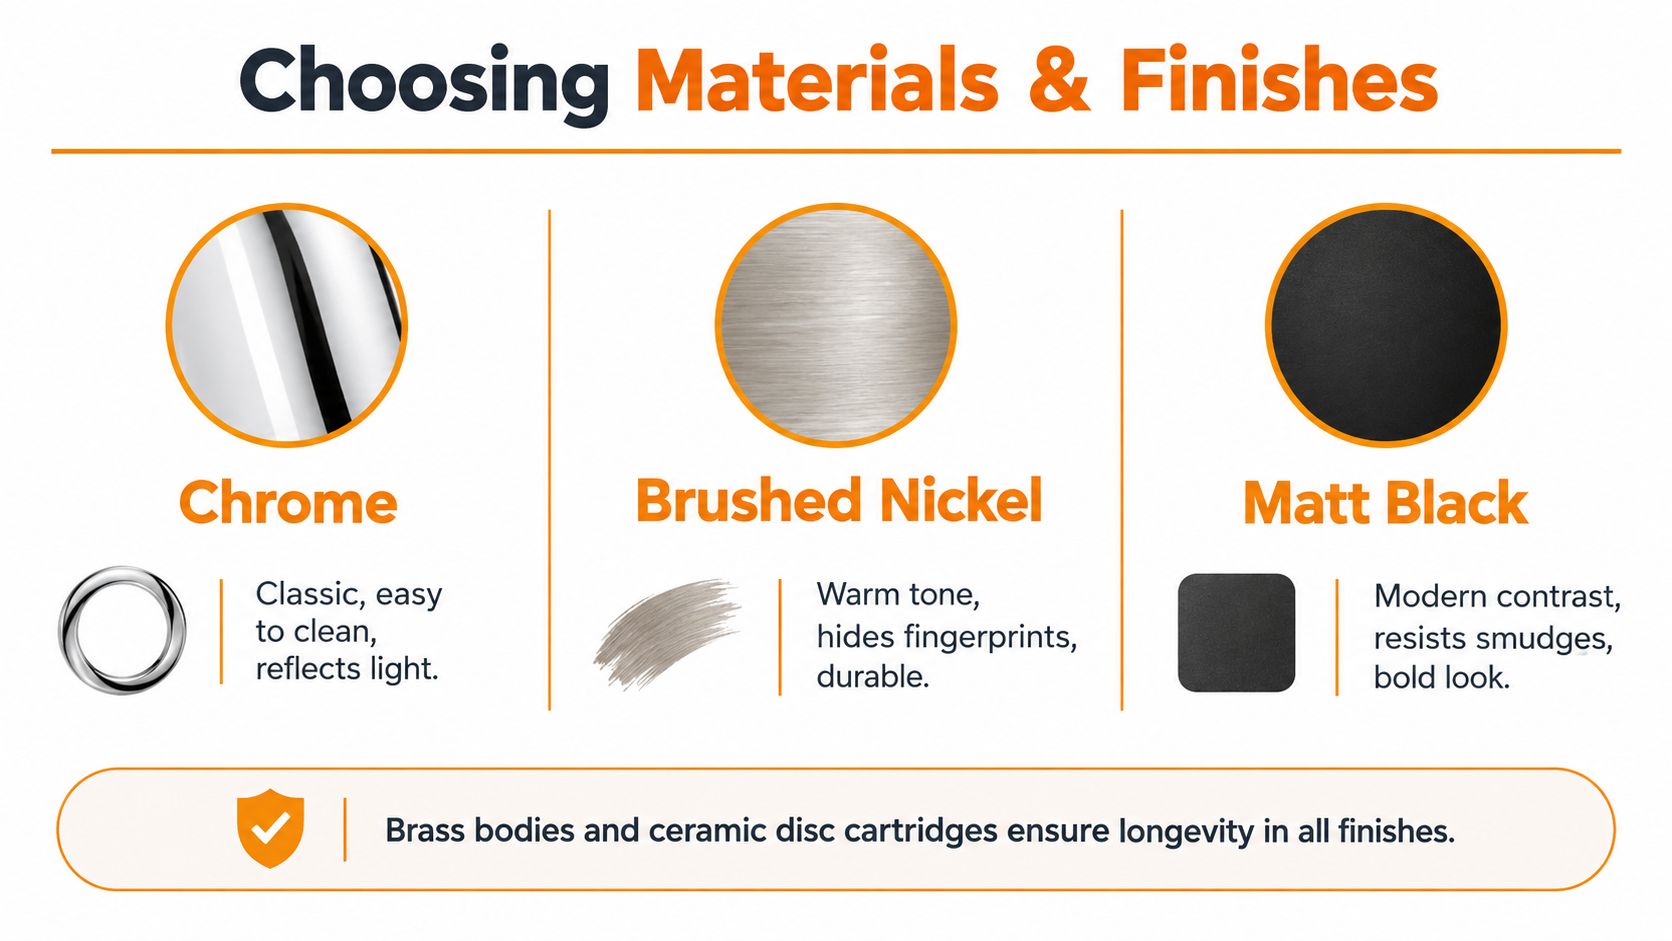
Brass bodies are widely used for tapware because they provide a solid base for machining and finishing. A ceramic disc cartridge controls the internal mixing action, while the exterior coating determines how the mixer responds visually to light, water marks and surrounding materials.
Match the finish to the room
Chrome reflects light and suits bathrooms with polished details, cool white surfaces or classic styling. It can make a compact room feel brighter, but it may show water spots clearly.
Brushed nickel has a softer metallic appearance. Its restrained texture works well with warm whites, timber-look vanities and stone with beige or grey movement. Matt black introduces strong contrast, especially beside white sanitaryware and pale marble-look tiles, but it should be repeated thoughtfully through handles, accessories or shower hardware.
Brushed brass brings warmth to a bathroom with cream grout, timber textures or warm stone. The surface should be cleaned according to the manufacturer's care instructions. Abrasive pads, harsh acids and unsuitable descalers can damage decorative coatings.
Let the tiles set the visual temperature
A Calacatta marble-look tile often contains crisp veining and a bright base. Chrome can reinforce a cooler, reflective scheme, while brushed brass can soften it and create a deliberate warm contrast. Kit-kat tiles bring rhythm through repeated narrow pieces, so a simple cylindrical mixer often prevents the wall from feeling visually overworked. Penny round mosaics already have a strong pattern, making finish consistency more important than adding another decorative shape.
For practical fixture coordination across kitchen and bathroom settings, the Kitchen Renovations Perfected showroom advice is a useful companion resource. The key lesson is to compare hardware samples beside tile, grout and vanity finishes rather than relying on a screen image.
Measure reach and height together
Spout reach is the horizontal distance from the mixer body towards the basin. Height is the vertical clearance between the mounting surface and the outlet. You need both measurements because a tall mixer isn't automatically a well-positioned mixer.
An above-counter basin usually needs a tall basin mixer, since the bowl raises the rim above the vanity. A short spout may leave the water falling behind the usable centre of the bowl. Conversely, excessive height can create a forceful fall and more visible splashing.
Check the product's spout projection, outlet height and total height, then compare those dimensions with the basin manufacturer's drawing. The Orbit basin tap can be considered alongside the basin profile and vanity top, not as an isolated finish decision.
Design check: Place the mixer, basin rim and wall tile sample in the same visual field. Scale problems become obvious before the tiles are fixed.
Plumbing Fit Water Pressure and Efficiency Explained
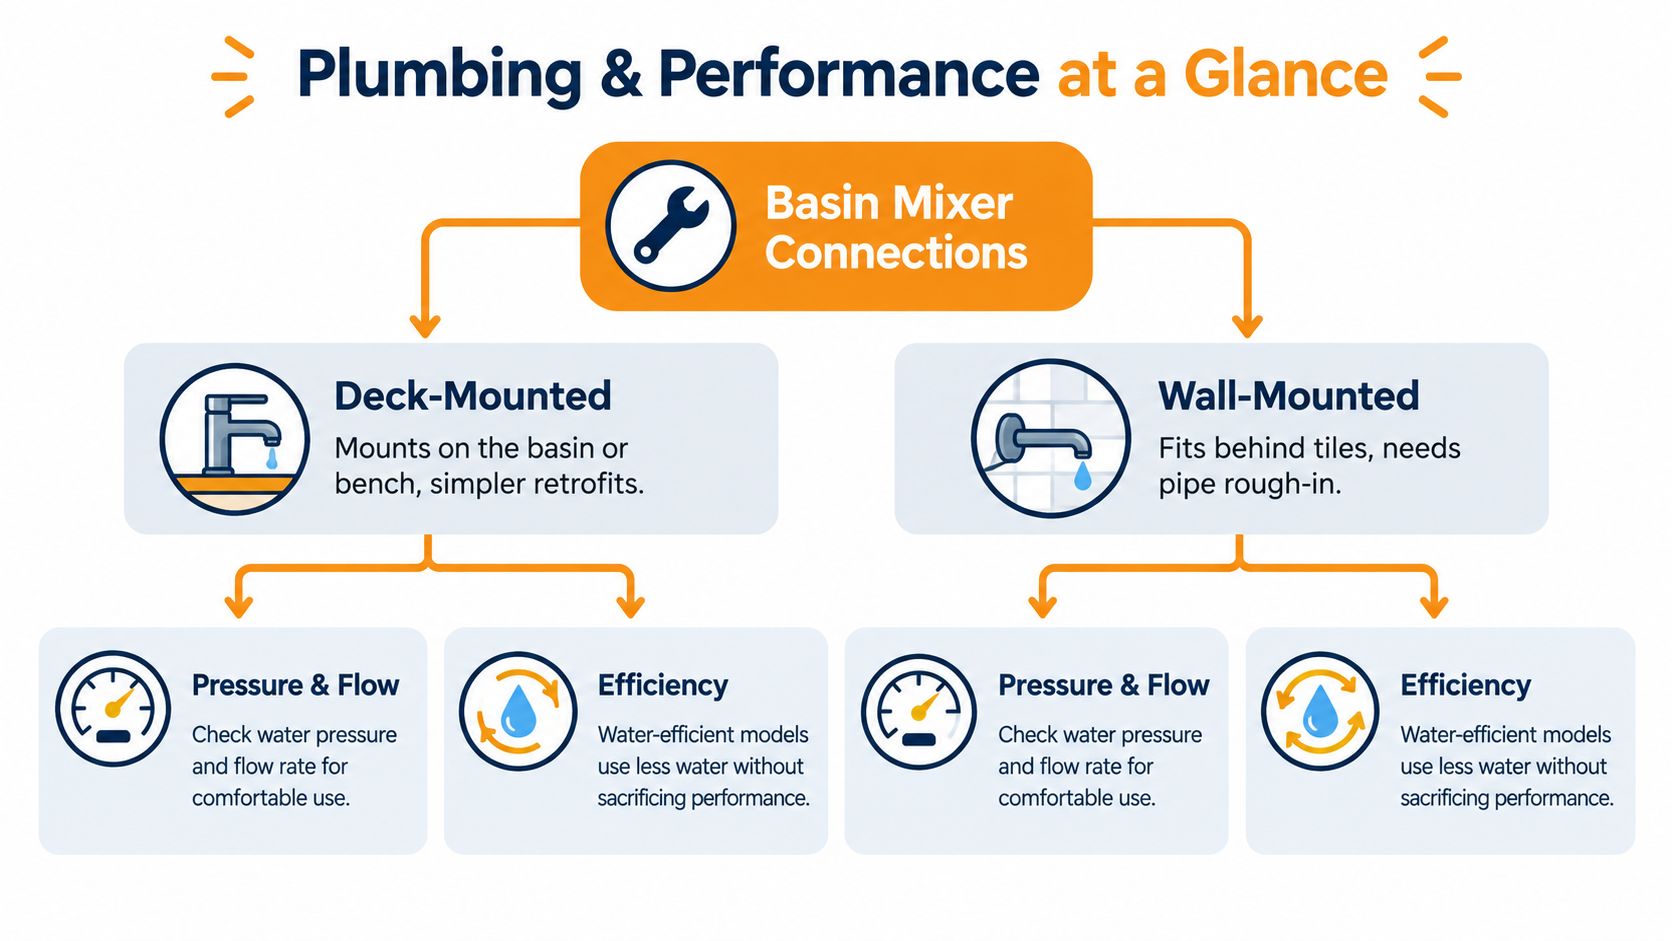
The most attractive basin mixer won't perform well if the plumbing position, pressure conditions or flow specification doesn't suit the room. Treat the selection as a sequence: identify the connection type, confirm the supply conditions, then choose the efficiency level that still gives comfortable everyday use.
Start with the fixing method
A deck-mounted mixer is installed through the basin or vanity top. It usually suits a renovation where existing pipework rises beneath the bench, provided the hole, bench thickness and underside clearance are compatible.
A wall-mounted mixer needs a concealed connection behind the finished wall. The plumber must set the pipework at the correct height and depth before waterproofing and tiling. The finished tile thickness matters because it changes where the trim and spout sit relative to the wall surface.
Flow rate isn't the same as comfort
WELS is mandatory for regulated basin mixers in Australia. Sellers must display WELS labels or equivalent product information under Australian Standard 6400:2016, and basin mixers are specifically included in the regulated product categories, as outlined in Australian WELS product information.
The star rating communicates flow performance. A common retail benchmark is a 4-star basin mixer at 7.5 L/min, while higher-rated local products can reach 6-star performance around 4.0 to 4.5 L/min, according to the same Australian WELS reference. Lower flow can reduce water demand and hot-water use, but the experience depends on the aerator, supply pressure, basin shape and the user's expectations.
A quality aerator can add air to the stream, making a lower-flow outlet feel fuller during handwashing or toothbrushing. That's why the highest star rating isn't automatically the best answer for every home. A large basin, modest pressure or users who prefer a stronger-feeling stream may need a carefully balanced option.
Make the decision room by room
Use the bathroom's daily pattern as the test. A rarely used powder room may suit a more conservative flow option, while a busy family vanity may benefit from a smoother, fuller stream that keeps handwashing comfortable. Ask the plumber to assess pressure and confirm whether the chosen mixer is suitable for the property's supply conditions.
Australian listings commonly pair WELS information with AS/NZS 3718 and WaterMark details. For a Victorian renovation, keep those compliance markers with the product documentation so the installer can verify the selection before fit-off.
Installation Checklist Maintenance and Troubleshooting
Most basin mixer problems begin before the tap is turned on. A short pre-install check can prevent a hole that doesn't align, a fixing nut that can't be reached or a spout that lands in the wrong part of the bowl.
Before the installer arrives
Confirm these details from the basin, vanity and mixer specifications:
- Basin opening: Check whether the basin has a pre-drilled hole and whether the mixer requires the commonly referenced 35 mm opening.
- Mounting thickness: Verify that the fixing kit suits the thickness of the vanity top or basin deck.
- Underside access: Leave room for the mounting hardware, flexible hoses and isolation valves.
- Basin geometry: Measure the distance from the hole to the bowl centre and compare it with spout reach.
- Finished wall position: For wall-mounted models, allow for waterproofing, adhesive and tile thickness before setting the outlet.
- Compliance documents: Confirm the product's AS/NZS 3718, WaterMark and WELS information where applicable.
During first fix, protect the selected tile edges and keep the mixer position visible in the set-out. During fit-off, the plumber should flush the lines, install the cartridge and aerator correctly, and check the hot and cold orientation before sealing around the base.
Simple care that protects performance
Wipe the surface with a soft cloth and mild cleaning solution, then dry it. Avoid abrasive pads, strong acids, bleach and aggressive descalers, particularly on matt black, brushed brass and other decorative finishes.
The aerator at the end of the spout can collect debris or mineral deposits. If the stream becomes uneven, remove and rinse the aerator if the manufacturer permits it. Don't force a concealed component or use a sharp tool that could damage the outlet.
For general background on diagnosing tap problems and the importance of correct repair methods, this guide to reliable bathroom faucet repair Vancouver provides useful maintenance context, even though local Australian compliance requirements still take priority.
Read the symptom before replacing parts
- Dripping after shut-off: Check the cartridge, seals and debris in the waterway.
- Stiff lever: Look for cartridge wear or restricted movement. Don't force the handle.
- Weak or uneven flow: Inspect the aerator, isolation valves and supply lines.
- Splashback: Recheck the spout height, reach, aerator and basin depth.
- Water around the base: Stop using the mixer until the connection and seal are inspected.
The bathroom fittings guide can help place basin mixers within the wider set of bathroom hardware decisions. A consistent care routine and accurate installation usually prevent the most disruptive call-backs.
Your Final Basin Mixer Buying Checklist for Victoria
Before ordering, bring the basin drawing, vanity measurements and tile sample together. A basin mixer should be approved only when the technical fit and the visual fit both make sense.
- Basin type: Identify whether the basin is inset, semi-inset, under-counter or above-counter.
- Height and reach: Confirm where the water will land, not just whether the mixer looks tall enough.
- Vanity and wall clearance: Check lever movement, splashback spacing and access beneath the top.
- Mounting method: Decide between deck-mounted and wall-mounted before waterproofing and rough-in.
- Flow performance: Compare WELS ratings and litres per minute, then consider aeration and household pressure.
- Compliance: Look for relevant WELS information, AS/NZS 3718 and WaterMark documentation.
- Finish coordination: Place the mixer beside the actual tile, grout, vanity surface and other hardware.
- Maintenance: Choose a finish and aerator that suit your cleaning routine and water conditions.
- Ordering support: Confirm stock, delivery timing and the availability of samples before the installer is booked.
For Melbourne and wider Victoria projects, coordinated selection can save more than a visual mismatch. It can prevent changes to the vanity top, wall rough-in or tile layout after the work has started. Tiles Mate offers $15 packs of five samples, a free 15-minute design consultation and TilesMate Pro trade pricing, giving homeowners and professionals a practical way to compare tile, vanity and tapware finishes together.
Tiles Mate Pty Ltd can help you coordinate bathroom tiles, mosaics, flooring and finishes with the basin mixer you're specifying, backed by Melbourne delivery, local expertise and trade sourcing support. Visit Tiles Mate Pty Ltd to order samples, arrange a design consultation or discuss your next bathroom project.