




Curved Vanities: Design, Sizing, and Installation
by Shivam Tayal 21 Oct 2026 0 Comments
You're standing in a compact Melbourne ensuite with a tape measure in one hand and a phone full of saved bathroom photos in the other. The existing rectangular vanity works, technically, but it crowds the doorway, catches your hip, and makes an already small room feel boxy and hard. A curved alternative looks softer in every image, yet you're not sure if it'll store enough, fit the plumbing, or survive daily splashes. That's the right question to ask, because the curve changes far more than the look.
What Curved Vanities Are
The problem first shows at the corners. In a narrow ensuite, a square vanity turns the path to the shower into a small negotiation, and a sharp benchtop edge sits exactly where you turn with a towel or help a child at the basin. The room hasn't changed size, but every hard angle makes it feel tighter. A curved design promises relief from that boxed-in feeling, although the promise only holds if the shape suits how you move and store things.
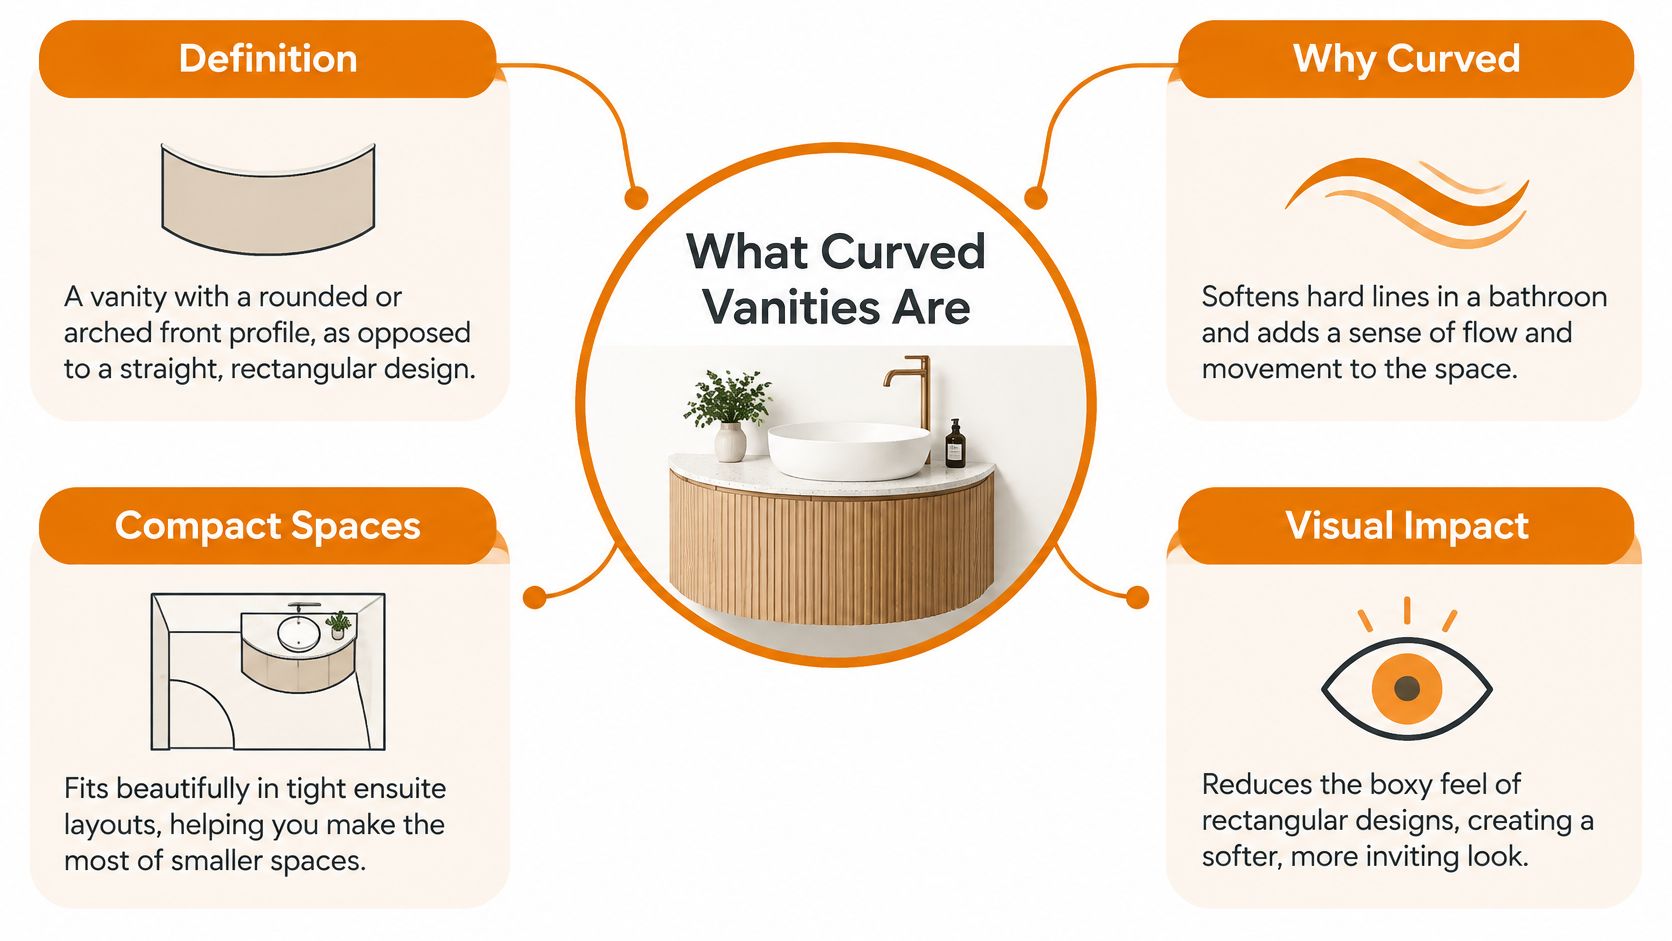
Curved vanities are vanities with a rounded front, a curved top edge, softened corners, or an arched, furniture-like silhouette instead of a straight rectangular face. Some designs curve gently across the full front. Others keep a mostly straight cabinet and round only the ends, while more sculptural units wrap the cabinet and top in one continuous convex profile. The basin may sit on top, sit partly recessed, or form part of an integrated top.
More Than a Rounded Corner
Don't confuse a fully curved vanity with a rectangular unit that has a safer edge profile. A small radius on a benchtop changes feel and cleaning, but it does little to alter circulation or internal storage. A deep convex front changes the cabinet footprint, the drawer shape, the basin position, and often the way the top must be made. That distinction matters when you're comparing products that look similar in a thumbnail.
- Rounded-end vanities: Straight through the centre, with curved returns that ease movement past either side.
- Convex-front vanities: The centre projects furthest into the room, creating a softer silhouette and a changing depth across the drawers.
- Arched or fluted designs: The curve is expressed in the door profile, ribbing, framing, or silhouette, sometimes with a less dramatic cabinet footprint.
- Semi-recessed curved units: The basin projects from a shallower cabinet, which can help in a powder room where floor space is scarce.
Australian bathrooms have moved from standalone porcelain basins toward integrated, furniture-like pieces with storage and a stronger influence on the room's style. Against tile, glass, stone, and metal, a rounded vanity becomes a visible architectural feature rather than a purely utilitarian box. That's why the shape deserves serious consideration, not because it photographs well, but because it can change movement, storage, installation, and daily comfort in ways a standard rectangle won't.
Judge the curve by what it does to clearance, drawers, and basin use, not by the render alone.
Benefits and Design Styles
The vanity earns its influence because you use it at close range, every day, and it usually faces the door. Reece's Australian bathroom research identifying the vanity among the four most important bathroom products found it was selected by 27% of respondents, behind the shower enclosure at 44%, tiling at 39%, and the bath at 35%. The same research recorded 31% of women ranking it among their most important products, compared with 22% of men. Those figures explain why a change in vanity shape has a disproportionate effect on whether a renovation feels considered or merely updated.
Practical Benefits You Can Feel
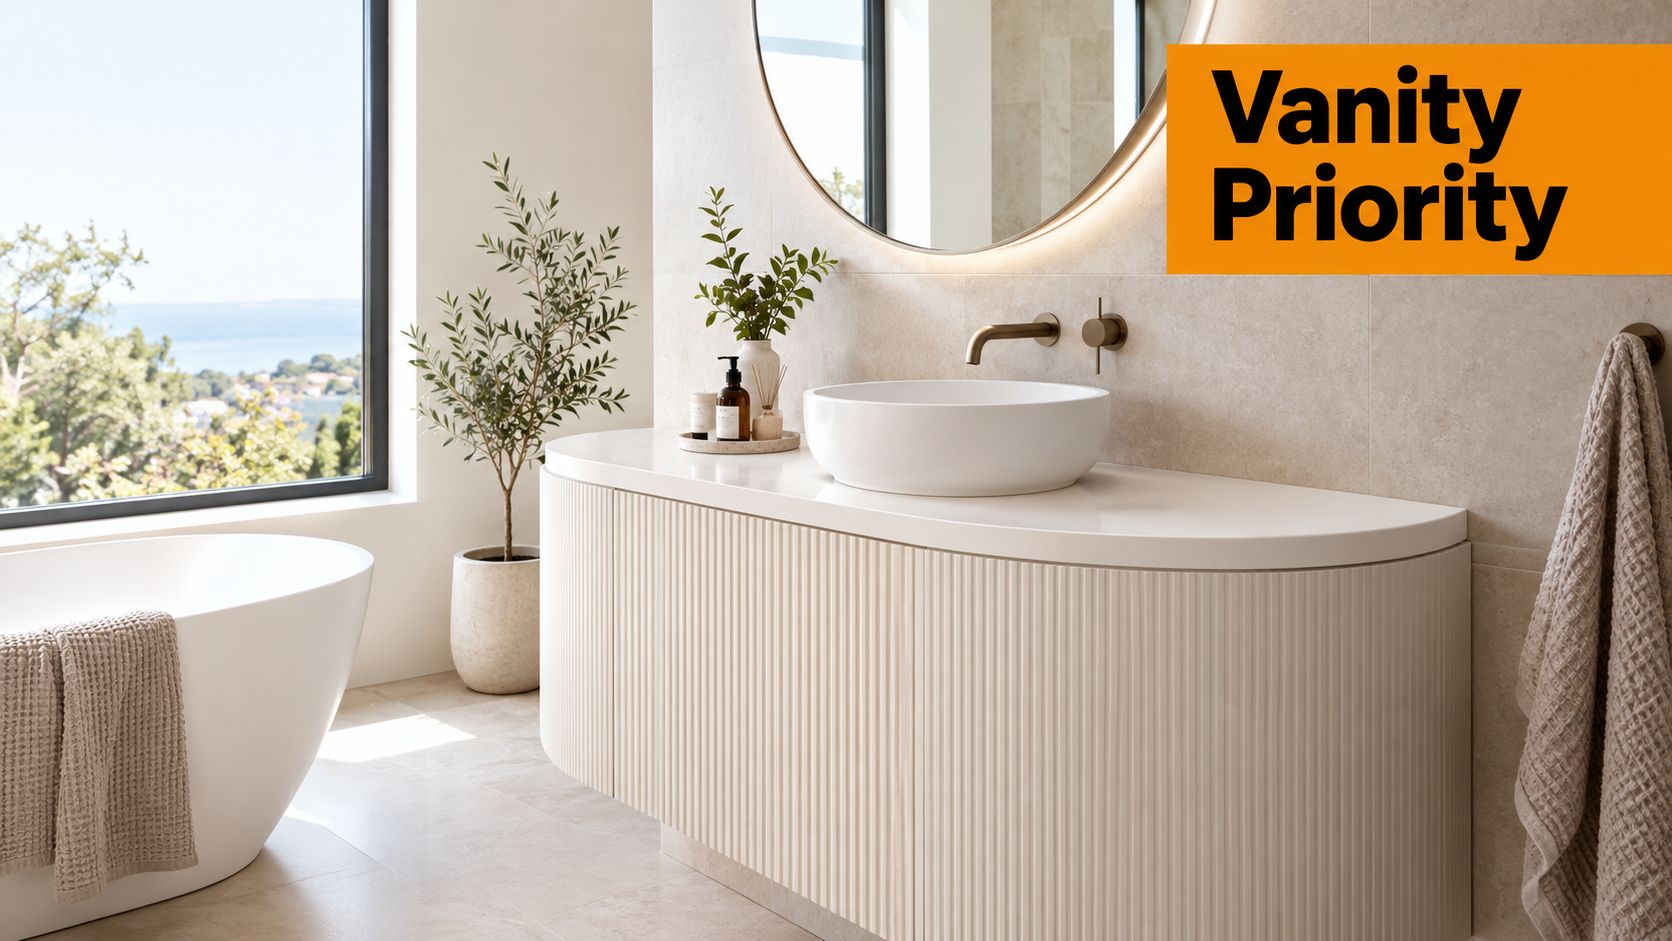
A curved front softens a room dominated by hard, flat surfaces. It can also improve corner circulation because there's no projecting square corner to step around or catch clothing on. In a tight ensuite, rounded ends may make the route between door, toilet, and shower feel less interrupted, particularly where the vanity sits beside a thoroughfare. That benefit is spatial and tactile, not just visual.
The furniture quality matters too. Fluted fronts, arched framing, timber-look finishes, and stone tops can make the unit read as a crafted piece rather than built-in plumbing cabinetry. If you're weighing the vanity against the wider room palette, the Epic Remodeling bathroom remodel guide is useful background for thinking about how one focal piece influences the rest of the layout. Use that kind of broad planning view before you commit to a silhouette.
- Flow in compact rooms: Rounded ends reduce abrupt pinch points beside doors and shower screens.
- Softer visual weight: A convex front breaks up long tile lines and can make a narrow room feel less rigid.
- Focal-point value: The profile gives a small bathroom character without relying on busy decoration.
- Style range: Curves suit contemporary, coastal, Art Deco inspired, and softer traditional schemes when the finish is chosen well.
Choosing a Style That Fits the Room
A subtly rounded vanity suits homeowners who want comfort without a strong statement. It keeps most storage and works with standard basins and mirrors, so it's often the safest first step away from a rectangle. A fully curved freestanding unit makes a bolder furniture statement and can look superb in a larger bathroom, but it asks more of the floor area and cabinetmaking. Wall-hung curved vanities keep the floor visible and suit ensuites where visual lightness matters.
Semi-recessed designs deserve attention in powder rooms. The cabinet stays shallow while the basin projects enough to use comfortably, although storage will be limited and splash control needs thought. Arched silhouettes and ribbed fronts sit at the decorative end of the range, giving you the language of curves even where a deep convex cabinet would be impractical. Choose based on room width and storage habits first, then let the finish carry the personality.
Materials and Finishes
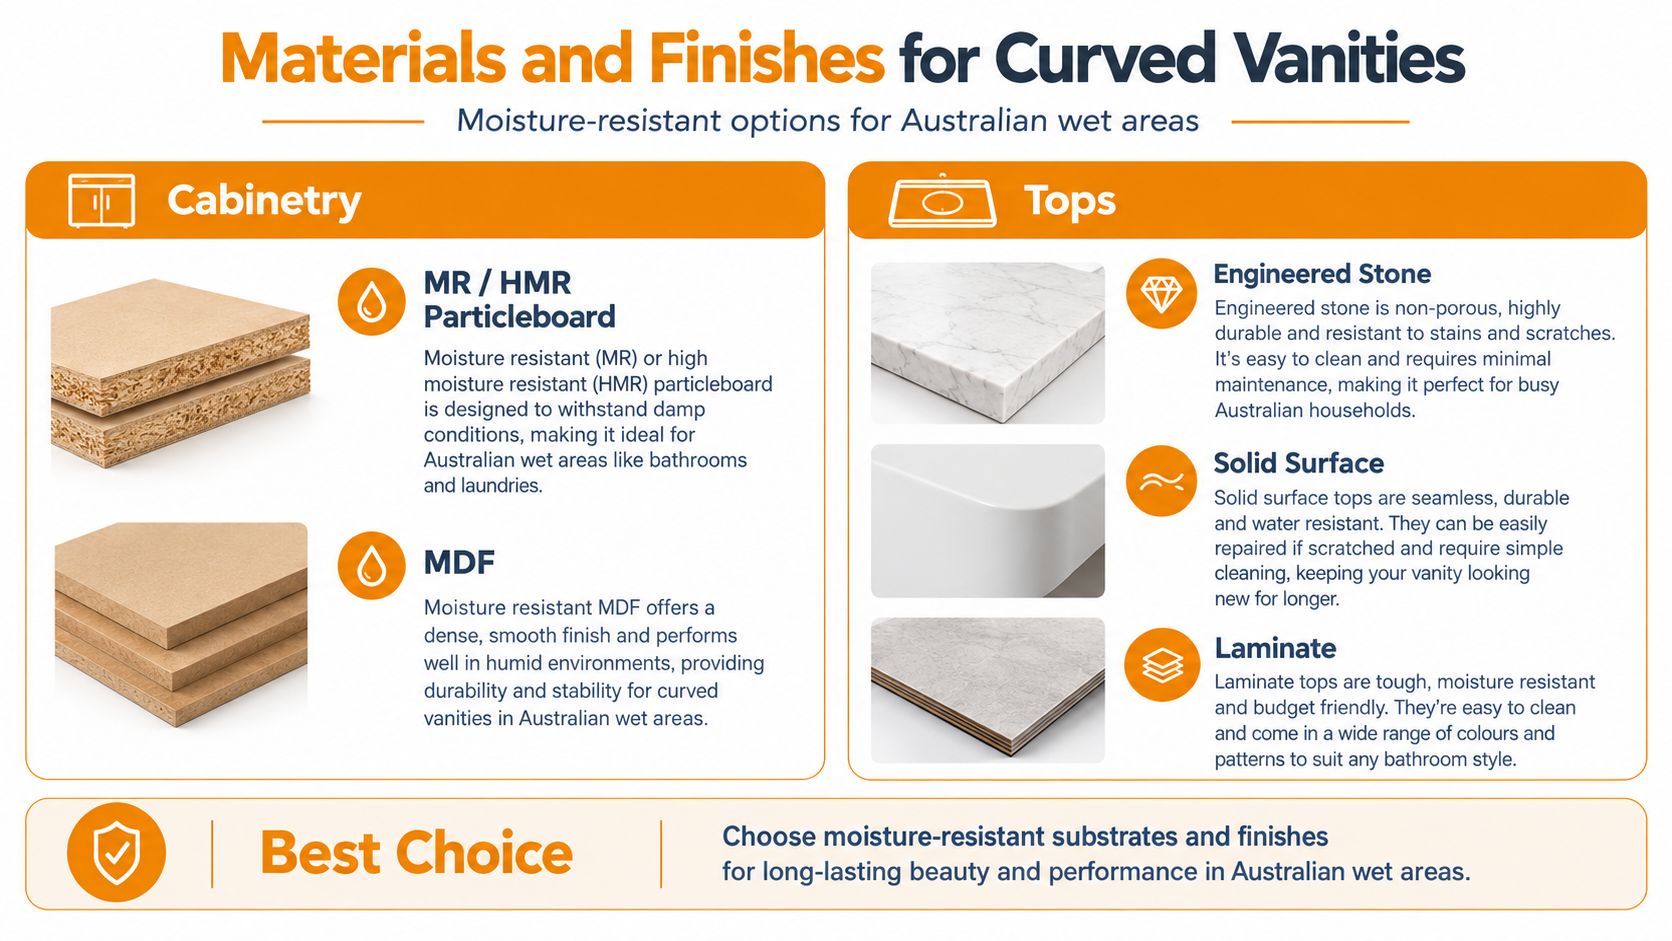
Curved cabinetry fails early when owners treat moisture resistant as waterproof. Australian warranty guidance on MR and HMR board in bathroom conditions identifies MR/HMR particleboard or MDF as suitable for normal bathroom humidity when ventilation and spill control are adequate, while prolonged pooling, basin overflow, or plumbing leaks can still cause swelling, delamination, and deformation. It also highlights the added sensitivity of curved components, because bent panels, routed edges, and segmented joints create more exposed substrate and sealing interfaces than a flat cabinet. That last point should shape every material decision you make.
Cabinet Substrates and Edges
MR and HMR boards are practical for many Melbourne bathrooms, provided the cabinet isn't sitting in pooled water and every cut edge is protected. Ask how the curve is formed, how joins are sealed, and what edge treatment is used on doors, drawer fronts, and the underside. Sealed PVC or ABS edging, careful sealing around plumbing cut-outs, and continuous sanitary-grade silicone at the top, basin, wall, and splashback junctions aren't decorative extras. They're the difference between controlled humidity exposure and water finding raw board.
| Component | Practical choice | Watch out for |
|---|---|---|
| Cabinet carcass | MR/HMR board with sealed edges | Unsealed cut-outs and pooling underneath |
| Curved fronts | Formed or segmented panels with protected joins | Hairline cracking, open seams, uneven finish |
| Underside | Finished surface on wall-hung units | Visible raw edges and poorly concealed brackets |
More water-tolerant construction is worth considering where children splash heavily, ventilation is poor, or the vanity sits close to a shower. Don't pay for an elaborate curve and then accept vague answers about substrate protection. The cabinetmaker should be able to explain the board, edging, joint sealing, and support structure in plain language.
Tops, Basins, and Finishes
Stone and porcelain tops give a crisp, durable surface, but a curve complicates templating, cutting, edge finishing, and future replacement. Solid surface materials can form smoother continuous shapes and integrated basins, although you need to check heat, staining, and repair guidance for the specific product. Laminate and timber-look finishes bring warmth and can suit curved fronts beautifully, yet their long-term performance depends heavily on edge quality and keeping standing water off joins.
Finish sheen also changes how the radius reads. Gloss highlights every wave in a formed panel, matt finishes are more forgiving, and fluting adds shadow that can either enrich the curve or make cleaning slower. Test samples under your bathroom lighting, wet them, wipe toothpaste and soap from them, and inspect the edges. A finish that looks calm in a showroom can be fussy beside a basin used by a busy household.
Sizing and Measurement Guidance
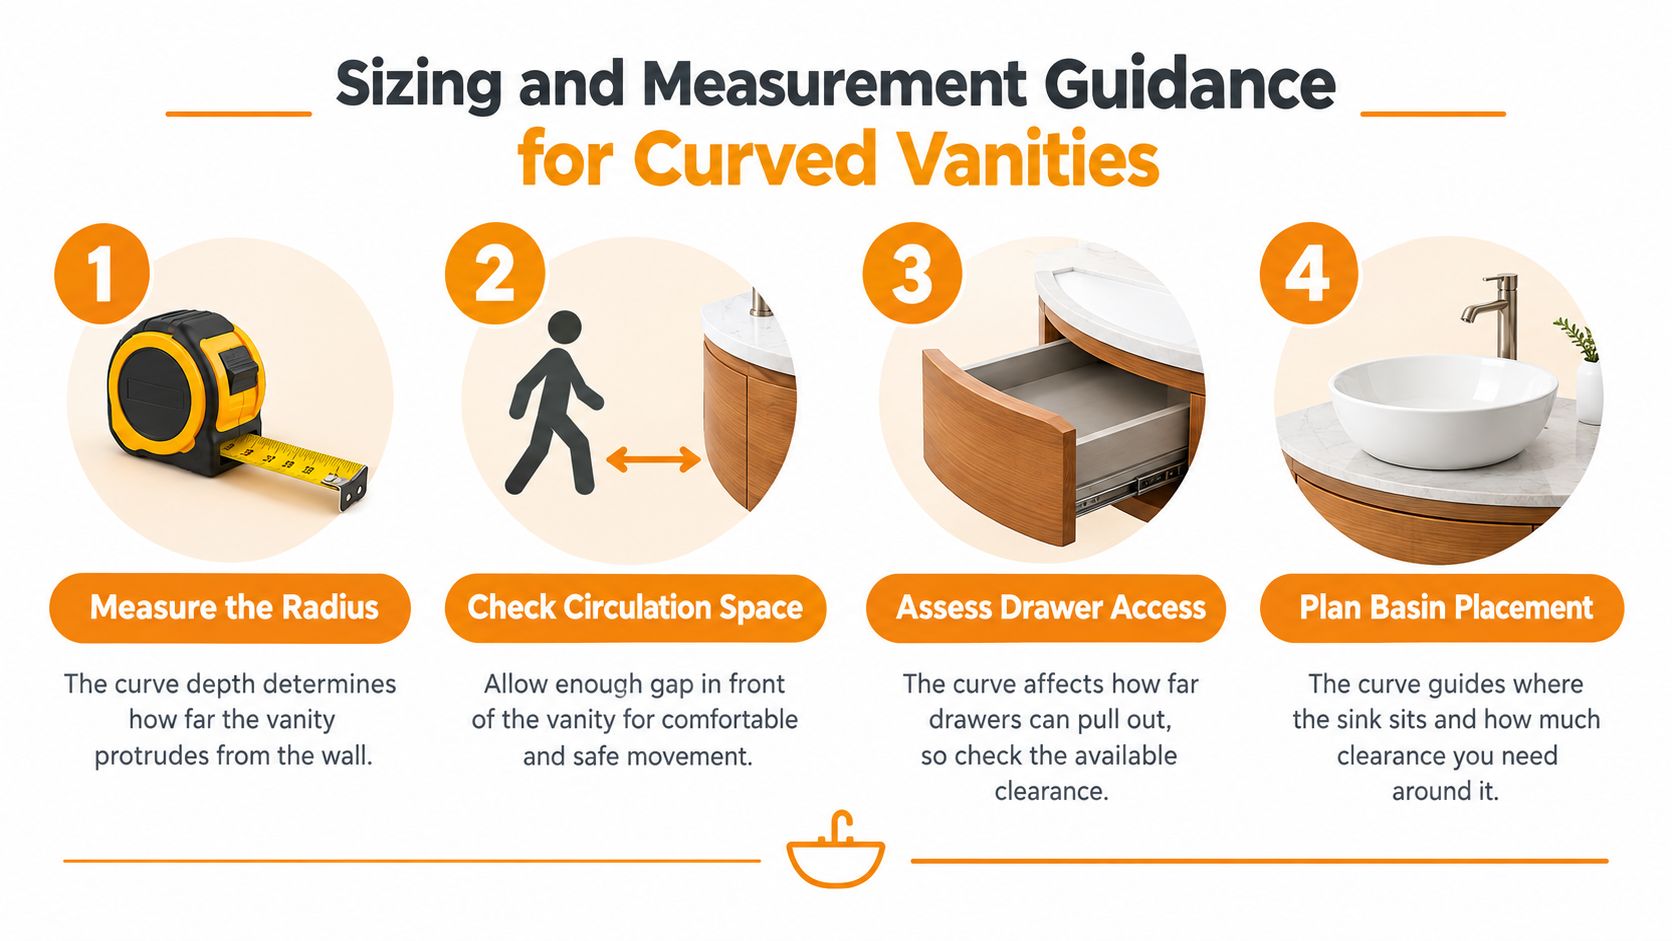
Measure the curve as a three-dimensional intrusion into the room, not as a catalogue width. Australian vanity sizing guidance on circulation and curved cabinet trade-offs gives a practical planning allowance of approximately 700–750 mm of unobstructed space in front of the vanity for standing, bending, opening drawers, and passing the basin. The same guidance notes that a curved cabinet can improve corner circulation and reduce sharp-edge impact risk, but reduced front depth may decrease drawer capacity and complicate waste traps, drawer runners, and wall fixings. Treat the clearance figure as a comfort guideline, then test it against your actual door swing, shower screen, and toilet position.
A Measurement Sequence That Catches Problems Early
Start with finished surfaces, not bare framing. Tile thickness, waterproofing build-up, skirting, and uneven walls can steal the small margin that makes a drawer or door work comfortably.
- Measure wall to wall at several heights: Record the narrowest finished dimension, then check whether the wall is square enough for the proposed top.
- Mark the deepest point of the curve: Tape the footprint on the floor, including the benchtop overhang, and walk past it carrying a laundry basket or towel.
- Test drawer and door travel: Allow for the person standing there as well as the drawer itself, especially opposite a bath, toilet, or shower screen.
- Locate plumbing before choosing drawers: Mark waste and water points, then confirm the trap won't consume the storage you're counting on.
- Align basin, tapware, and mirror: The visual centre of a curved top may not match the cabinet centre once the basin and mixer are placed.
Where Storage Disappears
A convex front doesn't automatically create more usable room inside. Drawers may become shallower at the sides, need shaped fronts, or lose space to runners and the waste trap. Curved doors can conceal awkward triangular pockets that suit spare rolls but not hair tools, cleaning bottles, or stacked towels. Open a display unit, take your largest everyday items, and test them rather than guessing from external dimensions.
Floor-tape test: If you can't bend, open the main drawer, and pass another person comfortably inside the taped outline, the curve is too deep for that room.
Basin placement needs the same honesty. Push the basin too far back and you'll lean over the deepest part of the curve. Bring it too far forward and splashing increases, tap reach changes, and the front edge can feel crowded. Confirm basin rim height, plumbing position, door swing, and drawer projection on the finished-tile layout before fabrication, because correcting a shaped top or cabinet after manufacture is rarely simple.
For a small ensuite, rounded ends often give the best balance. They ease movement while preserving a more conventional drawer box through the centre. In a wider bathroom, a deeper curve can work without stealing circulation, provided the storage layout is designed around the radius rather than forced into it.
Installation and Plumbing Considerations
Installation begins well before the vanity arrives. Your plumber, cabinetmaker, tiler, and waterproofer need the same finished layout, because the curved profile affects fixing points, waste location, silicone junctions, and access for future repairs. A useful starting point is to review the broader configuration options in this guide to bathroom vanities and layout choices, then confirm the exact product drawings against your wall and plumbing set-out. Don't let anyone work from a brochure image alone.
Wall-Hung Versus Freestanding
Wall-hung curved vanities need a support structure capable of carrying the cabinet plus a stone or porcelain top without deflection. Concealed brackets must align with studs or suitable blocking, and the underside finish matters because it's visible from the doorway and bath. If the wall is out of plumb, the curved top can expose uneven gaps that a straight unit might disguise more easily. Set out stud locations before tiling, not after the cabinet is on site.
Freestanding units transfer weight through legs or a plinth and can be more forgiving where wall structure is limited. They still need secure fixing, level support, and clearance so the curve doesn't foul skirting, floor wastes, or door movement. Legs create cleaning access underneath, while a plinth gives a grounded furniture look but can trap moisture if water repeatedly reaches the base. Choose according to structure, cleaning habits, and floor drainage, not appearance alone.
- Before tiling: Confirm studs, blocking, waste height, water points, mirror fixings, and power locations.
- Before fabrication: Check drawer cut-outs around the trap and whether isolation valves remain reachable.
- At installation: Protect the finished curve, level the cabinet, seal junctions, and test every drawer with plumbing connected.
Access, Waterproofing, and Victorian Jobs
Accessibility can change the right configuration. A University of Melbourne survey on housing accessibility needs found 73.6% of respondents lived in housing that did not meet, or only partly met, their accessibility needs. Australian accessible-bathroom guidance based on AS 1428.1 specifies a basin rim height of 800–830 millimetres and requires clear knee space beneath the basin for seated use. Those requirements may favour wall-hung or carefully configured designs, and compliance depends on the project classification and applicable standards, not the vanity shape alone.
In Victoria, coordinate the vanity with waterproofing and drainage work. The cabinet must not obstruct floor falls, waste access, or required wall waterproofing zones, and fixings shouldn't compromise membranes. Rounded corners may reduce collision hazards in compact circulation areas, but they don't replace compliant clearances, knee space, or basin height. If anyone in the household has changing mobility needs, involve the designer and relevant certifier early so storage, approach space, and pipework zones are resolved together.
Pairing with Tiles and Bathroom Layouts
A curved vanity looks intentional when the surrounding lines give it room to breathe. Australian trend coverage questioning curved vanities as a usability choice makes the useful point that curved vanities are often presented as a style choice, not a measurement and usability problem. A curved front may visually enlarge a room while reducing practical drawer capacity and complicating installation, so it should be evaluated by usable floor clearance and internal storage, not appearance alone. Tiles should support that practical decision rather than disguise a layout that doesn't work.
Tile Scale and Pattern
Large-format porcelain creates a calm backdrop with fewer grout lines competing against the radius. It suits a sculptural vanity, although cuts around a curved splashback or an unusually shaped top need precise templating. Mosaics can follow curved walls and niches more readily and bring texture at a small scale. Used over every surface, however, they can make a compact bathroom feel busy and increase grout maintenance.
Natural stone pairs well with curved cabinetry because both have an organic quality, but veining direction and joins become more conspicuous beside a shaped top. Ask how the stone will be templated, how the edge will be finished, and how difficult replacement would be if the top is damaged. Those conversations should happen before tiles are ordered, especially when the splashback, benchtop, and floor are meant to align.
For broader palette planning, browse these modern bathroom tile ideas for cohesive layouts with a sample of the vanity finish in hand. Compare grout colour as carefully as tile colour. A contrasting grout grid can fight the softness of the curve, while a closer match lets the cabinet profile carry the room.
Layout Patterns That Work
In a narrow ensuite, place the curved vanity where its rounded end eases the entry path, then keep the wall treatment simple. A round or pill-shaped mirror can echo the profile, but don't repeat arches in the mirror, shower screen, tapware, tiles, and lighting all at once. One strong curve needs contrast from a few disciplined straight lines.
- Vanity opposite the door: Make the curve the focal point and keep adjoining storage visually quiet.
- Vanity beside a shower: Check screen swing or sliding clearance against the deepest part of the top.
- Powder room layout: Use a shallower semi-recessed form and a splashback that protects the wall without overwhelming it.
- Family bathroom: Prioritise drawer volume and bench space, even if that means a gentler radius.
Lighting completes the pairing. Side lighting reduces shadows at the basin and reveals whether the mirror is centred over the usable basin position. Under-vanity lighting can emphasise a wall-hung curve at night, but it shouldn't expose poor underside finishing or uneven silicone. The best layouts feel calm because movement, storage, lighting, and tile lines were solved together.
Cost Ranges and Budgeting
A curved vanity budget has more moving parts than the purchase price on a product page. The cabinet may need formed panels, shaped drawer fronts, special runners, additional edge sealing, and a templated top. Installation can involve wall blocking, plumbing adjustments, careful tile cuts, and more time spent protecting and levelling the unit. Before allocating money, map those items against a bathroom renovation cost breakdown for Australian projects so the vanity doesn't consume funds needed for waterproofing, ventilation, or quality tapware.
What Drives the Price
Curve complexity is the first driver. Rounded ends on an otherwise standard cabinet are generally simpler than a deep, continuous convex front with shaped internal drawers. A custom radius also limits substitution if a panel or top is damaged. You're paying for design resolution and manufacturing time as much as for board and hardware.
Materials come next. Stone and porcelain tops require accurate templating and edge work, while integrated solid surface designs involve a different fabrication process. Premium drawer hardware, durable finishes, and well-sealed curved joints cost more upfront but protect the parts you touch daily. Cheap hinges, thin edging, and poorly supported tops are false economies in a wet room.
Site conditions can change the labour allowance quickly. Moving a waste to suit drawers, adding blocking for a wall-hung unit, correcting an out-of-square wall, or working around existing tiles all take time. In older Melbourne homes, hidden plumbing condition and uneven floors deserve a contingency allowance. Keep that contingency separate rather than spending it on a finish upgrade at the start.
Budget Decisions That Protect Value
Prioritise the substrate, waterproofing interfaces, drawer hardware, and installation quality before decorative extras. If funds tighten, choose a gentler curve with a durable top instead of a dramatic custom profile in a vulnerable finish. You can also keep plumbing in its existing position if the drawer layout still works, which reduces trade coordination and avoids unnecessary wall work.
Ask every quote to separate cabinet, top, basin, tapware, delivery, installation, plumbing alterations, and sealing. Confirm who templates the top, who supplies brackets, and whether removal of the old vanity is included. Written scope matters because curved vanities sit between cabinetmaking, stonemasonry, plumbing, and tiling, and gaps between trades become your cost.
Spend first on the parts water can damage and the hardware you'll operate thousands of times.
Don't judge value by external width alone. Compare usable drawer volume, bench area, warranty conditions, replacement difficulty, and the quality of edge protection. A slightly simpler vanity that fits the room properly will serve you better than a statement piece that forces compromises every morning.
Buying, Sourcing, and Maintenance Tips
Buy from a supplier who can show you the inside of the unit, not just a styled front view. Open drawers, inspect the underside, run a hand along the curved edge, and ask for drawings that show maximum depth, basin set-out, waste clearance, and fixing points. In Melbourne, visiting a showroom is valuable because you can stand at the basin, test reach, and compare finishes against tile samples. Online buying can work well if dimensions, substrate details, warranty terms, and delivery access are documented before payment.
Sourcing Checks Before You Order
Order finish samples and view them wet and dry under your own lighting. Confirm whether the top and cabinet are supplied together, whether the basin waste suits the drawer cut-out, and who is responsible if the radius doesn't match the drawing. Trade buyers should ask about sourcing support, replacement panels, and lead times for custom components. Homeowners should book design advice early enough to change the plumbing set-out if the preferred vanity won't work.
- Documentation: Keep product drawings, care instructions, finish codes, and warranty conditions in one project file.
- Delivery access: Measure gates, hallways, stairs, and bathroom doorways, because a one-piece curved top may not turn like a flat-pack cabinet.
- Compatibility: Check basin, mixer reach, waste, mirror, and power points as one set.
- Spares: Ask how a damaged curved drawer front or shaped top would be repaired or replaced.
Check the unit on delivery before trades are booked around it. Photograph edges and joins, confirm hardware is complete, and store the cabinet in a dry area away from active wet trades. A curved finish is vulnerable to knocks on its projecting centre, so keep protective packaging on until installation.
Care That Preserves the Curve
Wipe spills promptly, particularly around basin joins, drawer edges, handles, and the junction between top and splashback. Use cleaning products approved for the specific top and cabinet finish, and avoid flooding the cabinet with water during routine cleaning. Ventilate after showers so humidity doesn't sit on sealed edges and inside drawers. Leave drawers slightly open after a leak or overflow until you're confident everything is dry.
Inspect silicone and edge seals as part of normal bathroom maintenance. Small gaps around a curved top can direct water into substrate that's difficult to replace, and early resealing is far simpler than repairing a swollen formed panel. Tighten handles gently, avoid hanging heavy wet towels from curved drawer fronts, and use organisers that suit the shaped drawer rather than forcing rigid trays against the sides. With realistic sizing, sound materials, and disciplined maintenance, curved vanities can deliver both the softer look you want and the daily function your bathroom needs.
If you're planning a curved vanity and need tiles, mosaics, stone-look surfaces, or flooring that will sit comfortably with its shape and clearances, talk to Tiles Mate Pty Ltd about samples and practical product advice for your Melbourne renovation. Bring your measurements, vanity drawings, and finish shortlist, and you'll get guidance grounded in how the room will be built and used.