




Hexagon Mosaic Floor Tiles: Materials, Sizes and Costs
by Shivam Tayal 08 Nov 2026 0 Comments
You've found a hexagon tile you like, but the sample doesn't answer the questions that matter once the bathroom is in use. Will it feel secure under wet feet? Will the grout stay manageable? And can your tiler make the sheets follow the shower floor without leaving puddles or obvious sheet edges?
Hexagon mosaic floor tiles are a flooring-system decision, not just a pattern choice. For a Melbourne renovation, the right selection balances material, documented slip resistance, drainage, waterproofing and the amount of cleaning you're prepared to do.
Materials, Sizes and Finishes Compared
Hexagon mosaic floor tiles are small six-sided tiles, usually supplied on mesh-backed sheets. The backing lets the tiler position a group of individual tiles together while retaining joints between them.
Their appeal comes from repeated geometry rather than an uninterrupted tile face. Matching grout can soften the pattern, while contrasting grout makes every hexagon visible. Small individual pieces also offer more layout flexibility around sloping surfaces and irregular boundaries than a large rigid tile.
The shape sits comfortably in Melbourne's older homes. Tiles Mate's history of mosaic flooring describes patterned tiles on Victorian and Federation verandahs, paths and entrances, with their use increasingly shifting into bathrooms and wet areas by the 1930s.
Hexagon mosaic floor materials compared
| Material | Typical finishes | Strengths | Watch-outs |
|---|---|---|---|
| Porcelain | Matt, gloss, textured, lappato | Consistent colour, low water absorption, broad design choice | Harder to cut neatly around curves; confirm the actual slip rating |
| Natural stone, including marble and travertine | Honed, polished, tumbled | Natural veining, tonal variation and visual warmth | Porous; needs a suitable sealing plan; acid-sensitive stone can etch |
| Glass | Gloss, frosted | Reflective, bright and useful for light-toned effects | Smooth glass can be slippery wet; scratches show; floor suitability must be explicit |
Choose the material before the scale
Porcelain is the practical starting point when you want predictable maintenance. Natural stone makes sense when you value genuine variation enough to accept more careful cleaning and surface care.
Glass needs a stricter screening process. Don't assume a mosaic sold for bathroom walls is suitable for a floor, and don't treat a frosted appearance as evidence of wet traction.
For scale, compare the individual cell as well as the overall sheet. Smaller cells can follow changes in slope more readily, but they create a denser grout network. Larger cells give a bolder pattern and fewer joints, although they need closer checking against the drain layout and surrounding cuts.
Selection order: Choose the material, then the cell size, then the finish. Reject any combination that doesn't suit the room before choosing the grout colour.
Ask to see a complete sheet rather than judging from a loose tile. You need to assess edge consistency, mesh alignment and the spacing that will remain visible after installation.
Slip Ratings, Grout and Cleaning Trade-offs
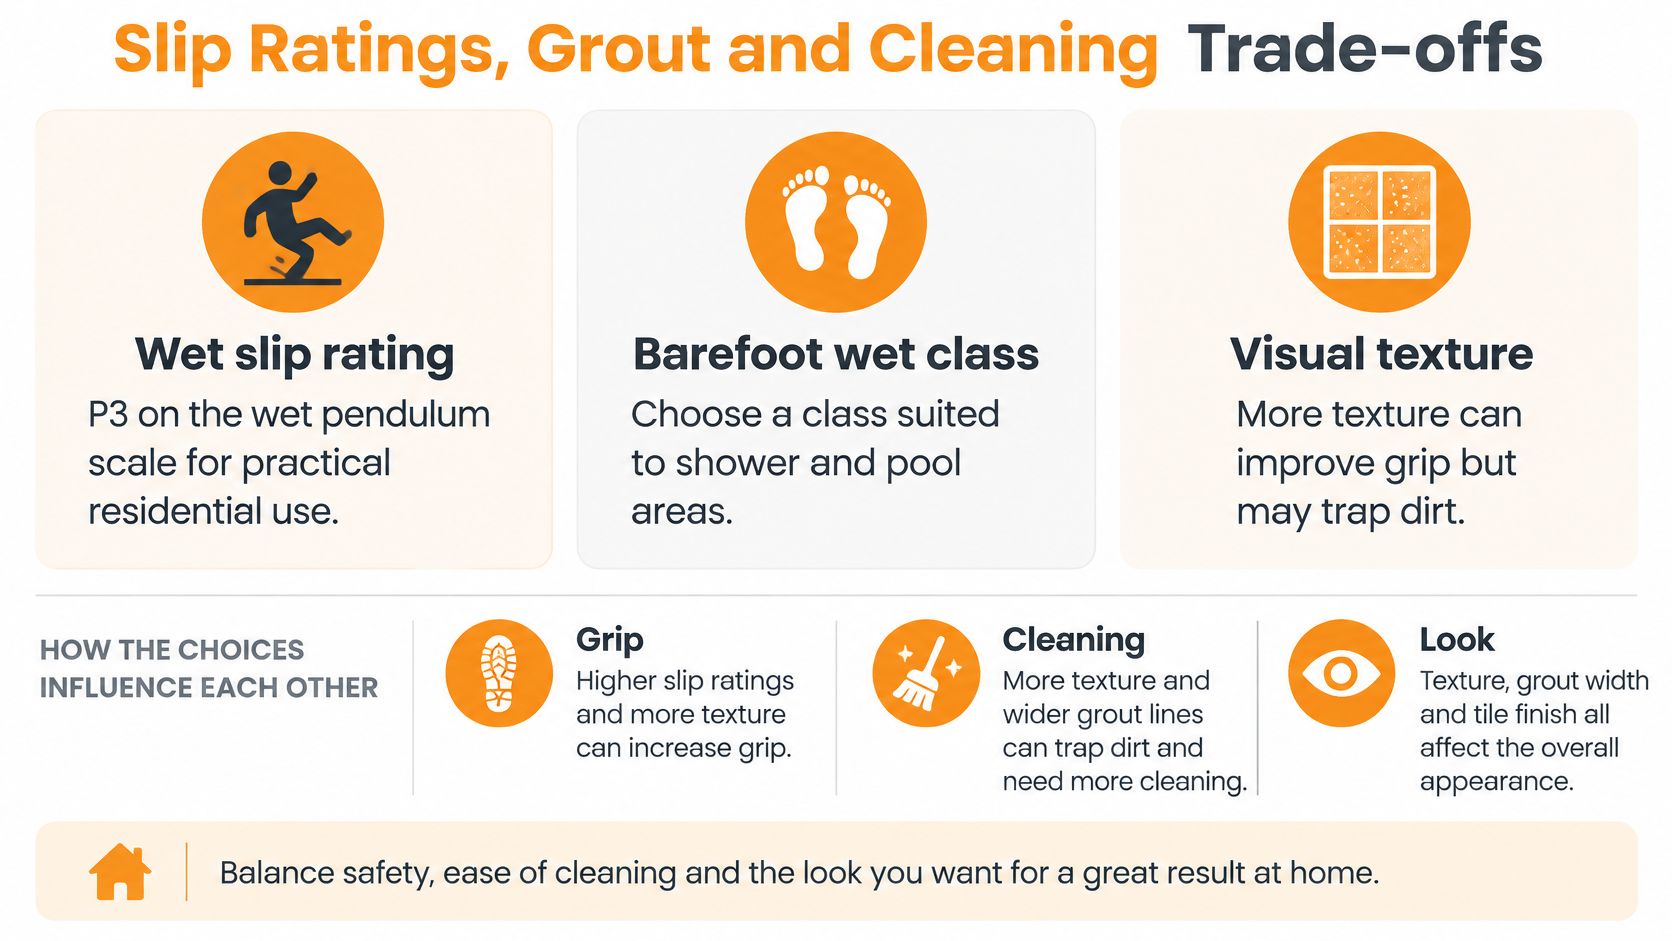
More texture doesn't automatically mean a safer floor. Wet slip testing, barefoot classification and the surface's visual texture describe different things. A rough-looking sample isn't a substitute for a documented test result.
Architecture & Design's Australian slip-rating guidance distinguishes the P0–P5 wet pendulum scale, R9–R13 oil-wet ramp scale and A–C barefoot wet classes. It identifies P3 as a commonly recommended practical residential bathroom minimum and R10/P3 in government bathroom-modification guidance.
Slip rating scales and where to specify them
| Rating | Test | Where it applies | Specify when |
|---|---|---|---|
| P3 | Wet pendulum | Practical residential bathroom selection benchmark, not a universal legal minimum | Assessing wet bathroom floors, including outside the shower |
| P4 or P5 | Wet pendulum | Higher classifications for demanding wet conditions | The project's risk assessment calls for greater wet traction |
| R10 | Oil-wet ramp | Used alongside the pendulum benchmark in bathroom-modification guidance | Specifying bathroom modifications and accessible spaces |
| R11 to R13 | Oil-wet ramp | Higher classifications within the ramp test | A ramp or commercial wet-area specification requires them |
| Classes A to C | Barefoot wet | Barefoot wet-area performance | Confirming the appropriate class for the intended application |
These tests aren't interchangeable. Ask the supplier to identify the relevant test and intended use rather than treating the highest-looking label as the best choice.
Balance grip with cleanability
Mosaics introduce many grout joints, so the installed floor's traction and drainage can differ from a large-format surface. Those joints aren't a guarantee against slipping, especially when soap residue remains on the floor.
Aggressive texture can also make it harder to remove residue. In most residential bathrooms, matt or lappato finishes are favoured for their balance of cleaning and slip resistance, but the particular product still needs checking. A finish name alone doesn't establish suitability.
Choose grout that accommodates the specified joint width. A mid-tone colour can be more forgiving than bright white, although very dark grout may highlight pale soap deposits.
Before ordering, put these questions to the supplier:
- Test conditions: Was the classification established wet or dry?
- Actual surface: Does it cover this exact product and finish?
- Soap residue: What cleaning method is recommended for bathroom use?
- Complete care advice: Are grout selection, joint width and sealing addressed?
Matching Hexagon Size and Finish to Each Room
Match the sheet to what happens in the room, not just how it looks beside the vanity. A shower floor needs to accommodate drainage geometry; an entry needs to tolerate tracked-in grit; a covered verandah still needs assessment for weather exposure.
Hexagon size and finish by room
| Room | Suggested finish | Main watch-out |
|---|---|---|
| Shower floor | Matt or textured porcelain, with small cells suited to the drain layout | Check fall to waste before tiling |
| Bathroom floor outside shower | Matt or lappato, with a small or medium-scale pattern | Confirm the wet slip rating |
| Laundry | Matt porcelain, with medium cells for a less busy floor | Soap and water spills; grout colour matters |
| Entry or hallway | Honed stone or matt porcelain, with a medium-scale pattern | Heavy traffic; seal natural stone where specified |
| Covered verandah | Textured, outdoor-rated porcelain sized to suit the paving layout | Weather exposure; documented slip suitability needed |
Let the layout guide the size
In a shower, ask the tiler to assess the cell size against the waste position and changes in slope. A sheet that looks tidy on a showroom board may need individual pieces adjusted around the drain.
Outside the shower, a slightly broader pattern can reduce visual busyness. Use our guide to choosing tiles by size to compare scale, then lay a sample sheet beside the proposed wall tile. The relationship between the patterns matters more than either sample viewed alone.
For laundries, favour a surface that won't make every lint mark obvious. In an entry, check the finish beside the adjoining timber, carpet or threshold so the transition feels deliberate.
Use grout to control the pattern
A single tile colour with closely matched grout gives a quieter bathroom floor. Lighter grout against a darker tile makes the hexagon outline stronger, which can work well in an entry but feel busy in a compact ensuite.
A border can frame a heritage-style floor, provided the tiler resolves the junction between the border and the mosaic field before fixing. Don't leave that detail to whatever cut happens to remain at the wall.
Take samples into the actual room and compare them in daylight and artificial light. Wet a sample to assess colour change and residue visibility, but don't use a hand or barefoot sample test as a replacement for laboratory slip classification.
Substrate and Waterproofing Under Hexagon Mosaics
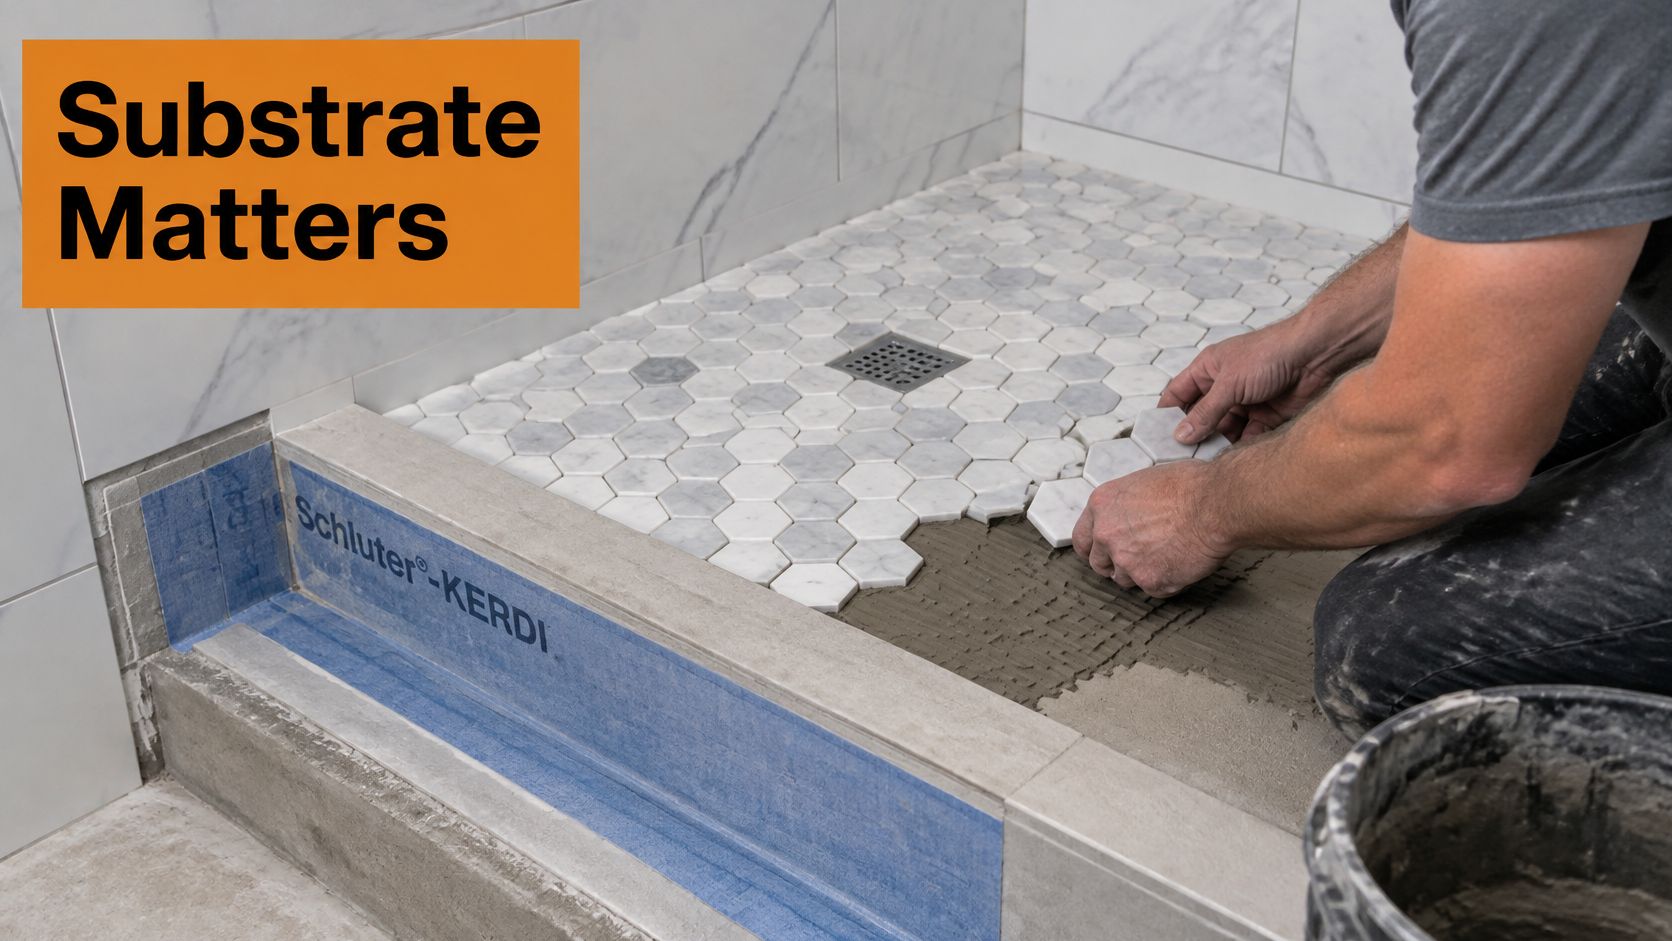
Tiles aren't the waterproofing layer. The NCC 2025 wet-area waterproofing provisions treat tiles as water-resistant only with an appropriate substrate and require shower floors to be waterproof.
The substrate and drain detailing deserve attention before the first sheet is laid.
Confirm the layers underneath
The builder and tiler need to agree on a sound substrate, designed falls, a compatible waterproofing system and the adhesive that will bond the mosaics. Flatness here means an even surface following the intended plane, not making a shower floor level.
Membrane detailing must address wall junctions, corners, penetrations and the connection to the waste. Confirm the applicable requirements, including AS 3740 where relevant, and how the installation will be inspected before it's covered.
Older Melbourne homes need particular care around timber-floor movement and existing slab moisture. A flexible mosaic sheet doesn't make an unstable substrate suitable for tiling.
Small tiles can follow a properly formed slope. They can't create a missing slope or repair defective waterproofing.
Record responsibilities before covering the work
Photograph the prepared substrate and completed membrane, including waste connections and penetrations. Record the waterproofing products used and who accepted the surface as ready for tiling.
Our bathroom floor tiling guide provides further preparation context. Use installation demonstrations to understand the sequence, not to replace the project's waterproofing design.
Give the builder this short sign-off checklist:
- Substrate: Sound, adequately supported and suitable for the selected system.
- Drainage: Falls and waste connections checked before fixing.
- Waterproofing: Corners, penetrations and terminations completed and documented.
- Compatibility: Membrane, adhesive and sheet backing approved together.
- Responsibility: Named parties for preparation, waterproofing and tiling.
How to Lay Hexagon Mosaic Floor Tiles Step by Step
A good hexagon mosaic floor reads as one continuous pattern. You shouldn't be able to pick out the boundaries of every mesh sheet.
The installation sequence matters because correcting a misplaced sheet becomes difficult once the adhesive starts to set.
Prepare and set out
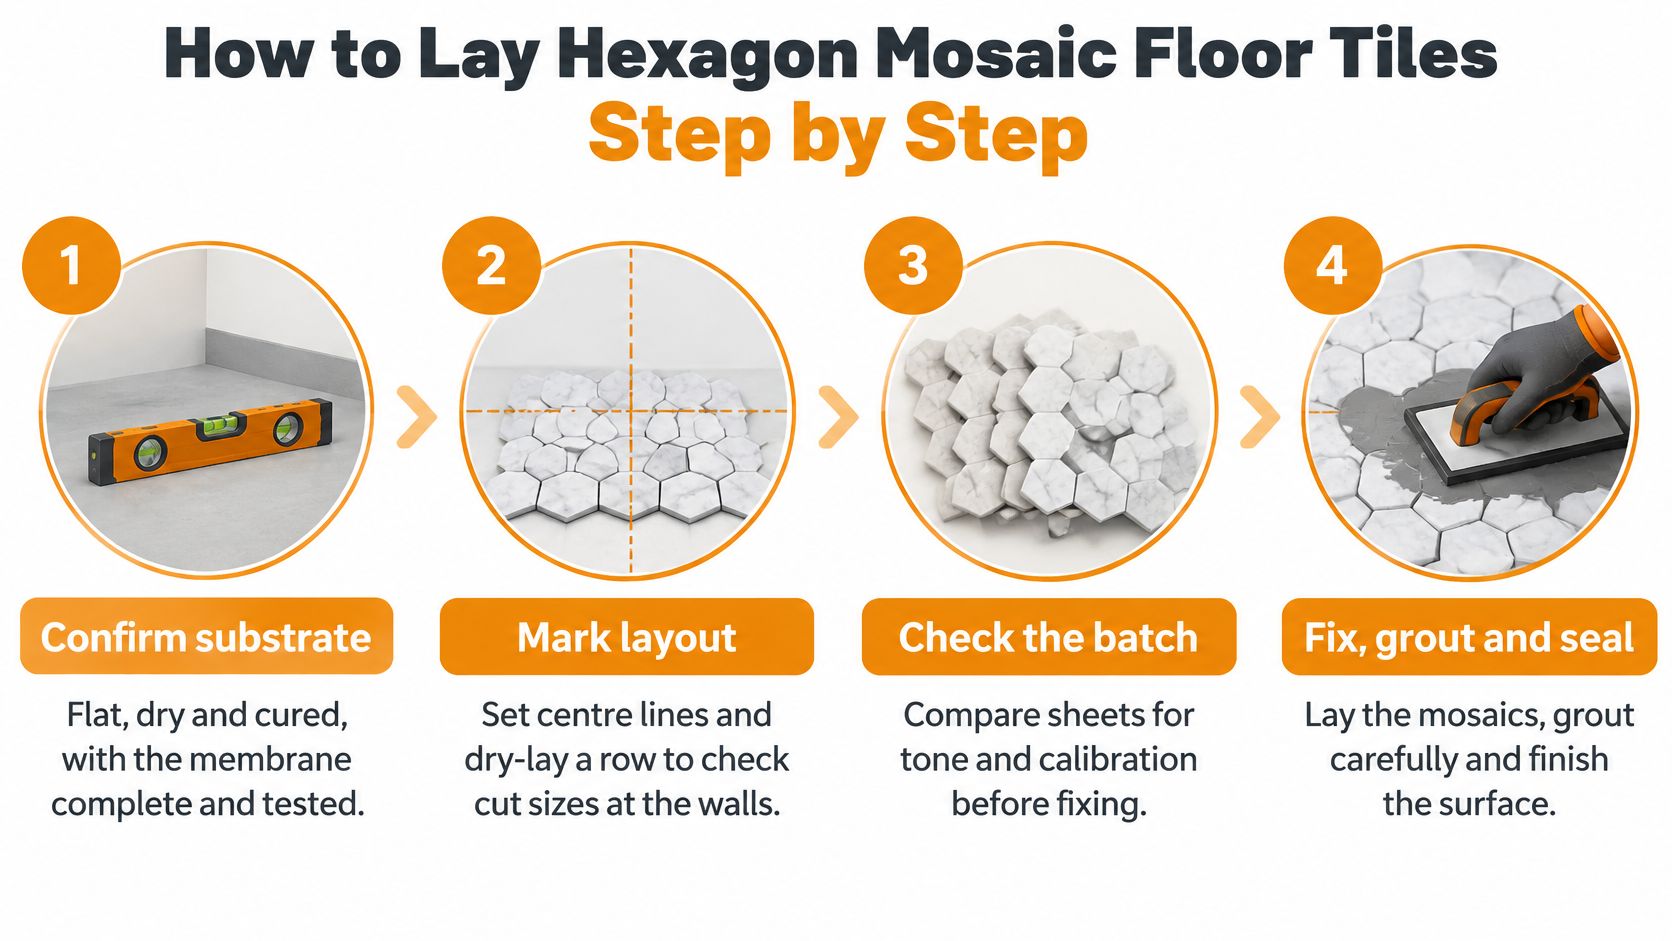
- Accept the substrate. Confirm it's clean, adequately cured and ready for the adhesive system, with waterproofing complete and inspected where required. Don't use extra adhesive to disguise hollows that should have been corrected during preparation.
- Mark the layout. Establish reference lines and dry-lay sheets across the floor, checking wall cuts, doorway alignment and the waste. Shift the starting point if it leaves fragile slivers at a prominent edge.
- Check the batch before fixing. Compare tone, cell dimensions, backing and sheet spacing. We recommend having your tiler verify all measurements before ordering because tiles from different batches can differ slightly in colour and size.
- Select and mix the adhesive. Confirm compatibility with the tile, backing, membrane and substrate, then measure the mixing water accurately. Choose the notched trowel through a coverage trial, not simply by using the tool left from the previous job.
Fix the sheets and preserve movement
- Bed the mosaics evenly. Press sheets into fresh adhesive with a grout float or beating block, keeping pressure even. Lift a trial sheet to check coverage and keep adhesive out of the grout space; mesh mustn't prevent an adequate bond.
- Provide movement joints. HIA's movement-joint guidance identifies joints generally at least 6 mm wide, with spacing no greater than 4.5 m for internal floors exceeding 9 m in a dimension, and 4.5 m in any direction externally. Coordinate structural joints, perimeter isolation and fixed penetrations with the project's installation design.
- Keep movement joints flexible. Use the specified sealant and backing arrangement, not rigid cementitious grout. Filling these gaps solid defeats their purpose and can transfer movement into the tiled surface.
- Cure, then grout. Wait for the adhesive's specified curing conditions before grouting, and choose a wet-area-suitable grout compatible with the joint width and tile. Epoxy can offer useful stain resistance, but requires careful cleaning during application and doesn't replace waterproofing.
- Finish and protect. Remove haze with a tile-compatible method and seal stone or grout only where the product system calls for it. Protect the floor from traffic and water until the relevant curing requirements are met.
The costly shortcut is fixing over an unaccepted substrate. At handover, look for consistent joints across sheet boundaries, clean movement joints and no lippage at sheet edges. Hollow-sounding areas warrant investigation, although tapping alone doesn't prove whether the installation has adequate adhesive coverage.
Cleaning and Grout Care That Keeps Floors Looking New
Clean the joints deliberately, not just the tile faces. A mop can leave the surface looking fresh while residue remains in recessed grout, particularly around the shower waste and beneath overhanging cabinetry.
Use a routine that removes loose dirt before adding water:
- Daily or between washes: Sweep or vacuum grit with a suitable hard-floor attachment. In the shower, remove standing surface water where practical.
- Weekly: Wash with a correctly diluted pH-neutral cleaner and a microfibre mop, then rinse away cleaner residue. Work a soft brush along textured areas and joints.
- As buildup appears: Use a tile-and-grout-compatible cleaner and a firm nylon grout brush. Rinse thoroughly rather than letting loosened soil dry back into the joints.
Avoid damaging shortcuts
Acidic cleaners can etch marble and other acid-sensitive stone. Abrasive powders or pads may alter the finish, while strong bleach products can affect some coloured grouts. Never mix cleaning chemicals.
For accessible household cleaning approaches, Western Bathroom Renovations' household solutions for dingy grout provides useful context. Check any proposed method against your tile and grout manufacturer's instructions before applying it across the floor.
Maintenance check: A persistent dirty patch may be a drainage or ventilation problem, not a reason to use stronger chemicals.
Ask for the specific sealing requirements of your stone and grout. Some products don't need sealing, and a sealer isn't a substitute for cleaning or waterproofing.
Recurring mould in the same location deserves investigation if it returns after cleaning and improved ventilation. Check for ponding, leaking fittings and failed sealant before assuming the membrane is defective.
The NCC 2025 Volume Two recognises wet slip-testing methods within its fall-prevention provisions, reinforcing why a vague non-slip label isn't enough. Keep the floor's documented performance and its practical cleaning needs together when choosing a finish.
Hexagon Mosaic Floor Costs and How to Compare Prices
Compare the selling unit before comparing the price. A per-piece mosaic listing can look cheaper than a square-metre price while telling you very little about the total floor cost.
Listed hexagon mosaic prices by product and unit
| Product | Format | Listed price (AUD) | Unit |
|---|---|---|---|
| Arden Smoke Italian porcelain hexagon | Floor tile | Tile Touch listed $177 in 2026 | Per square metre |
| Mono Black gloss hexagon mosaic | Mosaic piece | Beaumont Tiles listed $8.06 on sale, reduced from $8.95, in 2026 | Per piece |
| Regency Sage textured hexagon mosaic | Textured mosaic unit | Beaumont Tiles listed $15.26 on sale, reduced from $16.95, in 2026 | Per unit |
These are product-specific listing examples, not an installed-price range or a like-for-like material comparison. Confirm current pricing, coverage and floor suitability before relying on a quote.
Convert every quote to the same basis
For a box price, divide the box cost by its stated coverage in square metres. For a sheet or piece price, establish exactly what the supplier means by that unit and obtain its installed coverage, including the intended joints.
Don't calculate mosaic coverage from the outermost tips of a hexagon alone. Interlocking sheet edges and joint spacing can make that calculation misleading.
If you're considering marble, our natural stone tile pricing guide provides broader purchasing context. The available examples don't establish a reliable stone-versus-glass price comparison, so obtain equivalent quotes for those alternatives.
Budget for the complete floor
Request separate allowances for:
- Preparation and waterproofing: Removal, repairs, falls and membrane work.
- Fixing materials: Adhesive, grout, flexible sealant and any required sealer.
- Installation: Sheet alignment, drain detailing, border cuts and finishing.
- Supply logistics: Freight, layout-specific cutting waste and spare material.
Have the tiler calculate the waste allowance from the actual layout rather than applying an arbitrary percentage. On a small mosaic floor, detailed cutting and preparation can matter more to the final bill than a modest difference in tile price.
Order Samples and Check Batches Before You Tile
Approve a physical sample and an installation plan before committing to the full order. A screen image can help shortlist colours, but it can't show the texture underfoot, the depth of a joint or whether the mesh holds the cells square.
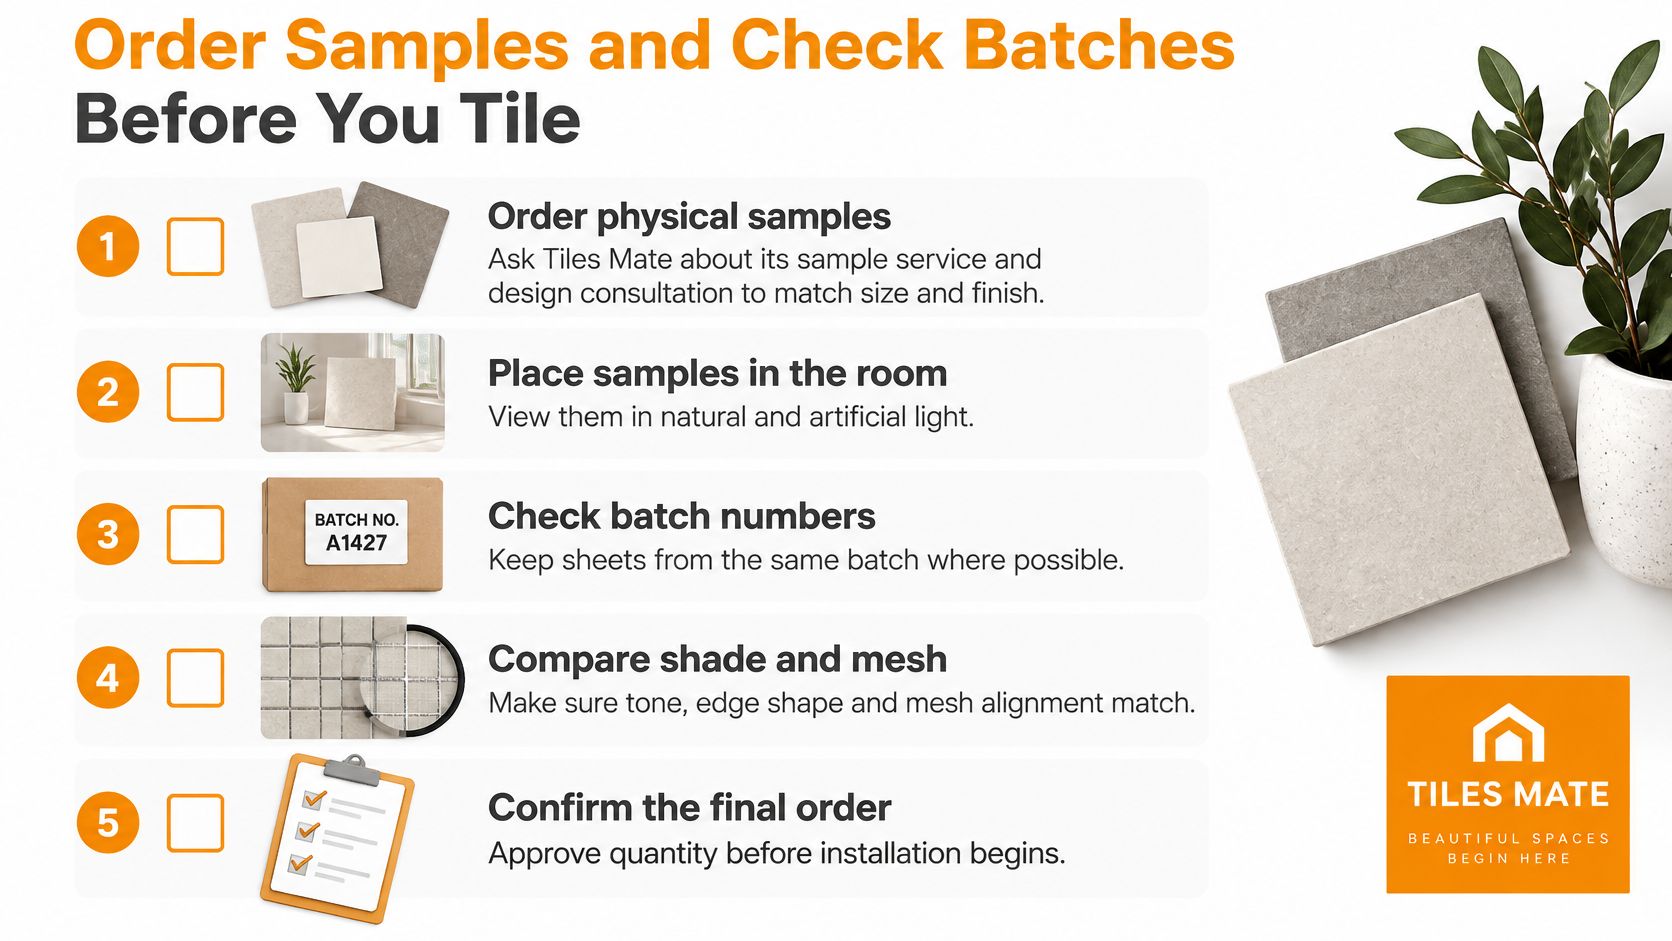
Use this approval checklist with the person purchasing the tiles and the person installing them:
- Order physical samples: We offer sample tiles so you can see and touch the finish before choosing.
- Place them in the room: Compare natural and artificial light, adjoining materials and the proposed grout.
- Obtain the classification: Keep the actual finish's slip-test information with the product specification.
- Approve the quantity: Have the tiler check floor measurements, sheet coverage, cutting requirements and spare material.
- Confirm the installation plan: Resolve waterproofing responsibilities, movement joints and waste details before work begins.
Inspect the delivered sheets
Keep packaging and batch labels until the job is complete. Open cartons before installation and compare sheets laid together, looking for shade differences, inconsistent edges and distorted backing.
A loose cell can sometimes be repositioned during fixing. Widespread spacing problems need resolving before the tiler spreads adhesive, not after the floor has been grouted.
For builders, tilers, designers and developers, we can discuss trade pricing and personalised sourcing through TilesMate Pro, with quotes compared on a consistent coverage basis. For Melbourne homeowners and Victorian renovators, confirm delivery arrangements for your address and discuss design consultation options before final approval.
Choose a finish for each room rather than forcing the same surface everywhere. Once the samples, documentation and quantities are accepted, keep the approved sheet available on site as the reference for the finished work.
Tiles Mate Pty Ltd offers hexagon mosaics, porcelain and natural stone options, with physical samples and design guidance to help you assess the right floor for your renovation. Visit Tiles Mate Pty Ltd to shortlist your finish and discuss samples, grout coordination and supply requirements before your tiler starts.