




Penny Round Mosaic Tiles: A Melbourne Buyer's Guide
by Shivam Tayal 07 Nov 2026 0 Comments
You've found a penny round mosaic that looks right beside the vanity and tapware, but the sample doesn't tell you whether it belongs on your shower floor. The important questions are less photogenic: is that exact finish tested for wet use, how will the tiler handle the waste outlet, and who's allowing for grout, cuts and spare sheets?
Penny round mosaic tiles are a wet-area system decision before they're a colour decision. For a Melbourne renovation, the best choice balances the surface, waterproofing, installation and maintenance. A beautiful sheet that's difficult to clean or unsuitable under wet feet isn't a bargain.
What Penny Round Mosaics Are and What They Are Made Of
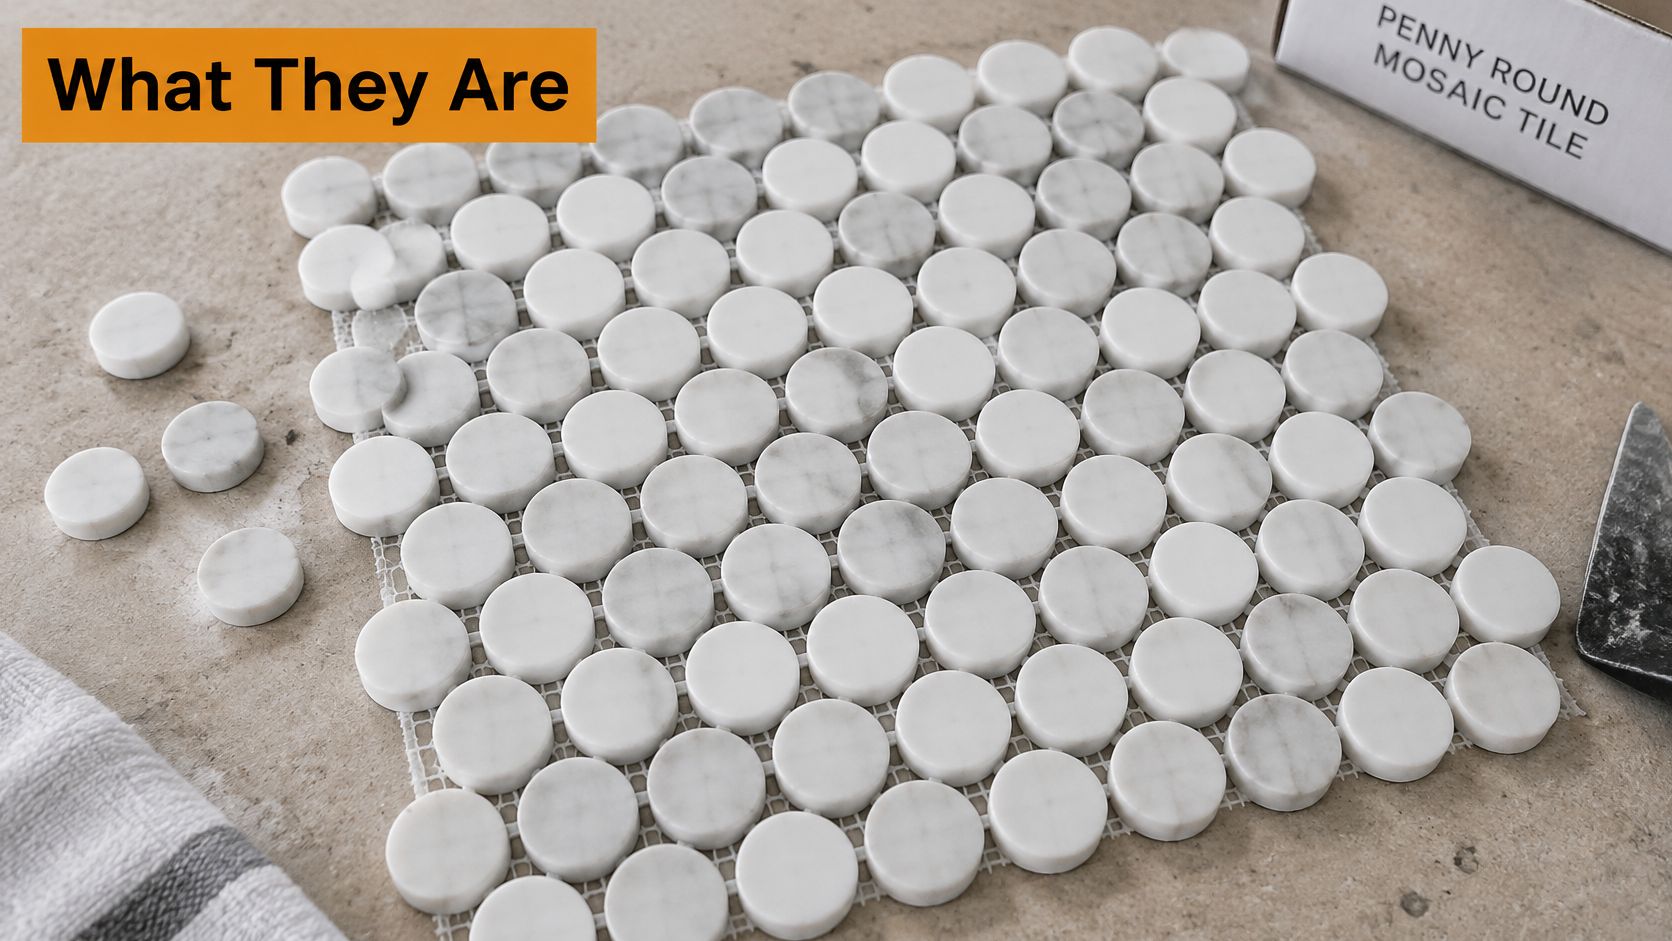
Penny round mosaics are small circular tiles arranged on mesh-backed or paper-faced sheets. The installer fixes the sheets, then adjusts individual discs where necessary so the joints between sheets look like the joints within them. You should see a continuous pattern, not a grid of separate panels.
They also suit Melbourne's established architectural language. Tiles Mate's mosaic flooring guide connects repeated small-unit finishes with Victorian- and Federation-era verandahs, paths and entry floors, and describes their move into bathrooms and wet areas by the 1930s.
The circles soften the straight lines of cabinetry, shower screens and rectangular wall tiles. Their jointed arrangement also gives an installer more freedom around curves and changes in floor level than a large rigid tile. That's useful geometry, but it isn't evidence that every penny round product suits a shower.
The sheet below shows how natural variation and joint spacing contribute to the overall appearance.
Penny round mosaic materials compared
| Material | Strengths | Watch-outs | Best fit |
|---|---|---|---|
| Porcelain | Dense body, low water absorption, consistent colour and disc size | Glazed surfaces can be slippery when wet; check the tested finish | Bathroom floors and showers with suitable approval, plus kitchen splashbacks |
| Natural marble | Classic veining, cool feel, natural variation between sheets | Porous and etch-prone; requires an appropriate sealing and pH-neutral cleaning routine | Feature walls, splashbacks, dry or low-splash zones |
| Natural stone, including travertine and limestone | Warm texture; honed or tumbled finishes can provide useful surface texture | Density and porosity differ; sealing and wet-use suitability need checking | Feature floors and pool surrounds only with suitable grades and test evidence |
| Glass | Bright, reflective surface that's easy to wipe | Can be slippery when wet; don't assume floor suitability without certification | Feature splashbacks and wall-only areas unless expressly approved otherwise |
Choose the material before the colour
Porcelain is a practical starting point for a working bathroom, but its dense body doesn't tell you how slippery its face will be. A gloss glaze and a textured finish require separate consideration, even when they share a colour name.
Natural stone asks for a different commitment. Veining and tonal changes are part of its appeal, yet those differences can become distracting when sheets aren't blended thoughtfully. Glass offers depth and reflection on walls, where foot traction isn't the deciding issue.
Grout colour changes the result too. A close match makes the circles read as texture; strong contrast outlines every disc and makes spacing errors easier to spot.
Before shortlisting materials, write down the room, whether the surface will be wet or dry, and the look you want. That simple specification is more useful than a folder of unrelated inspiration images.
Finish and Slip Ratings That Keep Wet Floors Safe
Slip ratings by location for penny round mosaics
| Rating or class | What it tests | Typical use | Check before buying |
|---|---|---|---|
| P3 | Wet pendulum slip resistance | Commonly cited starting point for domestic bathroom floors | Certificate for the exact tile and finish |
| P4 | Wet pendulum slip resistance at a higher classification | Shower recesses and heavily splashed wet floors, subject to specification | Test report matched to the ordered finish |
| P5 | Highest wet pendulum classification | Continuously wet bases and demanding wet zones, subject to specification | Floor-rated status and suitability for the actual location |
| Ramp classes A, B and C | Wet barefoot ramp performance | Pool surrounds, change rooms and communal showers | Appropriate class and current documentation for the tested surface |
The Blue Space's mosaic guidance identifies P3 as a commonly cited minimum for domestic bathroom floors and P4–P5 for shower recesses. Treat those as selection guidance, not a blanket legal rule or permission to use any product bearing the same classification.
DW Tiles' slip-rating explanation describes assessment under AS 4586, including the P0–P5 wet pendulum scale and A, B and C wet barefoot ramp classifications. Those tests represent different conditions, so a pendulum result shouldn't be casually translated into barefoot suitability.
Check the tested product, not the shape
The certificate belongs to the exact surface tested, not to penny rounds as a category. Extra grout perimeter can affect how a floor feels, but it can't replace product evidence.
Matt and textured surfaces are sensible candidates for wet floors. Honed stone needs its own assessment, while polished stone and glossy glazes deserve particular scrutiny. Finish names alone aren't performance classifications.
Before buying:
- Request the certificate: Match the product code and surface description to your selection.
- Confirm floor approval: A wall-only mosaic isn't suitable underfoot just because its backing bends around a shower base.
- Match the ordered finish: Don't accept a report for a textured version when you're ordering the polished version.
Our porcelain mosaic guide can help compare material options, but the product-specific test report should decide the wet-floor shortlist.
Practical rule: If the supplier can't identify the tested finish, don't specify it for a wet floor on appearance alone.
For Victorian pool surrounds, check that the evidence covers the proposed surface, installation orientation and maintenance conditions. Soap film, cleaning residue and poor drainage can reduce real-world traction even on a tested tile.
Slip classification guides the specification. It doesn't replace falls, drainage or waterproofing.
Where Penny Round Mosaics Work Best and Where They Do Not
Bathroom floors and shower bases
For a bathroom floor, judge the mosaic as part of the whole room. Consider where people step out wet, where a bathmat will sit and whether the proposed floor will drain rather than hold puddles beside the vanity.
A matt or textured candidate is worth investigating, but assess its suitability before committing to the design. A relatively dry powder room and a shower-adjacent family bathroom don't expose the floor to the same conditions.
Shower floors are a strong geometric use for penny rounds. The installer can separate discs from the backing to work around a curved edge or waste outlet. However, tiny crescent-shaped cuts can look untidy and be difficult to fix securely, so the waste position needs to be part of the set-out.
Shower niches and feature walls avoid foot traffic, but they aren't installation-free decorative zones. A niche shelf still needs to shed water, and its front edge needs a deliberate finish rather than exposed backing or an awkward strip of cut circles.
Splashbacks, pools and entrances
On kitchen and laundry splashbacks, glass or glazed porcelain provides a wipeable face. The trade-off is the joint network: cooking grease and laundry splashes may collect around the discs, so choose a grout you're willing to maintain.
Pool surrounds require a separate suitability decision. Confirm barefoot wet-use evidence and check that the tile, backing, adhesive and grout are compatible with the exposure. An indoor feature mosaic shouldn't migrate outdoors just because its colour matches the pool.
Entry thresholds and verandah-style floors can use the pattern as an architectural feature. Think about tracked-in grit, door clearance and edge protection, not just the view from the hallway. Where easy cleaning is the priority, a less joint-heavy finish may be the better choice.
Avoid these common mistakes:
- Polished shower floors: Don't specify a reflective surface without suitable wet-slip evidence.
- Grout as waterproofing: A neat joint finish doesn't establish a watertight assembly.
- Unchecked batch mixing: Compare sheets before fixing a large floor, rather than discovering colour bands after grouting.
If the surface stays wet, assess safety and wet-area construction first. If it stays dry, the design choice can lead.
Grout Choices and Routine Care for Long-Lasting Mosaics
Grout selection and cleaning habits strongly influence how a penny round floor looks after years of use. There's a lot of exposed joint area, so choosing the grout deserves more attention than picking a colour from a small chart.
A pale matching grout creates a quiet surface but can make discolouration noticeable. Dark grout outlines the pattern, although mineral deposits and soap residue may show against it. Make a sample board with the intended tile and grout before approving a strong contrast.
Cementitious or epoxy grout
- Cementitious grout: Usually less expensive and more forgiving to apply and repair. Stain resistance differs between formulations; check whether the selected product requires sealing rather than assuming every cement-based grout behaves alike.
- Epoxy grout: Often offers stronger stain and chemical resistance, making suitable formulations useful for demanding areas. It requires disciplined application and cleaning, and hardened residue or later repairs can be harder to deal with.
Neither choice excuses poor workmanship. Underfilled joints leave dirt-catching recesses; excessive grout can bury the edges of the circles and change the appearance. For pools, specify a grout expressly suitable for that environment.
Repairability matters too. An installer may be able to remove a damaged disc, but finding a convincing replacement is much easier with matching spare material. Cutting out a tile over a waterproof membrane also requires care to avoid turning a cosmetic repair into a waterproofing repair.
A maintenance routine you can follow
Start with a weekly pH-neutral clean, adjusting the frequency to use. Apply cleaner at its specified dilution, agitate joints with a soft nylon brush, then rinse away loosened soil rather than letting it dry back onto the floor.
- Inspect regularly: During a monthly visual check, look for cracked joints, loose discs and persistent damp patches.
- Seal selectively: Maintain natural stone and grout according to the chosen products' requirements.
- Protect marble: Avoid acidic cleaners, including vinegar-based mixtures, which can etch the surface.
Our natural stone mosaic guide provides additional material-selection context for stone finishes.
A darker patch isn't automatically a stain, and a cracked joint isn't automatically a defective tile.
Dull or rough areas may be residue, mineral build-up or surface damage. Cracking at a change of plane can indicate movement; investigate the cause instead of repeatedly packing it with rigid grout. Maintaining and repairing a sound finish avoids unnecessary replacement waste.
How to Install Penny Round Mosaics Step by Step
A successful installation starts beneath the mosaic. Small circles won't disguise an uneven base, and a regular pattern makes inconsistent sheet spacing unusually obvious.
AS 3740:2021 specifies minimum domestic wet-area waterproofing requirements for Class 1, 2 and 4 buildings. Treat the mosaic as the finish over the waterproofing system, with inspection and compliance records kept separately from the tile purchase.
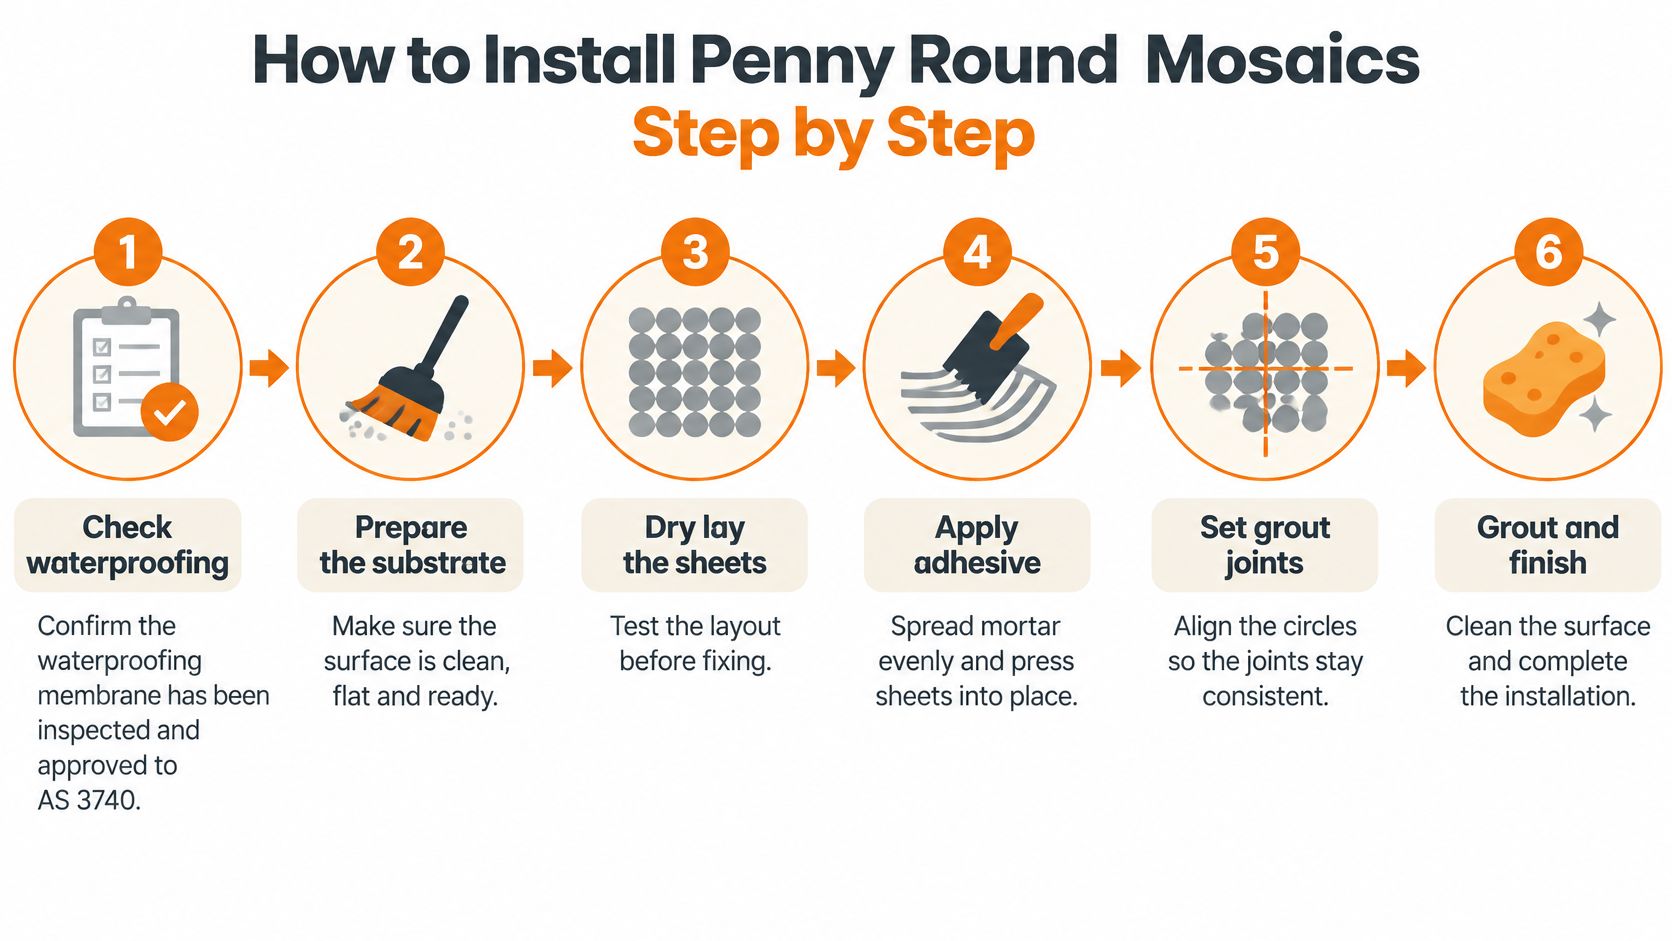
This process overview shows the main installation stages.
Prepare and set out
- Verify the waterproofing and substrate. Confirm that the membrane has been inspected and approved through the applicable project process, and that the base is clean, sound and ready for tiling. Resolve defects before adhesive hides them, without damaging the membrane during preparation.
- Check falls towards the waste. Use a straightedge and level to check the intended drainage planes. Don't expect adhesive beneath the sheets to correct a poorly formed shower base.
- Dry-lay sheets across the area. Check joints between panels, disc height and the cuts around the waste. View the arrangement from the doorway as well as directly overhead, because sheet boundaries can become more obvious at a low angle.
- Establish reference lines. Mark a centre line or another reliable datum, then balance visible edges before fixing. Set out niches, corners and the drain together so an attractive centre pattern doesn't create unworkable cuts elsewhere.
Fix, grout and finish
- Spread compatible adhesive. Use an adhesive approved for the substrate, membrane, tile and backing, with a notch that provides proper contact without flooding the joints. Press sheets with a flat beating block, lift a trial sheet to check coverage, and don't work beyond the adhesive's open time.
- Protect the curing installation. Keep traffic off until the adhesive datasheet permits access and grouting. Disturbing sheets too early can shift discs or weaken their bond even when the surface appears firm.
- Pack and clean the grout. Remove adhesive obstructions first, then fill the joints thoroughly and clean diagonally with a well-wrung sponge. Follow the grout's working window, especially in cold or damp conditions, and avoid washing material out of the joints.
- Complete flexible junctions. Use the specified flexible sealant at movement joints and changes of plane instead of bridging them with rigid grout. Keep these joints clear during fixing so the sealant detail can function properly.
The following video provides a visual reference for handling and fixing mosaic sheets.
A clean result has consistent joints, no abrupt lippage and secure discs, without visible panel outlines. Hollow-sounding or loose areas need assessment rather than a cosmetic grout touch-up; sound alone isn't a complete diagnosis of bond quality.
Cost, Ordering Quantities and Samples Before You Buy
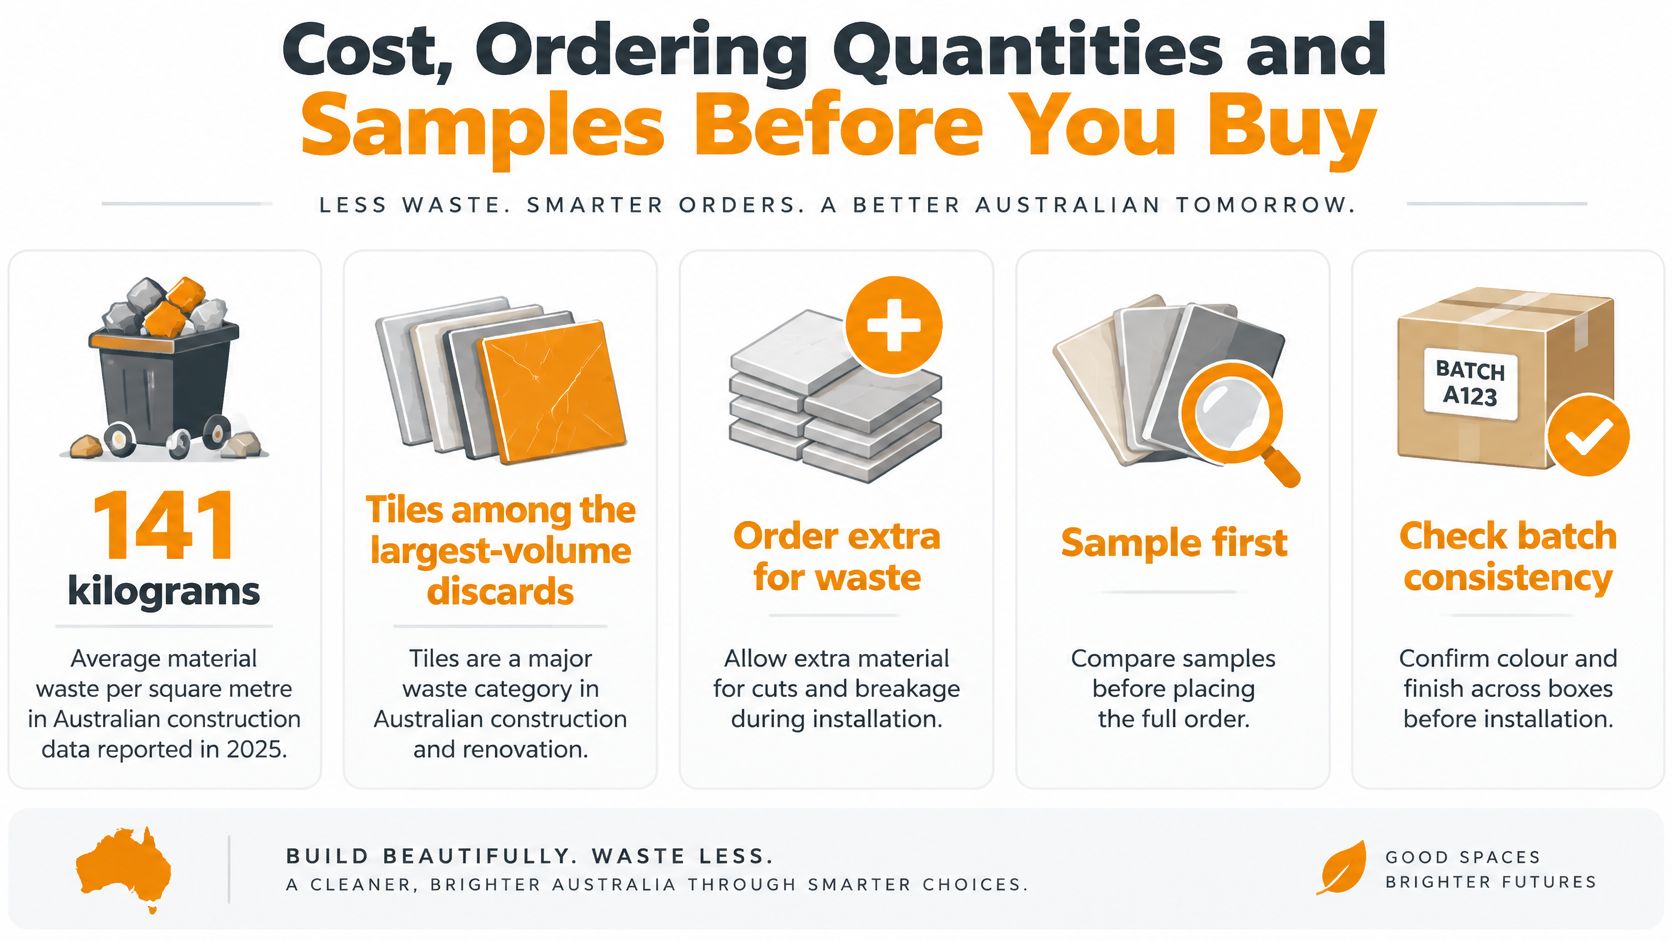
Australian construction data reported in 2025 found that building projects waste an average of 141 kilograms of material per square metre, with tiles among the largest-volume discarded materials, according to the Green Building Council of Australia. That's a whole-project waste measure, not an estimate of what your bathroom tiler will discard.
For price context, DPV Construction's bathroom renovation guide placed Australian bathroom tiles generally at $30 to $150 per square metre in 2024. It doesn't provide a penny-round-specific price, so use a current product quote rather than treating that range as a mosaic budget.
Penny rounds can add labour through sheet alignment, detailed cuts and extensive grouting. A lower tile price won't necessarily produce a lower installed price, particularly when the quote excludes preparation, waterproofing, sealants or waste handling.
The practical buying checks below help separate useful spare material from avoidable waste.
Ordering basis for penny round mosaics
| Ordering basis | How it is calculated | What it means for waste | Best for |
|---|---|---|---|
| Per square metre | Net area plus a project-specific cutting allowance | Allow for perimeter cuts, niches and unusable offcuts | Standard floors with clear measurements |
| Per box | Required area divided by stated box coverage, rounded up to whole boxes | Label usable leftovers as spare stock | Projects requiring a matched batch |
| Per sheet | Required area divided by stated sheet coverage, checked against the layout | Edge cuts and pattern continuity affect usable coverage | Small features, niches and splashbacks |
A sheet's outside dimensions aren't always enough to establish effective coverage. Confirm the supplier's stated coverage, sheet format and intended joint spacing, especially where the edges interlock.
Build the quantity from the actual layout
Start with our bathroom tile calculation guide, then have the tiler check the mosaic set-out before ordering.
- Measure net areas separately. Record floors, walls, niche interiors and returns so unlike surfaces don't disappear into a single total.
- Map perimeter and fitting cuts. Include the waste outlet, door opening and exposed edges. Note which offcuts can be reused.
- Allow for pattern loss. Account for sections that can't continue the circular arrangement neatly at the next edge.
- Set aside matching spares. Agree on spare stock before rounding to full boxes, then label it with the product, batch and room.
Use a project-specific allowance, not an automatic percentage. A curved shower may use small modules efficiently compared with cutting large tiles, while a simple rectangular floor can make sheet offcuts and alignment labour harder to justify.
Tiles from different batches can differ slightly in colour and size. We recommend having your tiler verify all measurements before placing an order, and checking the delivered batch details before installation.
Sample the finish and compare the full quote
Our 5 Samples offer costs $15, allowing you to see and touch tile samples before choosing. Examine candidates in daylight and artificial light, both dry and damp; a sample helps judge appearance and feel, but it doesn't replace certified slip testing.
Check disc consistency, sheet construction and the grout colour against your cabinetry and wall finish. Confirm that the certificate's product description matches the proposed order, and ask the installer to identify any backing or adhesive compatibility concerns.
Buying judgement: Compare complete installed scopes, not a sheet price against a square-metre price.
Include grout, sealing where needed, cutting labour, delivery, spare stock and disposal in that comparison. Epoxy's cleaning advantages may justify its application cost, while a more repairable cementitious system may suit another project; unused material and packaging also need an appropriate disposal plan.
Keep the labelled spare box somewhere dry and accessible. If a matching batch is later discontinued, those sheets may allow a local repair instead of a much larger replacement.
Once the sample's appearance works and the exact product has suitable wet-use evidence, approve the tiler's calculated quantity and agreed spare stock. That's a stronger buying decision than ordering by colour and hoping the installation details resolve themselves.
We offer penny round mosaics, tile samples and local selection support from our Melbourne-based Truganina location, with delivery across Melbourne. Visit Tiles Mate Pty Ltd with your room measurements, preferred finish and intended application so we can help you narrow the options before your tiler confirms the specification and order.