




Porcelain Finger Mosaic Tiles: Sizes, Uses and Costs
by Shivam Tayal 10 Nov 2026 0 Comments
A finger mosaic looks easy from two metres away. A sheet of narrow porcelain strips, sage green or gloss white, propped against a showroom wall under warm light, doing exactly what the photos promised. Then you get the quote home and the questions start stacking up. Will this be safe underfoot in a shower? How many sheets does a bathroom take? And why does every forum thread about finger tiles end up arguing about grout?
You're in a common spot. Finger mosaics, also sold as kit-kat or stick tiles, have moved out of boutique bathrooms and into everyday Melbourne renovations, and the buying advice hasn't kept up. Most of it sells the look. Very little of it tells you how to judge the sheet in your hand against the room you're putting it in.
This guide works through it in the order you'll need it. What the product is, where it's safe, how it goes down, how many sheets to order, and what the cost looks like once grout, waste and upkeep are counted.
Finger Mosaic Sizes, Finishes and Prices at a Glance
| Product | Sheet size | Chip size | Finish | Price |
|---|---|---|---|---|
| Atami Sage Green | 296 × 300 mm | 22 × 145 × 6.7 mm | Not listed, ask the supplier | $10.00 per sheet |
| Imari Speckle Gloss White | 293 × 287 mm | 15 × 145 × 7 mm | Gloss | $12.50 per sheet |
| Osaka Olive Green (hand-glazed) | Sold by the square metre, not by the sheet | 45 × 195 mm | Hand-glazed | $218.00 per m² ($217.53 per box) |
A finger mosaic arrives as one sheet of narrow chips, usually held together on a mesh backing. The sheet is what you order and what your tiler lays. The chip is what your eye reads once the wall is finished, and those two numbers do very different jobs.
ABI Interiors lists the Atami Sage Green porcelain finger mosaic at $10.00 per sheet, on a 296 × 300 mm sheet with 22 × 145 × 6.7 mm chips (ABI Interiors Atami listing). The Imari Speckle Gloss White sits at $12.50 per sheet on a slightly smaller 293 × 287 mm sheet, with thinner 15 × 145 × 7 mm chips (ABI Interiors Imari listing).
Those per-sheet prices aren't comparable until you convert them. Multiply sheet length by sheet width to get the sheet area, then divide the price by that area. Atami comes to 0.296 × 0.300, which is 0.0888 m², so $10.00 ÷ 0.0888 works out at about $112.61 per square metre. Imari comes to 0.293 × 0.287, which is 0.0841 m², so $12.50 ÷ 0.0841 lands near $148.63 per square metre.
Tile Touch prices the Osaka Olive Green Japanese hand-glazed finger mosaic by the square metre instead, at $218.00 per m² or $217.53 per box, in a 45 × 195 mm chip (Tile Touch porcelain range). That's a different product in a different unit, and a hand-glazed finish carries its own variation from piece to piece.
Before you compare anything: answer three questions. Which finish suits the room, what sheet size fits the wall or floor dimensions, and is the quoted price per sheet, per box or per square metre?
If a finish isn't published on the listing, get it in writing from the supplier before you go further, because finish drives the whole slip discussion.
What Porcelain Finger Mosaics Are Made Of
A finger mosaic is a row of narrow tiles set edge to edge, like a box of pencils laid side by side and taped together. Look at one chip and you see a slim rectangle. Look at the sheet and you see a single surface with fine lines running through it.
The material underneath explains why these tiles cope with wet rooms. Ceramic tiles are clay tiles fired in a kiln at around 1000°C until they harden. Porcelain is fired at a higher temperature than ordinary ceramic, which is what makes it exceptionally strong and durable, and it absorbs 0.5% of water or less. That low absorption is why porcelain suits high-traffic areas both indoors and outdoors, and why it's the sensible body for a shower floor or a pool surround.
The chip format is where the range opens up
A 22 × 145 mm chip is roughly 6.6 times as long as it is wide, which is the ratio that gives finger mosaics their linear look. The format range is wider than most buyers expect: Tile Touch's Australian mosaic range includes finger formats from 12 × 92 mm through 47.5 × 304 mm (Tile Touch mosaic collection). A narrow 12 mm chip reads as a fine pinstripe, while a 45 mm chip behaves more like a small brick.
That length carries a cost. Long, narrow pieces create many more joints per square metre than a large-format tile, and every joint is a line of grout to fill, seal and eventually scrub. A finger mosaic wall might carry several times the grout length of the same wall in 600 × 1200 tiles. You're buying a look, and the maintenance commitment comes bundled with it.
What to check on the label
Read the product page or box for four things before you compare anything else:
- Body material: porcelain here, but glazed ceramic finger mosaics exist and behave differently in wet areas.
- Finish: gloss, matt, textured, honed or lappato. This is the single biggest driver of slip performance.
- Glazed or unglazed: a glazed surface adds colour and stain resistance; an unglazed porcelain chip is denser and often more textured.
- Chip and sheet dimensions together: note both separately, because ordering mistakes usually come from mixing them up.
Where Finger Mosaics Suit and Where to Check First
Hold a finger mosaic sheet over a bathroom floor and it looks plausible. Put that same sheet in a shower that stays wet for ten minutes and the question shifts from appearance to grip. Finger mosaics are easy to justify on walls, splashbacks and feature walls. Wet floors are where the product has to earn its place, because the chip size that makes the pattern distinctive also creates a surface whose grip depends on finish, grout and drainage.
A finger mosaic belongs on a shower floor only when the exact product you're buying carries an Australian slip classification that suits that use, classified under AS 4586 and matched to the conditions the tile will meet (ABI Interiors mosaic guide).
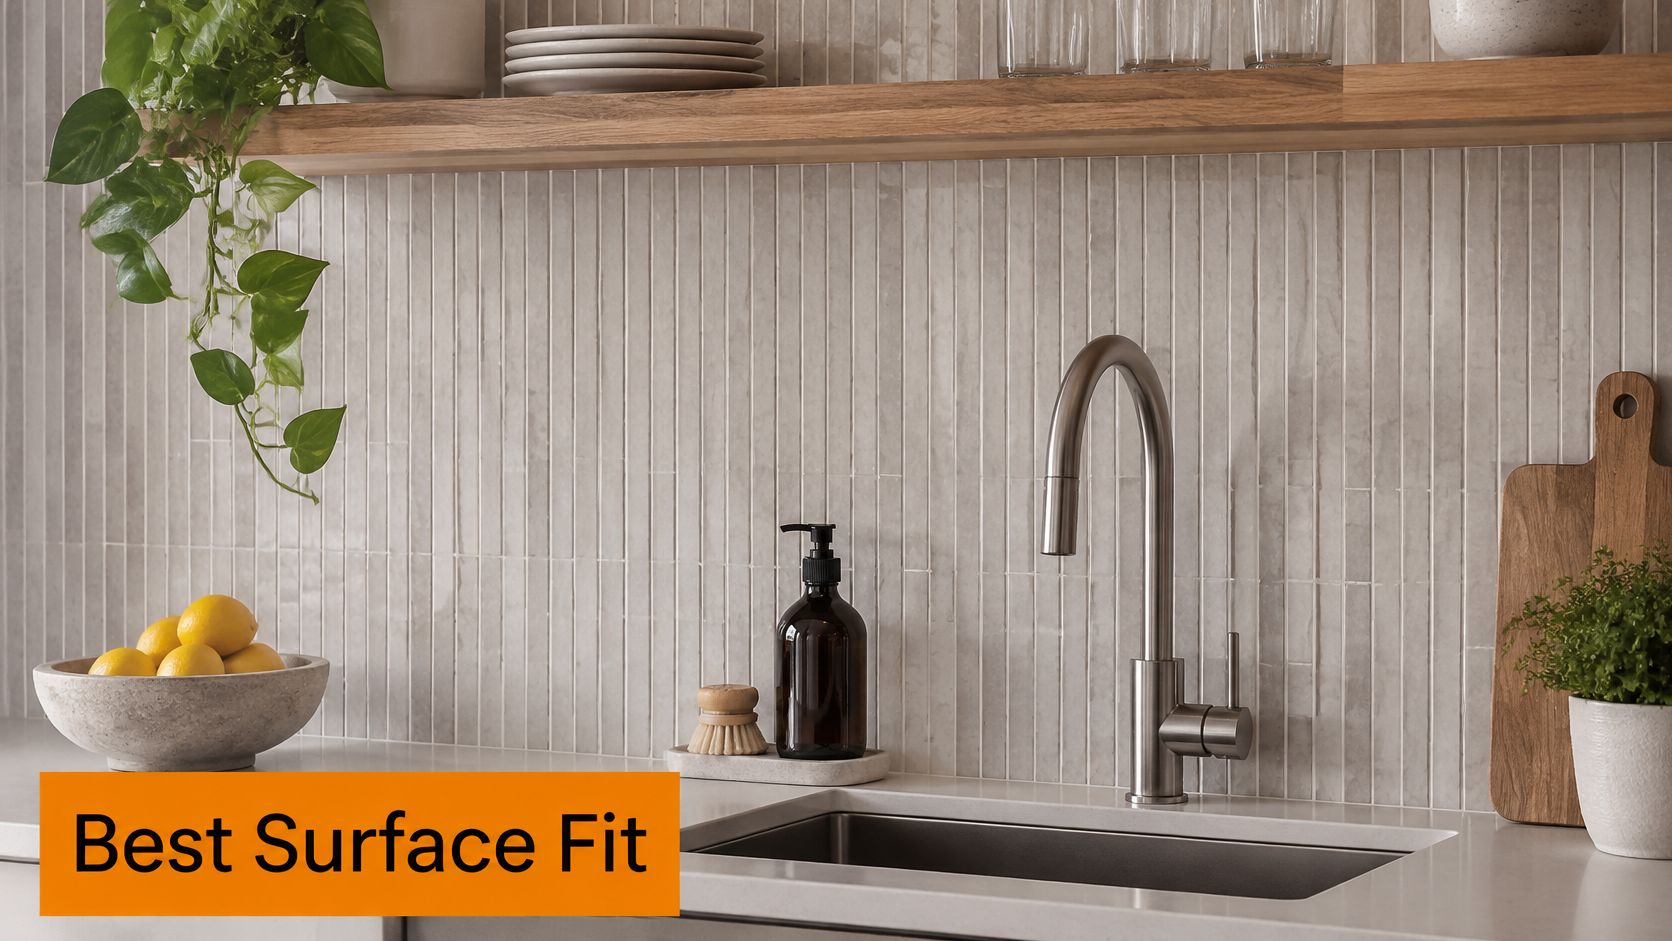
Shower falls are governed by wet-area requirements that generally specify a gradient between 1:80 and 1:50 toward the drain. Many households are renovating bathrooms and laundries right now, so the choice between a mosaic floor and a larger-format floor comes up in a lot of homes.
Buying advice often misleads on one point. Small sheets get described as naturally safe on floors because there are so many grout joints for water to follow toward the drain. Grout lines do help with drainage and add texture underfoot. They don't replace a classification for the finished product. The evidence that counts is the product's slip rating, its finish and the condition of use, not how small the chip is. Treat the rating as a laboratory result for the tile as supplied. It does not know your grout width, your falls, or how flat the tiler bedded the sheets.
Checking each location against the right test
| Location | Finish to shortlist | Check before buying | Note |
|---|---|---|---|
| Shower floor or hobless shower | Textured or matt | AS 4586 slip classification for wet barefoot use | Fall of 1:80 to 1:50 toward the drain |
| Bathroom floor | Matt or lappato | AS 4586 P-rating for the installed product | Narrow grout joints are easier to clean |
| Laundry floor | Matt or textured | AS 4586 P-rating for the installed product | Spills sit longer, so mop promptly and seal the grout |
| Pool surround | Textured, outdoor rated | AS 4586 slip classification for wet outdoor use | Confirm grip when wet with the supplier |
| Kitchen splashback | Gloss or glazed | Not a walking surface | Keep gloss off floors |
| Feature wall | Any finish | Not required for walking | Use sealed grout in wet zones |
Use two ledgers when you compare locations. The first is slip safety: can the product be used barefoot on a wet floor, and does the finish still grip when soapy? The second is installed cost after waste, grout and upkeep. A mosaic that passes the slip test but needs more grout maintenance can cost more over the life of the room than a simpler, larger tile that does not.
The rating that confuses buyers most is the P-rating. It's a wet test result for the tile as supplied. It doesn't tell you how wide your grout joints will end up, how flat the tiler bedded the sheets, or how the floor drains after a long shower. In most residential bathrooms, matt or lappato finishes are favoured for floors because they stay easy to clean and offer sufficient slip resistance.
A gloss waterline mosaic is a wall product. It looks superb as a band above a bath or behind a vanity, and it has no business underfoot. Backing sheet quality, grout width, drainage and installation quality all change the finished result too, so the same tile can behave differently in two rooms.
Three checks before you shortlist anything: the product's slip rating, its finish, and whether the location is a walking surface, a wet surface or a vertical one. Read How porcelain holds up over time alongside the rating, because durability and grip are separate questions with separate answers.
Design and Pattern Ideas for Finger Mosaics
Say you've chosen the 22 × 145 mm sage green chip for a bathroom wall, and the sheets are sitting in the hallway while you decide how to run them. The pattern changes the waste allowance, the grout exposure and how busy the wall reads, so settle it before you order rather than on the morning your tiler arrives.
Run the sheets vertically in a stack and the long lines pull the eye upward, which helps a small bathroom with a low ceiling feel taller. That's a wall application, so a gloss or glazed finish is fair game here in a way it never is on a floor.
For a kitchen splashback, a horizontal running bond with each sheet offset by half softens the chip lines into a gentle brick rhythm. It also disguises sheet-to-sheet joins better than a butt-jointed stack, where a visible vertical seam every 296 mm reads as a mistake.
Herringbone turns the chips 90 degrees and creates movement across a wall, at the cost of the most cuts of anything on this list.
A few decisions worth making early:
- Chip ratio: 22 × 145 mm chips read longer and calmer; 15 × 145 mm chips read busier at the same wall size.
- Band or border: a second sheet in a contrasting finish makes a dado line or frames a mirror, and those extra sheets belong in the order worksheet.
- Feature corner: wrapping a mosaic around a niche or a return looks deliberate, but every piece is a separate cut.
If you're torn between two directions for the room, a short guided tool can help you find your home's interior style before you commit to a colour. Whatever pattern you land on, run it past the finish and slip checks first. A decorative layout never makes a glossy chip safe underfoot.
How to Install Porcelain Finger Mosaics Step by Step
Finger mosaics fail in predictable places, and almost all of those places are decided before the first sheet goes up. Work through this in order.
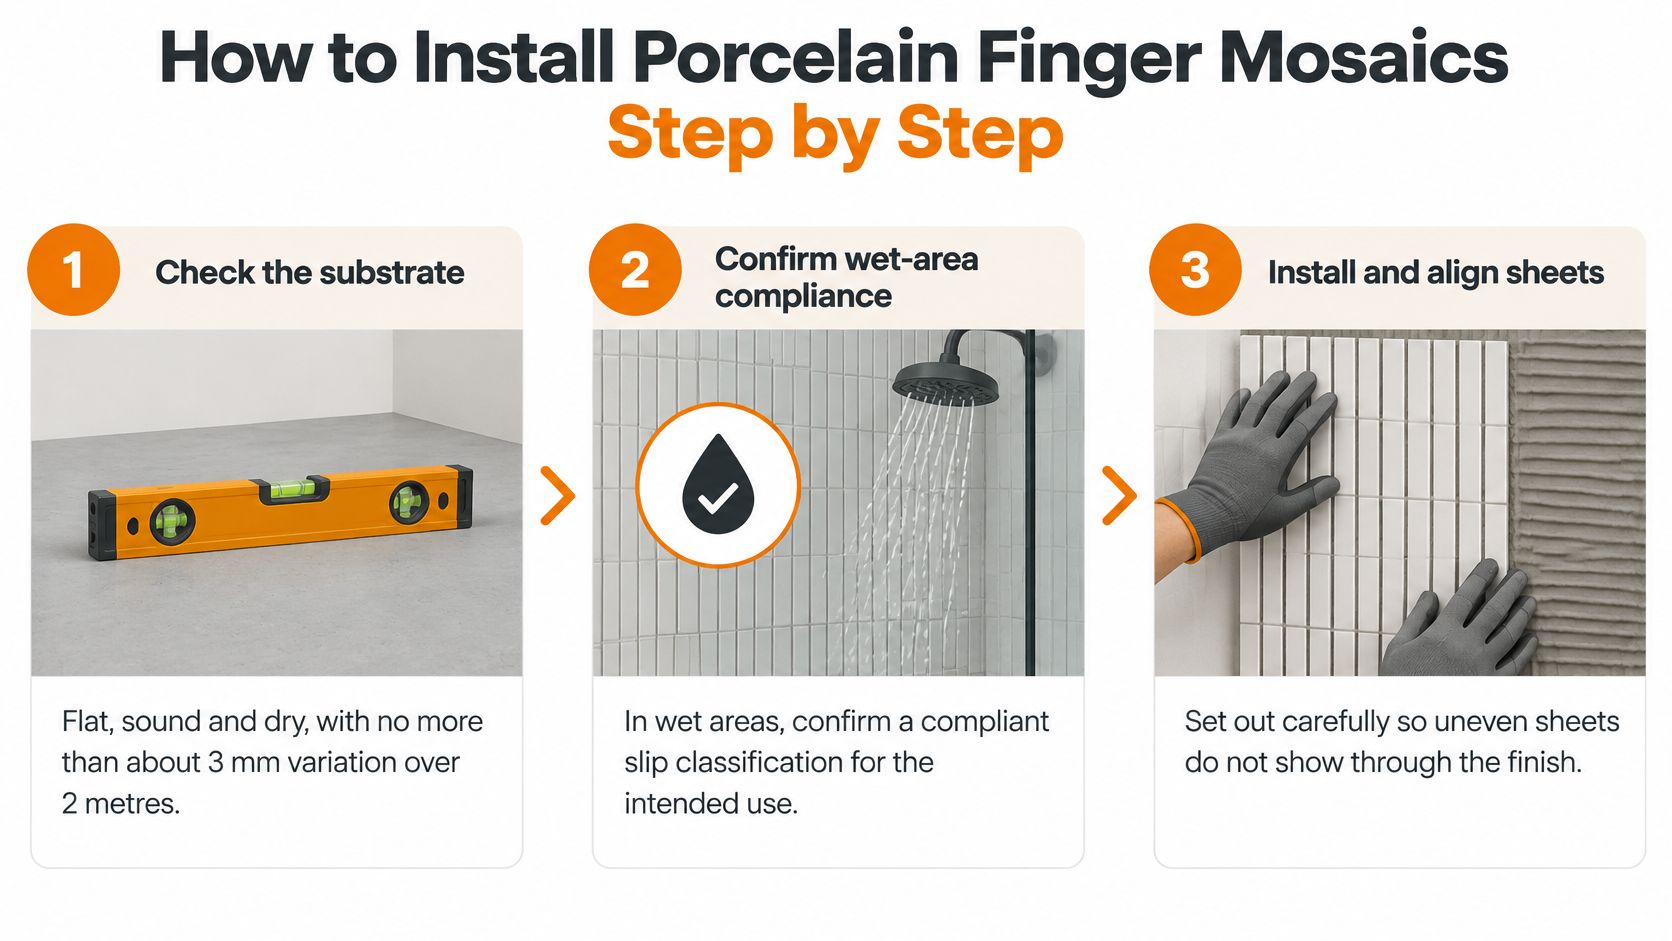
1. Check the substrate is flat, sound and dry. Aim for no more than about 3 mm of variation over 2 metres. Narrow chips telegraph every hollow and ridge, and no amount of grout hides a wave in the wall.
2. Confirm the waterproofing membrane. In wet areas a compliant membrane goes in and cures before a single tile is set. The membrane stops water entering the wall or floor. The mosaic and the grout don't.
3. Sign off the shower fall while the screed is still workable. A fall set wrong can't be fixed by the tile laid over it.
4. Dry-lay several sheets to check colour and size across the batch, and set a few spares aside before the first one is fixed. Tiles from different batches can differ slightly in colour and size, which is why it pays to have your tiler verify all measurements before placing an order.
5. Choose a flexible adhesive suited to the substrate and to wet areas, and match the trowel notch to the sheet size. A Mapei tile adhesive selection guide is a practical reference when you're matching product to substrate.
6. Set the sheets flat and align the chips with a straight edge. A raised chip is very hard to correct once the adhesive grabs, and finger formats show lippage badly because the chips are so narrow.
7. Cut edges with a wet saw. Non-rectified tiles have slightly rounded edges and can show minor size variations, which require careful planning during installation. Cut a test piece before you commit to an exposed edge. More detail sits in these porcelain tile installation tips.
8. Let the adhesive cure for the period on its data sheet before grouting. Grout spread over green adhesive can crack.
9. Grout and seal with a joint width suited to the chip size, following the manufacturer's directions.
Most finger mosaic problems trace back to three shortcuts: setting before the fall is checked, skipping the membrane because the sheets are "small anyway", and grouting the same day.
How Many Sheets to Order and What It Really Costs
Work it out on paper before you fall in love with a price per sheet. A 296 × 300 mm sheet covers about 0.089 square metres, so a 4 square metre wall needs roughly 45 sheets before any waste. Switch to a herringbone layout and add 15 percent: 4 × 1.15 = 4.6 square metres, which is about 52 sheets.
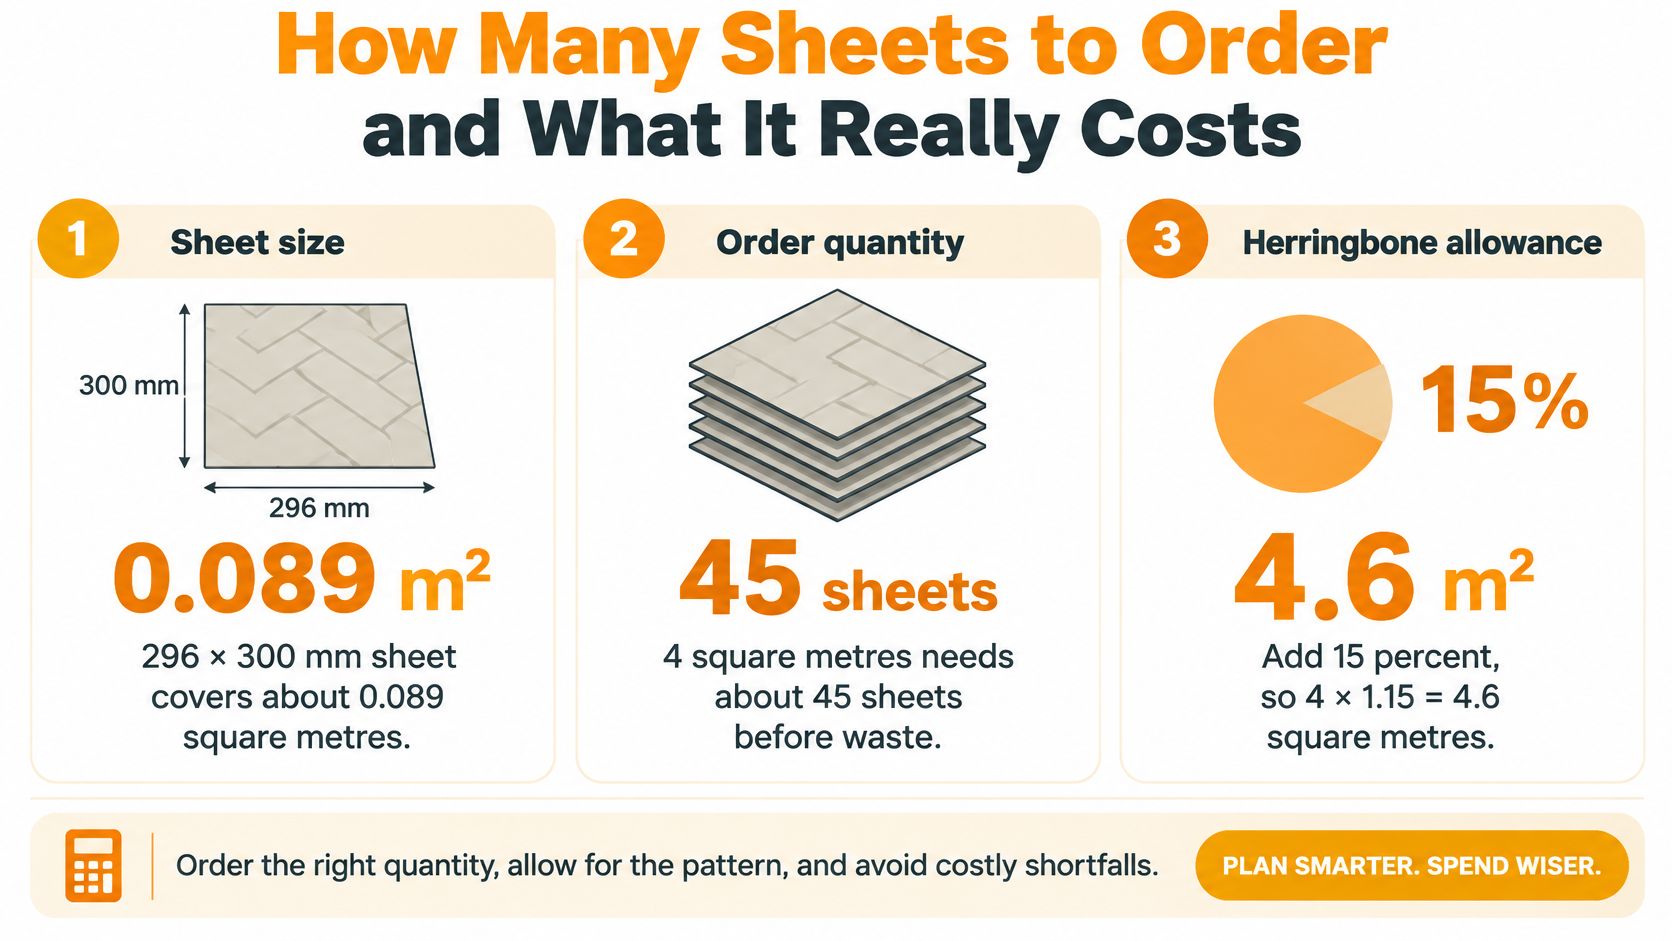
Order by the full sheet, never by square metre alone, and round up. The allowance you need depends on how much cutting the layout forces:
| Layout | Suggested waste allowance | Why it runs higher |
|---|---|---|
| Straight running bond | 10% | Few cuts, mostly at edges |
| Herringbone or diagonal | 15% | Angled cuts on most edges |
| Niches, curves and transitions | 15 to 20% | Each piece cut individually |
| Borders and rebate details | 10 to 20%, set by the cut count | Each border piece is cut one at a time |
Then build the worksheet properly: square metres plus waste, multiplied by sheets per square metre, plus adhesive and grout, plus labour, and a line for a large-format alternative covering the same area. Only then does the comparison mean anything.
Australian homeowners spent an estimated $54 billion on renovations in the year to August 2025, with bathroom renovations among the leading areas of demand (news.com.au). That spending power makes the total installed cost question worth asking, because a cheaper per-square-metre finger mosaic can become the more expensive choice once extra joints add grout consumption, cutting loss, alignment corrections and labour. Replacement is part of the sum too: matching a damaged sheet later from the same batch is difficult, so the spare stock belongs in the order, not in a future phone call. Our guide to calculating tiles for a bathroom walks through the same worksheet for a full wet area.
Cleaning, Grout and Long-Term Upkeep
The porcelain itself is close to self-maintaining. Vacuum or mop once a week and the surface stays clean. The work sits in the joints.
Grout is more porous than the chip beside it, so it stains and discolours first. Choosing porcelain doesn't remove the need to seal grout, whatever the chip is made of. Check the grout maker's sealing interval, and reseal when water stops beading on the joint instead of sitting on it.
A few habits keep the surface looking new for longer:
- Use a pH-neutral cleaner. Acidic cleaners attack grout and can dull some glazes.
- Reach for a soft brush along the narrow joints. A hard brush wears grout down over time.
- Test steam and abrasive pads in a corner first. Both can damage glazed surfaces.
- Wipe spills promptly, especially in laundries where detergent and bleach sit on the floor.
Keep a small spare stock from the same batch, around 5 to 10% of the order, and write the batch number on the invoice. Batches vary slightly in colour, and the spare sheet you kept is the only reliable match you'll have in two years' time.
A simple rhythm handles the rest: weekly floor cleaning, a monthly look along the joints, and a yearly check on the sealer and any loose chips.
For heavier soiling or a deep reset, this Renue Systems Four Points cleaning guide covers the methods that won't strip a glaze.
Order Samples and Confirm Quantities Before You Buy
You have the layout pencilled on the bathroom wall, the downlights are on, and the chip in your hand still does not match the photo you saved. A finger mosaic shifts in morning light, under a gloss glaze, and again once grout fills the narrow joints. A screen cannot show that shift. A sample can.
Treat the sample the way you would treat a paint swatch on the actual wall, not on a colour card in the shop. Shortlist two or three products that already pass the slip and finish checks for that room. Order samples so you can see, touch and feel the finish before you commit. Tiles Mate sells a pack of five samples for $15. Leave each one against the wall or floor for a day. Look at it in natural morning light, then again under the bathroom downlights.
Only then return to the sheet count.
- Recalculate the sheets from your worksheet, including the waste allowance for the layout.
- Have your tiler verify every measurement on site before the order is placed. Tiles from different batches can differ slightly in colour and size.
- Book the order in one delivery. A second delivery is how a later batch lands a shade off the first.
- Send the sheet count and the job area with the quote, so the figure includes the waste you have allowed for. A box price or a per-square-metre price on its own leaves that out.
Tiles Mate is a Melbourne tile store, so confirm delivery timing to your suburb before you lock a start date. Melbourne customers can also book a free 15-minute design consultation from home. Trade buyers can ask about TilesMate Pro for exclusive B2B pricing and personalised sourcing.
A finger mosaic has to clear two tests. It has to suit the slip and finish of the room it is going into, and the installed total has to cover waste, grout, adhesive, labour and later joint care. Tiles Mate Pty Ltd supplies porcelain mosaic tiles, pavers and flooring from its Melbourne base. Bring your room dimensions and layout plan if you want help matching a sheet size and finish to a wet area or splashback. Visit Tiles Mate Pty Ltd to browse the range and confirm stock.